Call of Duty 5: Zombie Map Tutorial: Der Riese
Overview
In Mod Tools Update 1.4, you will find Nazi_Zombie_Factory.GSC (Der Riese) script that contains code for DLC3 Zombies. It contains many lines of code to implement the new features; these new features will take quite a bit of time to integrate and requires proficient scripting knowledge as the scripts are tailored specifically for Nazi_Zombie_Factory.
In an effort to make it easier, a tutorial map was created for this tutorial to modulate the integration of the new Der Riese features without requiring scripting knowledge. All of the Der Riese specific code has been stripped out from the Nazi_Zombie_Factory script into separate DLC3 scripts and appropriate changes have been made to them as well as ZombieMode utility scripts to remove Nazi_Zombie_Factory specific lines and modulate them to work with any map that wants to use the features from Der Riese.
Tutorial Supplement Download: Version 1.0 Source Files (Updated September 24, 2009 )
Playable Tutorial Download:
Tutorial Map
Preparing
Mod Folder
You will need to start by creating a Mod folder for your map which is essential to getting a Zombie map to work. You can create a mod folder by:
1) Going to [root]/Mods
2) Create new folder.
3) Name the folder something unique like 'Zombies_On_A_Plane'. Be sure the folder name does not have any spaces in it, it may cause problems later on.
You should now see the mod folder in Launcher to compile FastFiles as Mod Specific.
Map Name
Custom Zombie maps will need to have a prefix of nazi_zombie_ in order to work correctly with the game. Your scripts/ zone source/ soundalias/ etc should follow the same naming convention too.
Intro String
At the beginning of the map start is a line of information providing players a detail into where your map is taking place. You can change this for your map by creating/opening mod.STR in [root]/raw/english/localizedstrings and adding:
VERSION             "1"
CONFIG              "F:\cod5\cod\cod5\bin\StringEd.cfg"
FILENOTES           "Strings displayed in the menus go in this file."

REFERENCE           INTRO
LANG_ENGLISH        "City, Country"

ENDMARKER
This mod.STR is added in your mod.FF through the mod zone source file if you use the mod zone source file in the tutorial supplements as a template.
Power Switch
A power switch turns on the power in your map to enable Electric Traps, Perks, Dynamic Lights, and opens Electric Doors.
Radiant
To make a Power Switch:
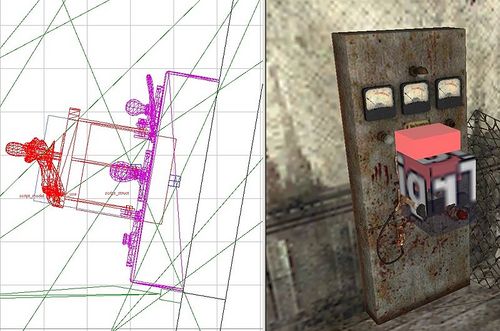
1) Create a Misc_Model. Assign it KVPs:
"model" "zombie_power_lever"
2) Create a Script_Model. Assign it KVPs:
"model" "zombie_power_lever_handle"
"targetname" "power_switch"
3) Create a Trigger_Use. Assign it KVPs:
"targetname" "use_power_switch"
4) Create a Script_Struct. Assign it KVPs:
"targetname" "power_switch_fx"
Position these entities to look like the Power Switch in-game or in the photo.
The Script_Struct will play an electrical FX spark when the power turns on.
Main Frame
The main frame is just a trigger in essence, but you can feel free to create snazzy geometry to represent an actual 'main frame'.
To create an operable Main Frame:
1) Create a Trigger_Use. Give it KVPs:
"targetname" "trigger_teleport_core"
Pack A Punch
To make Pack A Punch:
1) Create a Misc_Prefab. Give it KVPs:
"model" "_prefabs/zombiemode/vending_weapon_upgrade.map"
2) Create a Script_Model (or Script_Brushmodel if you want custom built geo entity). Give it KVPs:
"model" "zombie_teleporter_mainframe_door" // This is if you want to use the door from Der Riese
"targetname" "pack_door"
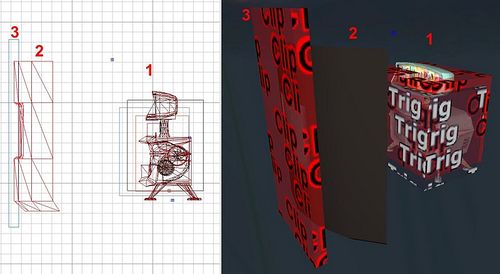
3) Create a Script_Brushmodel. Assign it the Monster Clip texture. Give it KVPs:
"targetname" "pack_door_clip"
"spawnflags" "1"
(2) and (3) are the barriers to Pack A Punch, and will move together as players link teleporters eventually granting access when all three teleporters are linked.
Teleporters
Teleporters
Destination
The destination to which players are teleported to requires:
1) Create four (4) Script_Structs. Give each one a unique Targetname KVP from the list...
origin_teleport_player_0
origin_teleport_player_1
origin_teleport_player_2
origin_teleport_player_3
Teleport Box
A teleport box is where players will be moved to during the teleport transition.
You will need to make one in your map by following the steps outlined.
To make a Teleport Box:
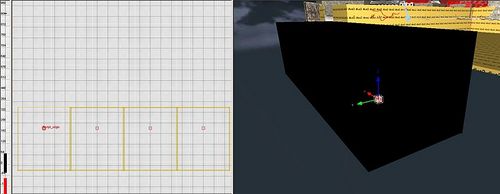
1) Make four (4) hollow boxes in an area where player's can't see them.
2) Assign the boxes a black material. global_black material works well.
3) Inside each box in the center, make a Script_Struct.
4) Assign each Script_Struct a unique Targetname KVP from the list...
teleport_room_0
teleport_room_1
teleport_room_2
teleport_room_3
Pandora Boxes
Pandora Boxes are your weapon chests in the game that players try their luck at a weapon lottery.
You can have as many of these as you wish, but you could have one that is a start_chest as outlined below that will ensure that chest is the first one enabled.
Level Script
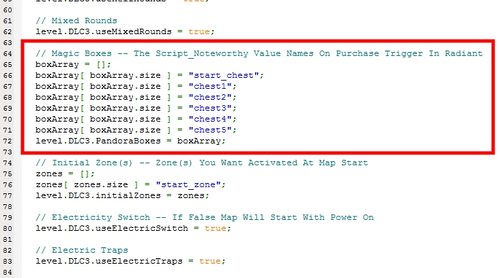
In your map script, you will see near the top a snippet of code pertaining to Pandora Boxes. Here you will list all the ones you plan to have in your map.
How this works is, whatever string you enter in for boxArray[ boxArray.size ] = "String_Goes_Here";, the game will try to get that Pandora Box in-game based upon a Script_Noteworthy KVP you assigned in Radiant to the purchase trigger for Pandora Boxes.
Having a start_chest in the list will ensure that the Pandora Box in-game with the same KVP will always be the first box in your map to be enabled. If one isn't present, a random box will be chosen by the game as the first one.
Radiant
To create a Pandora Box:
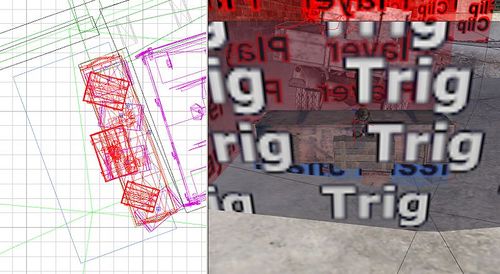
1) Create a Trigger_Use. Assign it KVPs:
"zombie_cost" "950"
"targetname" "treasure_chest_use"
"script_noteworthy" "[Assign It One You Listed In Script]"
2) Create a Script_Model. Assign it KVPs:
"model" "zombie_treasure_box_lid"
3) Create a Script_Origin.
4) Create a Script_Model. Assign it KVPs:
"model" "zombie_treasure_box"
Now we need to set up targeting:
| Targets | ||
| (1)Trigger_Use | ====> | (2)Script_Model. |
| (2)Script_Model | ====> | (3)Script_Origin. |
| (3)Script_Origin | ====> | (4)Script_Model. |
You should see a red line connecting from one to the other. Position them to look like a Pandora Box as seen in-game or in the photo.
The Script_Origin is half way through the (4)Teasure Box base, this is where the random weapon lottery will start from.
You will also need to add rubble for when a Pandora Box isn't active:
Buyable Weapons
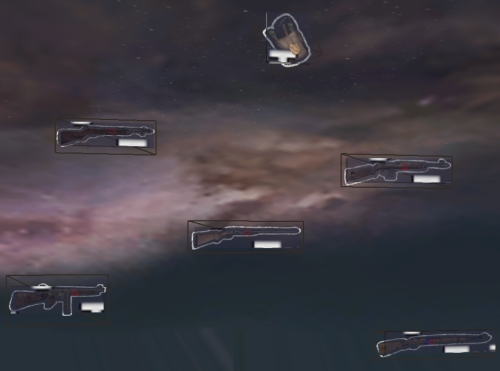
Adding weapons onto the wall is now conveniently as easy as dropping in a prefab:
1) Create a Misc_Prefab.
2) Select a weapon_upgrade_* prefab from [root]/map_source/_prefabs/zombiemode
Mini Map Image
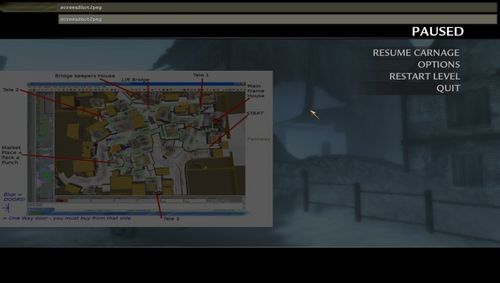
To create a minimap, you will need to have an image ready with dimensions that are power of two, such as 1024x512 or 1024x1024. Once you have your image...
1) Save your image as a DDS.
2) Place the DDS file in [root]/texture_assets/menu
3) Open up Asset Manager from Launcher.
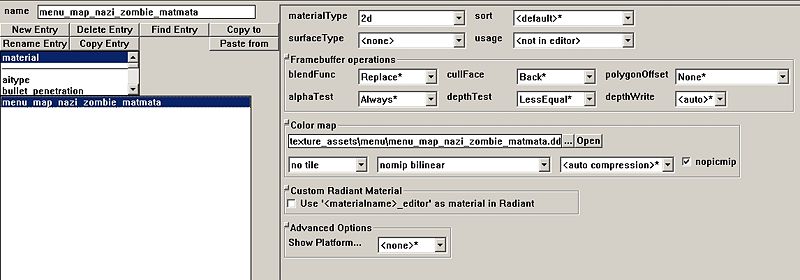
4) Select Material in the left scroll box. In the name field type in menu_map_nazi_zombie_[mapname] ie menu_map_nazi_zombie_boat
5) Click New Entry. A pop up box will appear, click Ok.
6) Configure your Asset Manager settings to be similar to one in the photo below. Your Color Map should be different and point to where you stored your image in the menu folder.
7) Save your GDT (Asset Manager File) in [root]/texture_assets, the filename of the GDT does not matter.
8) Either press F10, or navigate to PC Convert and select Current Asset Only.
9) Once Converter is done, navigate to [root]/raw/images and copy your minimap image and paste it into your mod folder's "images" folder.
10) Build your IWD including your minimap image.
11) In your mod zone source file, change the following line to fit your map name:
material,menu_map_nazi_zombie_matmata
HellHounds
You will only need two (2) Hell Hound spawners in your map, one (1) regular and one (1) teleporter. In DLC3 the spawner is moved around to spawn in Hell Hounds, so you do not need to add in a spawner at every location you want dogs to spawn in at.
Regular HellHound
These HellHounds only spawn in during HellHound rounds.
1) Create a HellHound spawner by right clicking in Radiant, Navigate to Actors, Select Zombie Dog.
"targetname" "zombie_spawner_dog_init"
2) Give It KVPs:
"spawnflags" "3"
"script_forcespawn" "1"
"script_noteworthy" "zombie_dog_spawner"
"script_string" "zombie_chaser"
Teleporter HellHound
Teleporter HellHounds spawn in during mid-rounds when players try their luck at the Teleporter system in hopes of getting a Power Up but end up getting something deadly.
1) Create a HellHound spawner by right clicking in Radiant, Navigate to Actors, Select Zombie Dog.
2) Create a Script_Struct with KVPs:
"targetname" "teleporter_powerup"
3) Give It KVPs:
"spawnflags" "3"
"targetname" "special_dog_spawner"
"script_forcespawn" "1"
"script_noteworthy" "zombie_dog_spawner"
"script_string" "zombie_chaser"
"target" "teleporter_powerup"
Zombies
In order for Zombies to spawn in the map, we need to place spawners.
To create a Spawner:
1) Right click in Radiant.
2) Navigate to Actor.
3) Navigate to Axis.
4) Navigate to Zombie.
5) Navigate to Ger.
6) Navigate to Ber.
7) Select SSHonor.
8) Give it KVPs:
"spawnflags" "3"
"count" "9999"
"script_forcespawn" "1"
"script_noteworthy" "zombie_spawner"
Zone Management
Zones manage Zombie spawners and lets AI spawn from them when players are in a zone. This is a useful and important feature because you do not want to have Zombies spawning on the other side of the map from players or spawning in areas where barriers have not been unlocked causing Zombies to get stuck.
Implementing Zones requires some scripting, but nothing too complex. All you need for implementing the zones in script is the name of the Zone and a Flag to tell the game when the area to that zone has been unblocked and is ok to start detecting players and spawning Zombies.
Info Volumes
Zones are Info_Volumes. To create a Zone (Info_Volume):
1) Right click in Radiant.
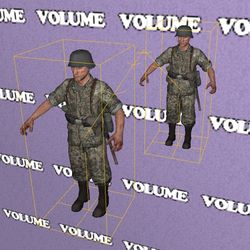
2) Navigate to Info, select Volume. You should not see a pink textured brush with the word 'Volume' written on it.
3) Give the Zone a unique Targetname KVP. For example:
"targetname" "reciever_west"
"target" "reciever_west_spawners"
Associate Spawners
Now, for the Zombie spawners you want associated with the zone you will need to change their Targetname to:
"targetname" "reciever_west_spawners"
You should see a line going from the center of the Info_Volume to the associated spawners. What we did here is tie the spawners to that specific Zone by taking the Targetname of the Zone ("reciever_west") and add "_spawners" to the end to come up with the Targetname for the spawners.
Associate HellHounds
Associate Risers
Fast Files
Make sure all compiled files are mod specific and placed in your map's mod folder when compiling them in Launcher.
Map
Copy Nazi_Zombie_Matmata.CSV in [root]/zone_source and rename it to your map.
Inside, replace any references of nazi_zombie_matmata to your map name.
Build your map!
Mod
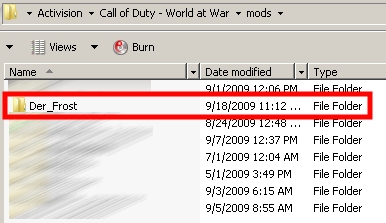
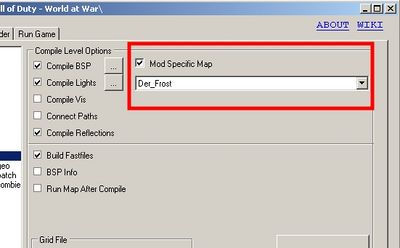
Copy the Mod.CSV from [root]/mods/Der_Frost and move it to your Mod folder.
Build the Mod.FF!
Patch
Copy the nazi_zombie_matmata_patch.CSV in [root]/zone_source and rename it to your map.
Build the Patch FF for your map!
IWDs
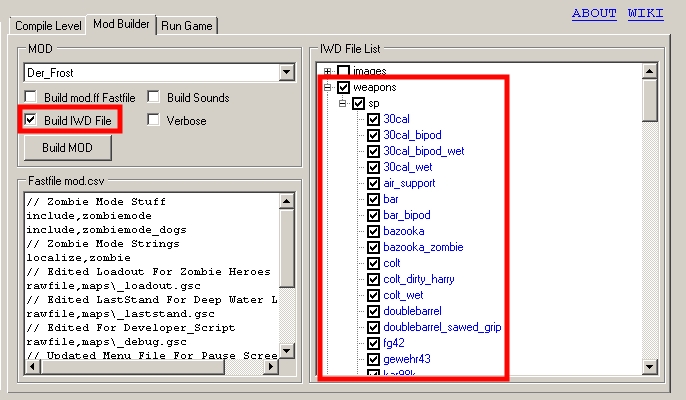
While not a Fast File, it is important to note you will need to put any weapons for ZombieMode in an IWD and place it in your mod folder.
FAQ / Solutions / Ask A Question
If you encounter any problems using this tutorial, please visit the Discussion Page.
Index
| Key Value Pair (KVP) | Information entered through the Entity Window (n by default in Radiant) to be assigned to entities. |
| Level Script | Your map script. ie Nazi_Zombie_BurgerJoint.GSC |
| Script_Struct | Right click in Radiant, Navigate to Script, Select Struct. |
| Trigger_Use | Right click in Radiant, Navigate to Trigger, Select Use. |
| [root] | The root installation of your CoDWaW game, usually "C:\Program Files\Activision\Call of Duty - World at War" for most users. |
