Call of Duty 4: Building Stairs: Difference between revisions
Jump to navigation
Jump to search
No edit summary |
mNo edit summary |
||
| (8 intermediate revisions by the same user not shown) | |||
| Line 1: | Line 1: | ||
[[Image:Nutshell.png]] This tutorial will show how to create Stairs Prefabs using | [[Category:Call of Duty 4]] | ||
[[Category:Modtools]] | |||
[[Category:Radiant]] | |||
[[Category:Basic Editing]] | |||
[[Category:Brush Work]] | |||
[[Image:Noobs.png|200px|right]] | |||
[[Image:Nutshell.png]] This tutorial will show how to create Stairs Prefabs using terrain patches:: | |||
<br><br> | |||
Result are as follow: | |||
<br><br> | |||
[[Image:stairs_2.png]] | [[Image:stairs_2.png]] | ||
| Line 64: | Line 64: | ||
[[Image:stairs_2g.png]] | [[Image:stairs_2g.png]] | ||
* Now we need to adjust the decals are they are clearly streched, for this select all the decals (both sides of stairs) using Ctrl+SHIFT+LEFT-CLICK and make sure you arent selecting a brush face by right-clicking on 3D windows and making sure only WC/com_stain_01 is selected: | |||
[[Image:stairs_2h.png]] | |||
* When all decals are selected press 'S' and use the 'Lmap' tool to adjust the textures. | |||
[[Image:stairs_2.png]] | |||
* Finally select all using 'I' go to File > Save Selected > Save under the name you want under /map_source/prefabs/ | * Finally select all using 'I' go to File > Save Selected > Save under the name you want under /map_source/prefabs/ | ||
* Note that you could at this point add a row on the top terrain patch of the steps and move its vertices to make an uneven look. | |||
Latest revision as of 11:20, 29 May 2009

![]() This tutorial will show how to create Stairs Prefabs using terrain patches::
This tutorial will show how to create Stairs Prefabs using terrain patches::
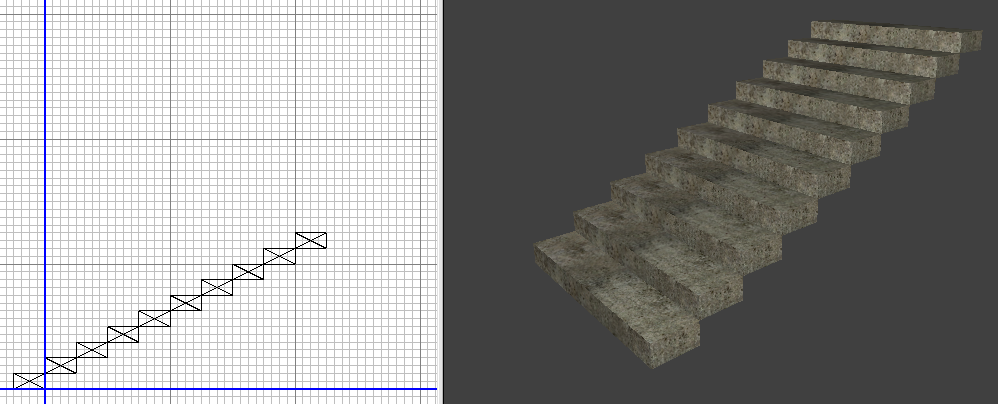
Result are as follow:
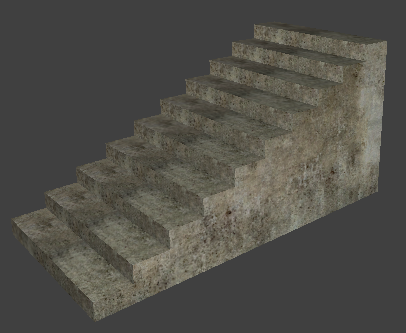
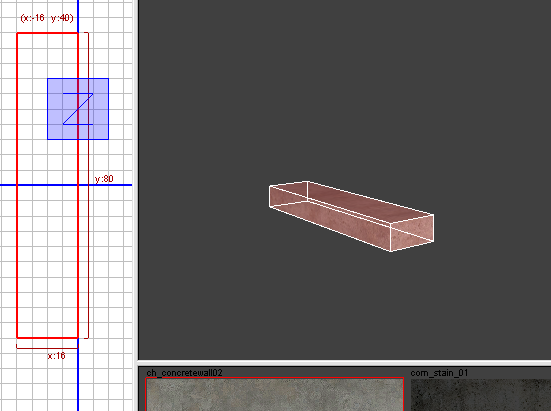
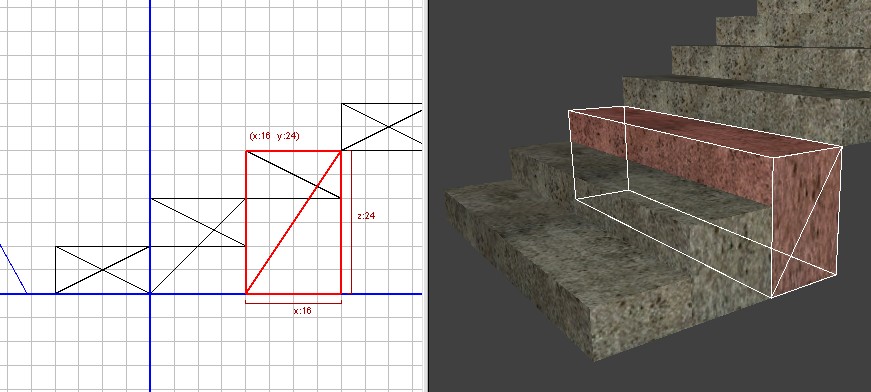
- Create a new map in Radiant, select the texture ch_concretewall02 and using Z 2D view create a brush of
X = 20
Y = 8
Z = 80
- Deselect the brush (Esc)
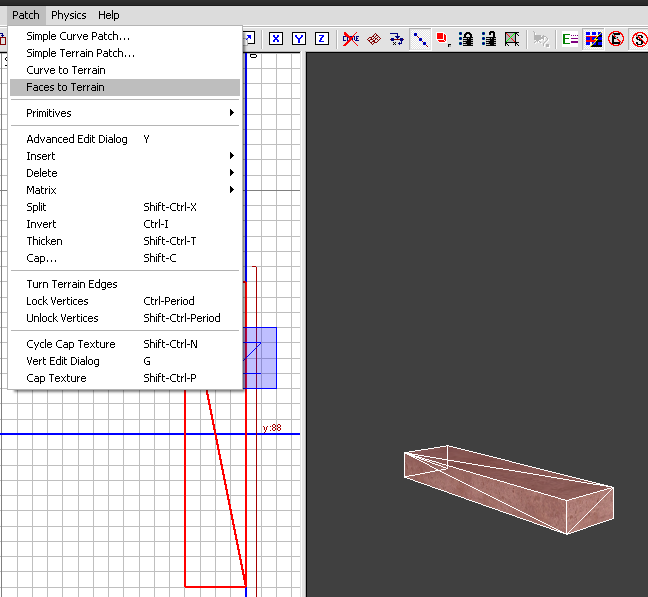
- Select the outside faces of the brush now using Ctrl+SHIFT+LEFT-CLICK and go to Patch>Faces to Terrain
- In the texture window look for the texture com_stain_01 and click on it
- Still with the new faces selected, press 'S' and hit 'Lmap' - This will adjust the texture to the size of the faces.
- Deselected all (Esc)
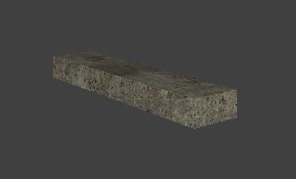
Now you should have this:
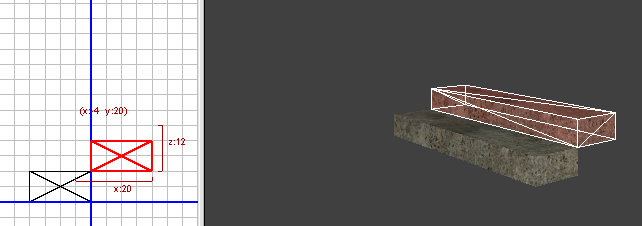
- Select all using 'I' and press SPACEBAR to Duplicate the brush+decals
- Place the duplicate brush+decals as shown below:
- Repeat as many time as necessary
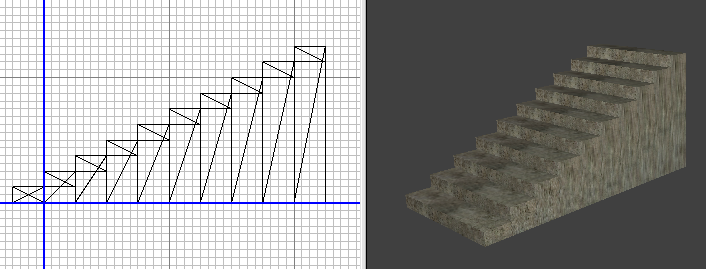
- Now to adjust the side of the stairs place your self in the X 2D view and select one step at the time (one brush) + the 2 decals (each side) requiring to be adjusted
 Make sure to select both the brush face and the decal by right-clicking on the 3D windows and selecting both.
- Drag all to the level of the first step, when completed it should look like this:
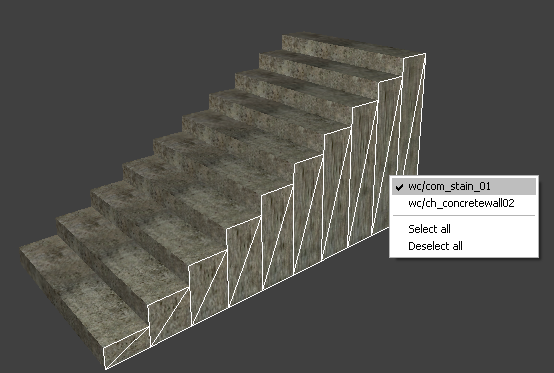
- Now we need to adjust the decals are they are clearly streched, for this select all the decals (both sides of stairs) using Ctrl+SHIFT+LEFT-CLICK and make sure you arent selecting a brush face by right-clicking on 3D windows and making sure only WC/com_stain_01 is selected:
- When all decals are selected press 'S' and use the 'Lmap' tool to adjust the textures.
- Finally select all using 'I' go to File > Save Selected > Save under the name you want under /map_source/prefabs/
- Note that you could at this point add a row on the top terrain patch of the steps and move its vertices to make an uneven look.
