Call of Duty 4: Arches: Difference between revisions
Jump to navigation
Jump to search
mNo edit summary |
mNo edit summary |
||
| (2 intermediate revisions by the same user not shown) | |||
| Line 1: | Line 1: | ||
By One Richard | [[Category:Call of Duty 4]] | ||
[[Category:Radiant]] | |||
[[Category:Basic Editing]] | |||
[[Category:Arches]] | |||
[[Category:Brush Work]] | |||
<br>By One Richard | |||
[[Image:Nutshell.png]] This tutorial will show you how to create arches (The easy way). | [[Image:Nutshell.png]] This tutorial will show you how to create arches (The easy way). | ||
Latest revision as of 16:12, 3 November 2008
By One Richard
![]() This tutorial will show you how to create arches (The easy way).
This tutorial will show you how to create arches (The easy way).
Step 1 (Structure)
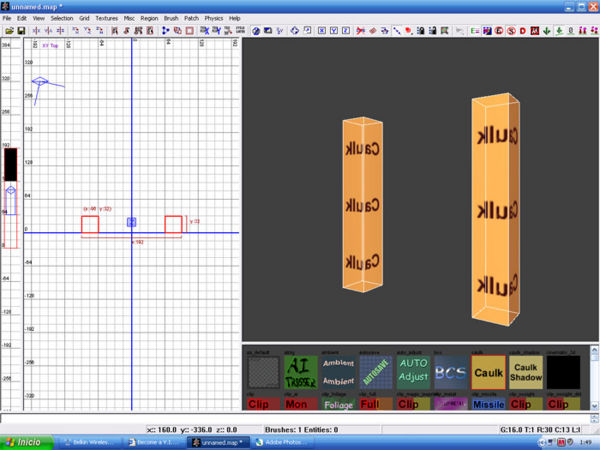
- First you do is to determine the place you are going to locate the arch.
In this case I will do it between these two columns.
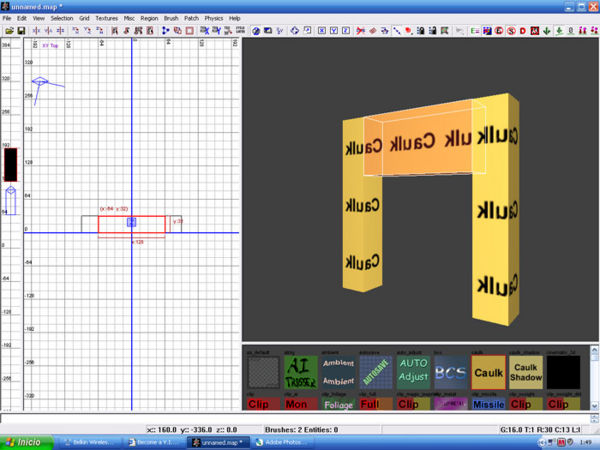
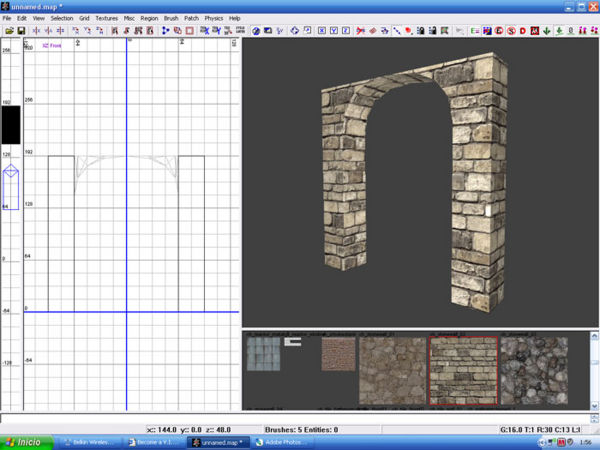
- Create a brush that will represent the total size of it.
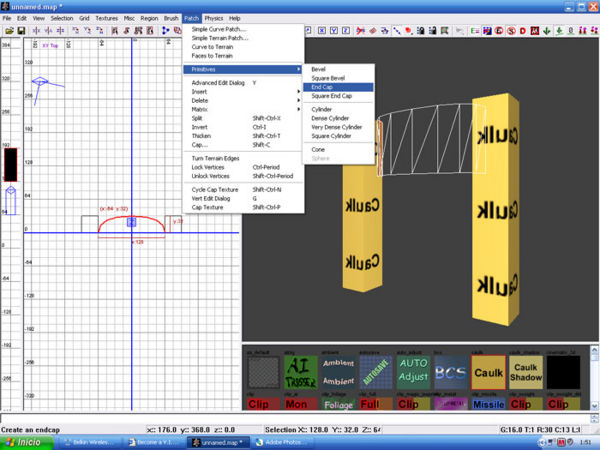
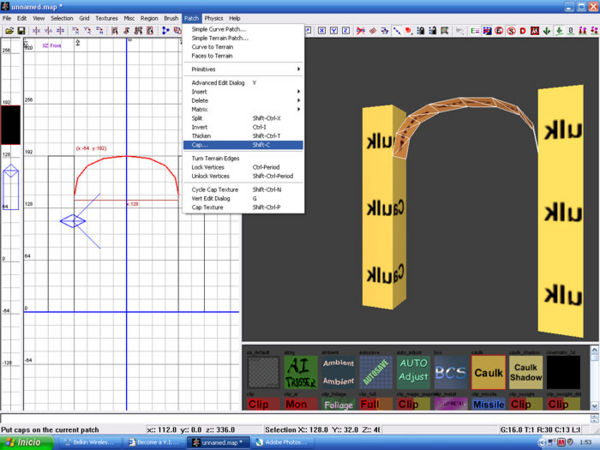
- With the brush selected, go to Patch > Primitive > End Cap, this will convert th brush in to a curved patch.
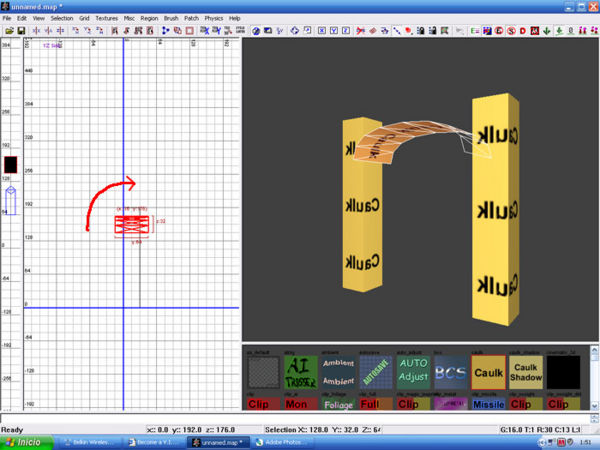
- Usually it needs to be rotated and scaled to fit in its place.
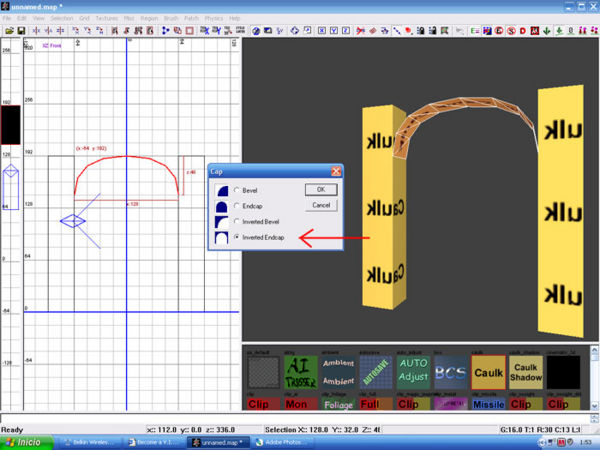
- When done, just go to Patch > Cap.
- In the small options windows that pops up just check Inverted Endcap.
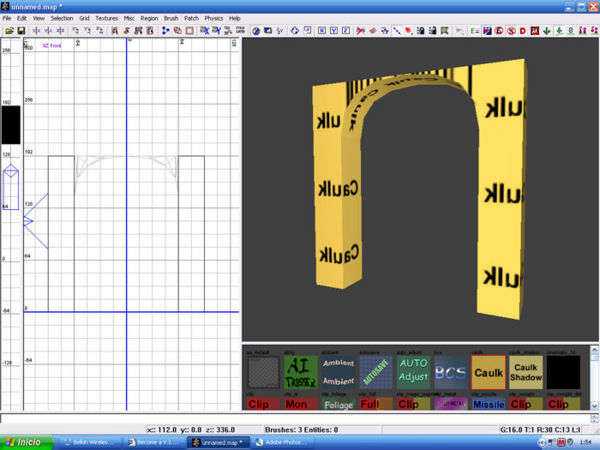
- The basic structure of the arch is done.
Step 2 (Texturing)
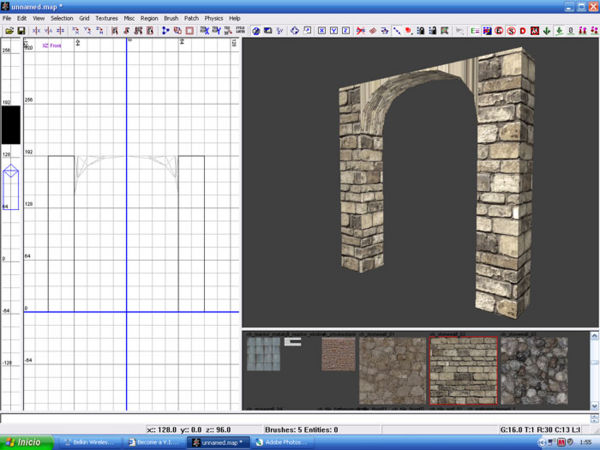
- When applying textures to this arch you may notice that some of them just doesnt look correct or simply looks a bit trange.
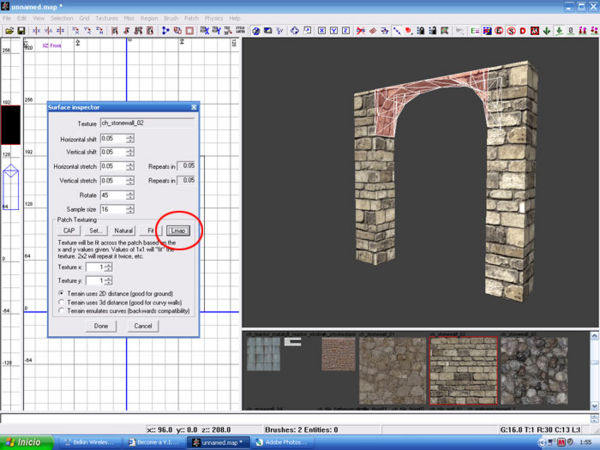
- When this happen, just select all the strange looking faces, and press ¨S¨ for the Surface Editor and click Lmap.
- Also maybe you will need to select some faces individually to rotate or correct the direction of the texture.
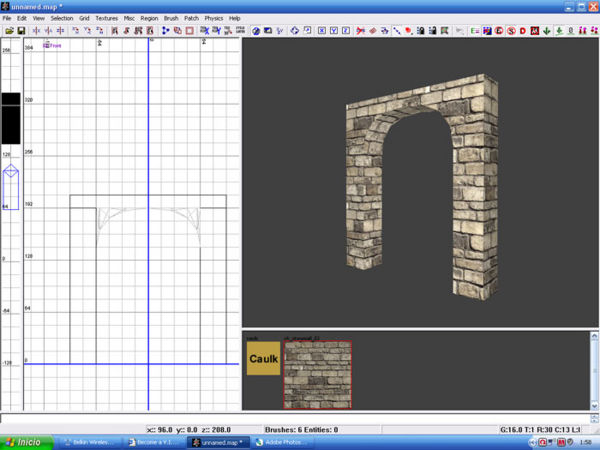
- As a final touch I added a block on top of the arch to complete the structure and now is ready to use.
