Call of Duty bo3: ZM efxconverter: Difference between revisions
(Created page with "== Requirements == * EFX Converter * Photoshop (Or other image editing software) EFX Converter: http://www.mediafire.com/file/obolorjvrnok61o/EFX+CONVERTER.zip ''*The conv...") |
No edit summary |
||
| Line 94: | Line 94: | ||
[[File:fx_distortion_settings.jpg]] | [[File:fx_distortion_settings.jpg]] | ||
'''Smoke:''' Mostly a similar name is in the material name smoke/smk | |||
''Material Type:'' effect_lit_blend | |||
''Tile Mode:'' Set this on no-tile since we don't need to repeat the image. | |||
''ShadowTransparency:'' Controls how transparent the (in this case) smoke will be, if you have a fairly low value the smoke will be less clear/thicker. | |||
''Texture Atlas Settings:'' Here you have a Row/Column count, for normal images they both need a value of 1, but if there are multiple images in the image (Like a sequence) you need to count row & column and fill them in. | |||
[[File:fx_smoke_setting.jpg]] | |||
== Creating materials == | == Creating materials == | ||
Revision as of 02:35, 8 January 2017
Requirements
- EFX Converter
- Photoshop (Or other image editing software)
EFX Converter: http://www.mediafire.com/file/obolorjvrnok61o/EFX+CONVERTER.zip
*The converter is still being worked on, if you encounter any bugs please let us know
Preparing EFX Converter
First you have to edit folders.dat that is included with the download, in there you will setup the paths for the game you want to convert from.
The contents of the file look like this:
cod4=
cod5=
bo1=
This is a example how it could look like:
cod4=E:\Program Files (x86)\Activision\Call of Duty 4 - Modern Warfare
cod5=E:\SteamLibrary\steamapps\common\Call of Duty World at War
bo1=E:\SteamLibrary\steamapps\common\Call of Duty Black Ops
Converting the FX
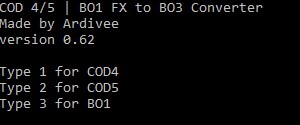
Drag n drop one or more FX's you like to convert onto the efx_converter.exe
Type the correct number from which game you convert the fx from and press Enter.
After the conversion is done a folder "converted" is created with the converted files.
Converter Output
In the folder "converted" there is a file called output.txt There you will find what materials are used in the fx.
Example output.txt:
MATERIALS

Material name: gfx_fxt_exp_fire	Image name: fxt_exp_fire.dds
Material name: gfx_fxt_light_ray_ribbon_spread	Image name: fxt_light_ray_ribbon_spread.dds
Material name: gfx_fxt_smk_tendril	Image name: fxt_smk_tendril.dds
Material name: gfx_fxt_light_flare_phosphorous	Image name: fxt_light_phosphorous.dds
Material name: gfx_fxt_spark_anim_blink	Image name: fxt_spark_anim_blink.dds
Material name: gfx_fxt_env_water_ripple	Image name: fxt_env_water_ripple.dds
Material name: gfx_fxt_smk_whisp_spiral	Image name: fxt_smk_whisp_spiral.dds
Material name: gfx_fxt_env_water_ripple_add	Image name: fxt_env_water_ripple.dds
Material name: gfx_fxt_smk_gen	Image name: fxt_smk_gen.dds
Material name: gfx_fxt_flashback_1	Image name: fxt_flashback_1.dds
Material name: gfx_fxt_env_dust_mote_pcloud_add	Image name: fxt_env_dust_mote.dds
On the left is the material name and on the right is the image that is used in that material.
Preparing images
In the folder "converted/images" are all the images being used by the fx
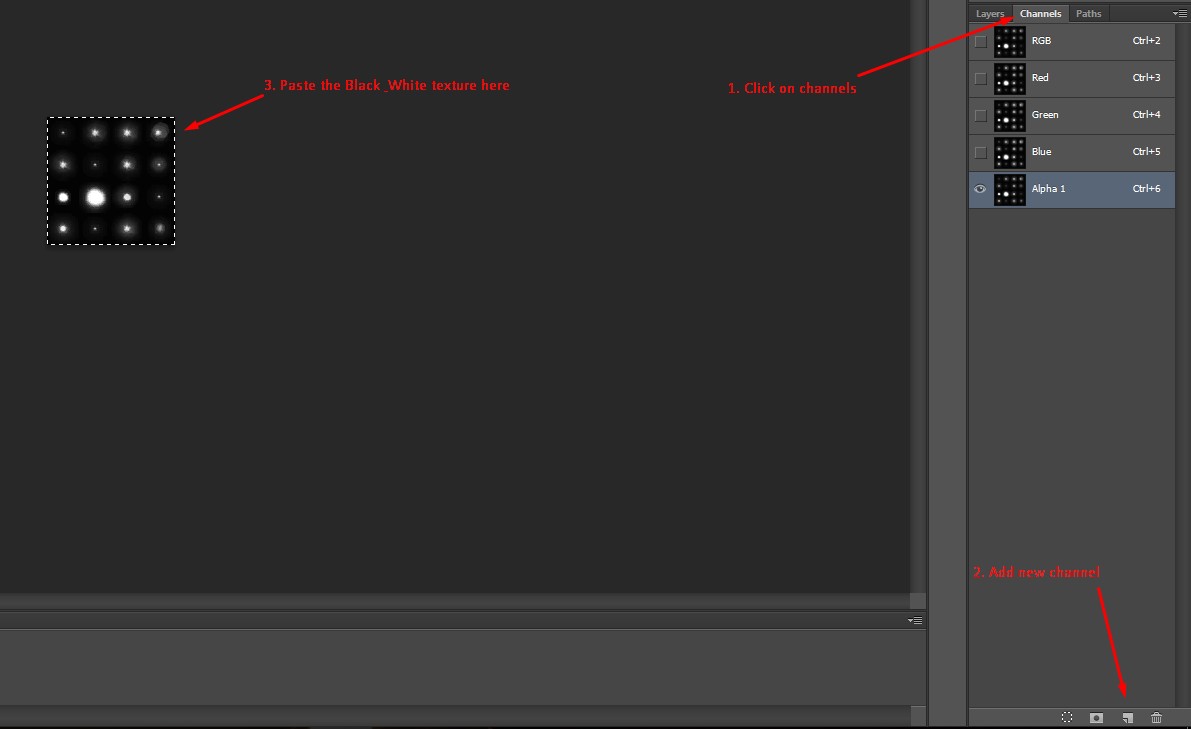
Certain images don't have a alpha channel by default, in that case we have to make our own. (They have a black background)
Open the image in Photoshop or the image editing software you like (And can open .DDS)
Duplicate the layer and make it Black & White (Using default preset)
Select the Black & White layer and paste it in the alpha channel of the first layer.
Now you can save the image as a .tif
In this case the image will be emmisive so we have to create a "mask" image as well.
Make the image Black & White and save it. (Save it with same name with _mask behind it)
The rest of the images you can just save as .tif
Materials Explained
*This is mostly based on guessing, so not everything might be 100% correct
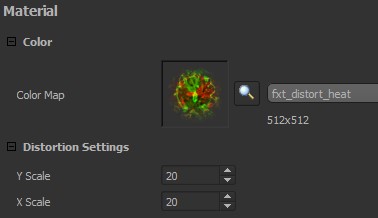
Distortion: Mostly a similar name is in the material name disortion/distort
Material Type: effect_distortion
Distortion Settings: There is X & Y scale you can adjust, the higher the value the more the distortion is.
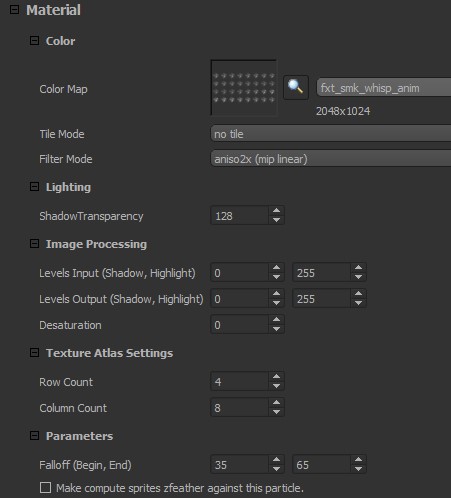
Smoke: Mostly a similar name is in the material name smoke/smk
Material Type: effect_lit_blend
Tile Mode: Set this on no-tile since we don't need to repeat the image.
ShadowTransparency: Controls how transparent the (in this case) smoke will be, if you have a fairly low value the smoke will be less clear/thicker.
Texture Atlas Settings: Here you have a Row/Column count, for normal images they both need a value of 1, but if there are multiple images in the image (Like a sequence) you need to count row & column and fill them in.


