Call of Duty 5: Create Custom Textures

Export from Photoshop
You can use any program that will save an image as either a .tga or .dds, Photoshop is the industry standard so I'll start in there.
If your using Photoshop then download this plug in and install:
 The ATI Normal map generators is the easiest to use, it converts premade .tga files.
You can use your color map or a bump map.
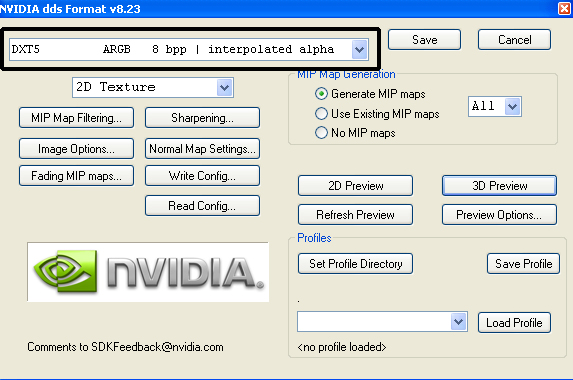
The Nvidia plugin can do normal maps too in the "Normal map settings" button in the picture.
1. First resize your image as (n^2)x(n^2) and "n" can be any number.
IE: (8^2)x(16^2) = 64 x 256 pixels, this would be useful for trim.
- Some other sizes: 64 x 64, 512 x 512, 1024 x 512, 256 x 128, ect...
2. Save as either .tga or .dds.
- TGA is only useful for opaque textures, this is easiest to use as there are no options.
- DDS can be used for textures that have transparency like windows.
- DXT1 has only 1 bit alpha, like an on / off switch. There is no fading and a pixel is either opaque or see through.
- DXT5 has the most detailed alpha so fading between opaque and transparent looks good, good for dirty glass.
- DXT3 has a less detailed alpha channel so its good for fading but only if there's a little of it.
3. Save into your raw/images folder.
- I suggest you save a copy elsewhere too but when we go to Asset Manager it will only consider images in the "raw/images" folder.
Asset Manager
1. Create the Material
- Once you open asset manager there is a menu to the left and select "Material".
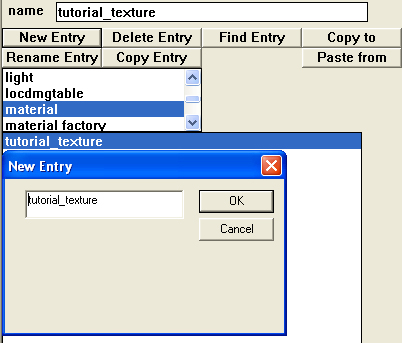
- Once "material" is highlighted then click on New Entry and fill in the name of your texture.
- Click on OK and your material should show up like in the picture.
2. Filling in the rest of the information.
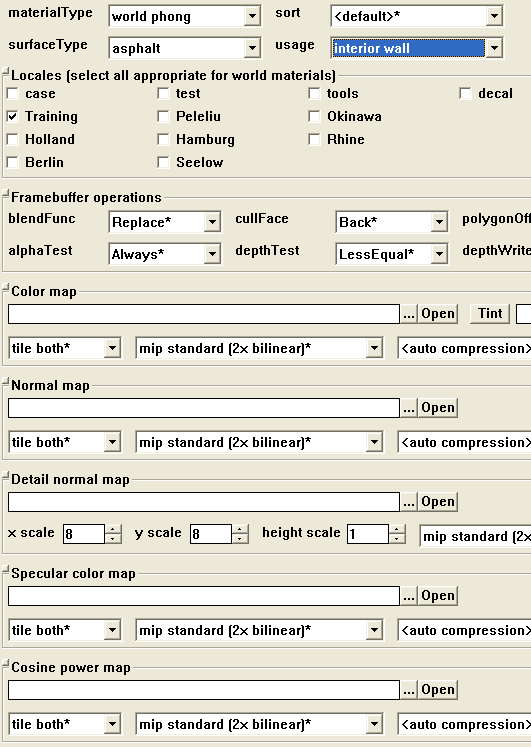
- materialType - Select "world phong" for a texture.
- surfaceType - Select the proper surface type to use stock settings for the type of material.
- Stock settings include impact effects, sounds, and penetration ability.
- sort - Leave as "<default>*".
- usage - Select the intended use for your texture.
- Locales - Intended theme or location for your texture.
- Framebuffer operations - Leave alone unless you are an advanced user.
- If creating an alpha blending texture then change "blendFunc" to "blend".
- Color Map - This is the image file that you created, this is also what the player will see.
- Normal Map - This section can accept a bump map or normal map to show height.
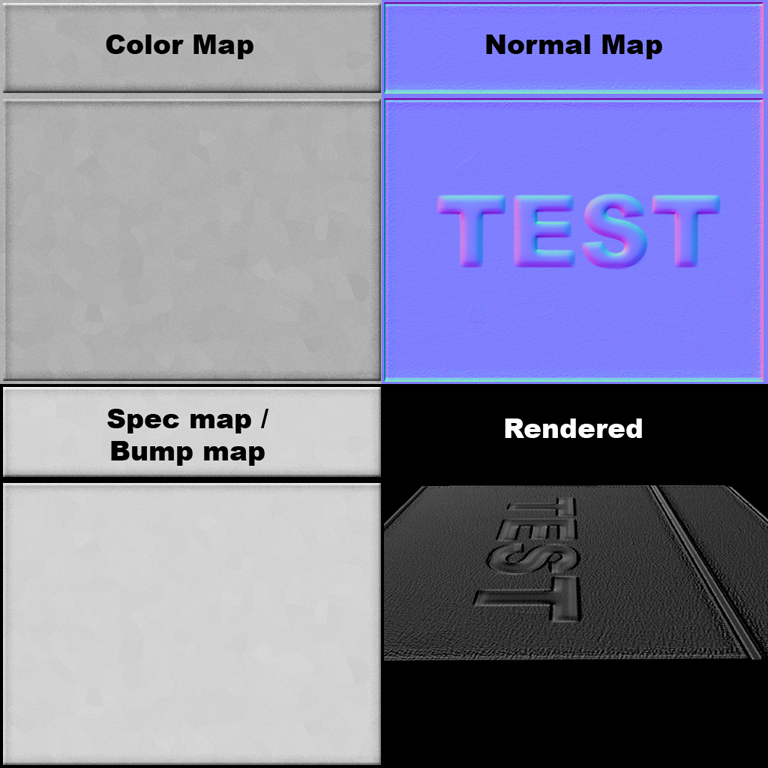
- A bump map is a Grey scale image of your texture showing height.
- Black is low, white is high, values in between are relative height.
- A normal map is provided by converting a bump map with a plug in.
- while most of your image may be purple there are different colors that represent height.
- A bump map only shows height in an image, a normal map shows height and direction of a bump.
- A bump map is a Grey scale image of your texture showing height.
- Detail Normal Map - This is the same as a normal map but only shows when the player is close to the texture, usually only small bumps or holes.
- Specular color map - Same rules as a bump map but white is shiny and black is no shine. This will only be visible if r_specular is set to 1.
- Cosine power map - Adjustments to Specular color map.
3. Convert your file.
- Once everything is setup go to "PC Convert -> Current Assets Only"
- You can use the convert all option but any errors may be lost in scrolling log.
- Once successful you will have 3 files to keep in mind when packing your map or mod.
- raw/materials/texturename <no file type>
- raw/material_properties/texturename <no file type>
- raw/images/texturename.iwi
Viewing
To be sure your custom texture has been successfully imported, you can open up radiant and find your texture setup by the filters you specified. If you can view it in radiant then you will be able to use it anywhere. If you created a model phong then you can view your texture on your model in asset viewer.
Sources: Treyarch's Wiki


