Call of Duty 5: Waterfall
 Step-by-step tutorial explaining how to add a waterfall to your MP map
![]() NOTE: This tutorial, taken from the Treyarch Wiki, has been edited as the original code doesnt work
NOTE: This tutorial, taken from the Treyarch Wiki, has been edited as the original code doesnt work
Make your environment for the waterfall
First create somewhere for your waterfall to drop down using Radiant. The mapping aspect is not covered by this tutorial (yet?), but you may have a look at other terrain editing tutorials.
Find out the coordinate
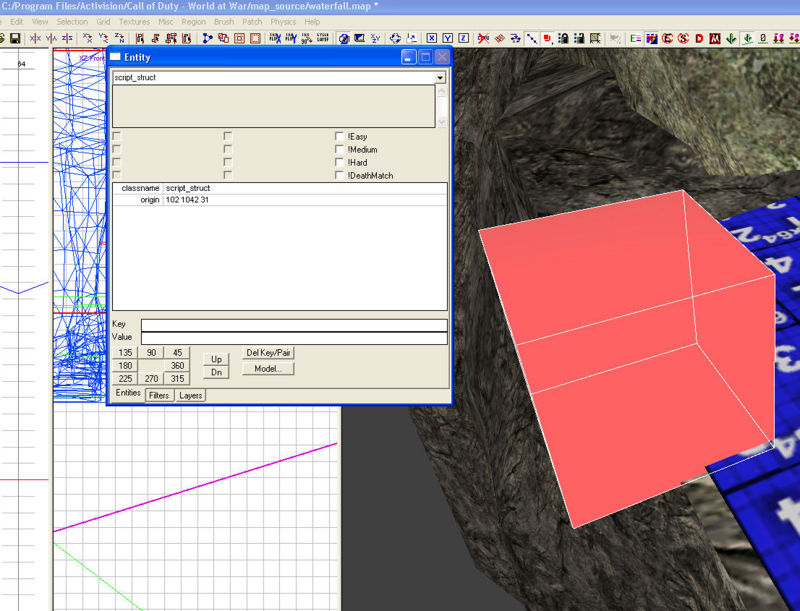
Lets get some coardinates for our effect so the game knows where abouts we want our effect to spawn. At the top of your waterfall right click the grid and select script/struct. Now place this at the top of your waterfall where you want the water to start from. Deselect it, then select it again (origin coord does not update in realtime). Press N on your keyboard and you will notice it has an origin. Copy these coardinates down and pop them on a notepad for now. Delete the script struct. Save and close your map.
Create the necessary script files
We need to create a GSC and call it mp_yourmap_fx.gsc (replace "yourmap" by the actual map name of course). Enter the following code:
#include maps\mp\_utility;

main()
{
	precacheFX();
	spawnFX();
}

precacheFX()
{
	level._effect["waterfall"] = loadfx("env/water/fx_wtrfall_md");
}

spawnFX()
{
	playLoopedFx(level._effect["waterfall"], 4, (100.0,1042.5,24.5), 0, anglestoforward ((0,90,0)), anglestoup((0,0,0)));
}
Replace the coardinates (100.0,1042.5,24.5) with your own coardinates (see above). Save this to raw/maps/mp/ folder in your CoD:WW directory.
Next we need to create another GSC. This time we call it mp_yourmap.gsc
Copy and paste this text in:
main()
{
	maps\mp\_load::main();
	maps\mp\mp_yourmap_fx::main();

	// If the team nationalites change in this file,
	// you must update the team nationality in the level's csc file as well!
	game["allies"] = "russian";
	game["axis"] = "german";
	game["attackers"] = "axis";
	game["defenders"] = "allies";
	game["allies_soldiertype"] = "german";
	game["axis_soldiertype"] = "german";

	setdvar( "r_specularcolorscale", "1" );
}
Save this to raw/maps/mp/ folder in your CoD:WW directory. Don't forget to change "yourmap" to the actual name of your map.
Add the waterfall fx to your zone file
We need to add the effect to the CSV so the game knows to load this effect. So open up the folder zone_source, then look for your CSV file. It will be named mp_yourmap.csv (yourmap = name of your own map).
Now add this line:
fx,env/water/fx_wtrfall_md
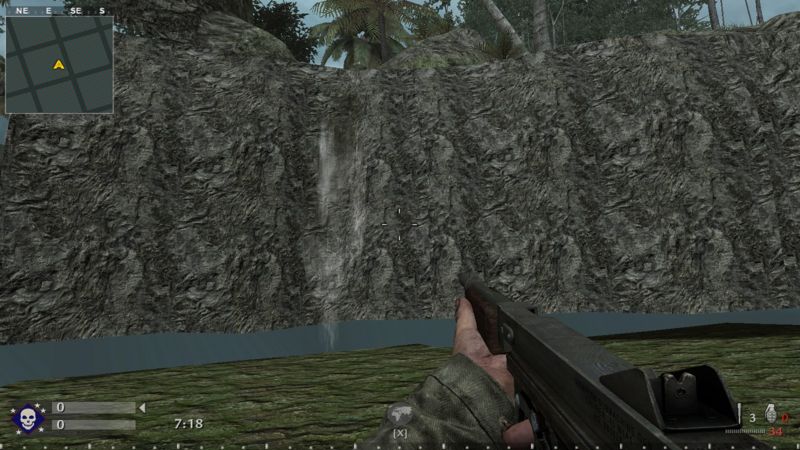
Compile and go have a look at your waterfall.
Troubleshooting
If the waterfall doesn't work, the main reasons will be:
- you have not replaced "yourmap" in this tutorial with the name of your own map
- you have not edited this line maps\mp\mp_yourmap_fx::main(); in mp_yourmap.gsc witht he name of your own map
- you did not change the coardinates in mp_yourmap_fx.gsc i.e (100.0,1042.5,24.5), to your own coardinates
by elim @ClanFru


