Call of Duty 5: SP - Vehicle Implementation
![]() In explaining how to implement a vehicle into your Singleplayer/Co-Op map, we will walk through adding a Jeep. This walk through assumes you are familiar with the basic operation of Radiant and somewhat familiar with the scripting language.
In explaining how to implement a vehicle into your Singleplayer/Co-Op map, we will walk through adding a Jeep. This walk through assumes you are familiar with the basic operation of Radiant and somewhat familiar with the scripting language.
Adding A Vehicle
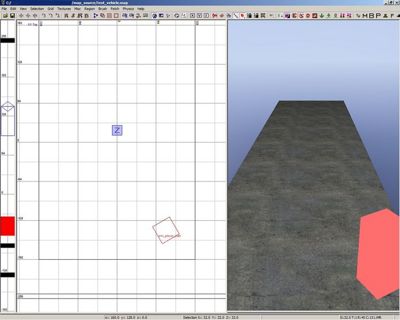
Open or create your map, be sure there is an info_player_start for a player to spawn in.
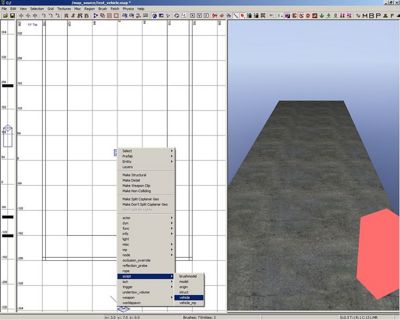
To add in a vehicle, we begin by right clicking in the 2D window.
In the right click menu that opened, go down to Script. A sub menu will open and choose Vehicle.
A small red box will appear, this is a script_vehicle entity.
It doesn't look like a vehicle yet, we need to give it Key/Value pairs.
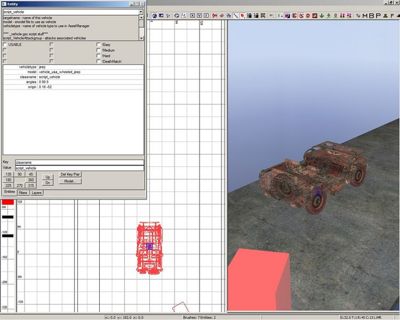
Select the script_vehicle in the map, then press N (by default) to open up the Entity window.
Inside the entity window, give it the following KVPs.
Key:model
Value:vehicle_usa_wheeled_jeep
Key:vehicletype
Value:jeep
Model is assigning the vehicle model we want to use, in this case, an American jeep.
Vehicletype is the type of vehicle it is (the type is tied into how the vehicle is setup and handled by the game). You can find the many vehicletypes in Asset Manager by opening up the vehicles.gdt, or you can visit the VehicleTypes page to find every model with it's corresponding vehicletype.
 Vehicletypes are case sensitive, so be careful when entering them into the entity window.
Pathing
We have our vehicle, but now we need to give it a path to follow.
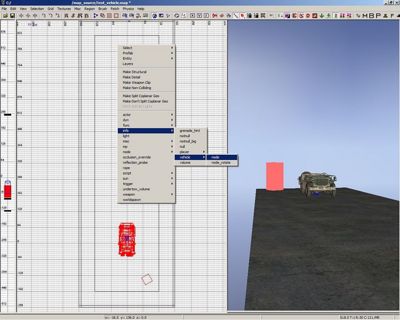
Start by right clicking in the 2D window and going down to Info.
Within that submenu, go to Vehicle.
And finally, choose Node in the new submenu that opened.
Place it in front of (or inside) the vehicle.
 This is where the vehicle will actually start from when it spawns.
You will need a second info_vehicle_node, you can go through the menu or simply copy/paste (spacebar by default when you have it selected) the current node.
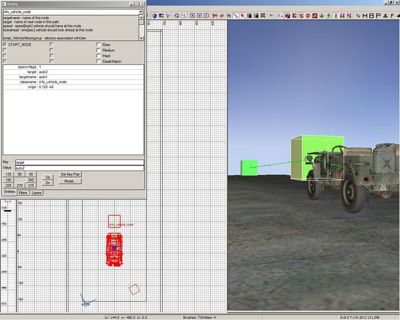
Select your vehicle, then select the first node. Connect these two entities by pressing W (by default).
Your first node should still be connected, while it still selected select the second node as well and connect them.
You will see a green line going from the vehicle to the first node, and from the first node to the second node.
The first node in any path will need to be marked as [Start Node] in the entity window. Select the first node and press N (by default) to open up the Entity Window and make sure []Start Node is checked.
Now we have our path set up, but we need to tell the vehicle how fast to go. We do this by assigning KVPs to the info_vehicle_nodes. We can enter these by hand, or we can use the Vehicle GUI. We will do it by Vehicle GUI, afterwards you will see what the KVPs are and will be able to do it by hand in the future if you choose to do so.
Speed & Look Ahead
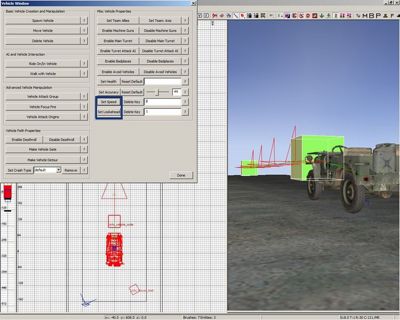
Select all your info_vehicle_nodes on the path and open up the Vehicle GUI by pressing Shift + V (by default).
![]() You can set individual/unique speeds to each node if you wish by only selecting the ones you want to affect.
You can set individual/unique speeds to each node if you wish by only selecting the ones you want to affect.
On the right side of the GUI you will see Set Speed and Set Look Ahead. Next to them they will have a Delete Key button. And next to that you will see field boxes. In these field boxes you enter in the values you wish to use. We will use 8 for Speed and 1 for Lookahead.
Press the Set Speed button, or Set Look Ahead, the order doesn't matter. The Vehicle GUI will close, but your entities will still be selected. Open up Vehicle GUI again and click the Set Look Ahead or Set Seeed dependent upon which one you didn't already click. The Vehicle GUI will close out again.
![]() Look Ahead is the number of nodes ahead the vehicle will look at in order to create it's spline. Lower number for Look Ahead results in tighter conformation to the spline, but will sometimes result in bad looking movement. Higher number for Look Ahead results in smoother vehicle path spline, but requires more nodes and more time to tweak.
Look Ahead is the number of nodes ahead the vehicle will look at in order to create it's spline. Lower number for Look Ahead results in tighter conformation to the spline, but will sometimes result in bad looking movement. Higher number for Look Ahead results in smoother vehicle path spline, but requires more nodes and more time to tweak.
You should now see a red line of arrows along your path now. This red line of arrows is the spline for the vehicle's movement.
Vehicle Spawning
We now have everything set up, but need to make sure our vehicle spawns and moves. This is another situation where we can enter the KVPs by hand or use the Vehicle GUI. We will use the Vehicle GUI that way you become more familiar with it and can also learn which KVPs are entered.
Make a brush in your map which will trigger the vehicle to spawn and move.
While it selected, right click in the 2D window and going down to Trigger, in the sub menu select Multiple.
We now turned that brush into a trigger_multiple.
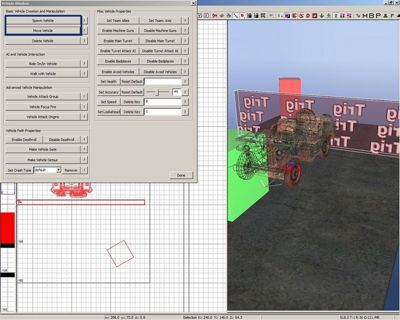
Select the trigger you just made, and the vehicle. Press Shift + V (by default) to open the Vehicle GUI.
On the left side of the GUI, select Spawn Vehicle'. The Vehicle GUI will automatically close.
Open up the Vehicle GUI again and select Move Vehicle. The Vehicle GUI will automatically close again.
 You can have an entirely separate trigger for Move Vehicle if you wanted it to move sometime later.
The vehicle will now spawn when a player touches that trigger.
AI & Vehicle
This is an optional section if you want to add an AI inside the vehicle riding. It is just as simple as making the vehicle spawn.
Start by adding an actor in: right click in the 2D window, go to Ally, and choose any actor you want from that point on. The entity that pops up in your map is the Spawner location for AI of the actor class your chose.
![]() You can also use Axis actors on vehicles.
You can also use Axis actors on vehicles.
With the Spawn selected, go into Entity Window (N by default) and check []Spawner. This ensures the AI will automatically spawn when the vehicle spawns and place him into the vehicle.
In this tutorial the Spawner can be seen by the player, so we will need to make he will spawn since AI can't spawn where a player can see them. We will give the Spawner a KVP:
Key:script_forcespawn
Value:1
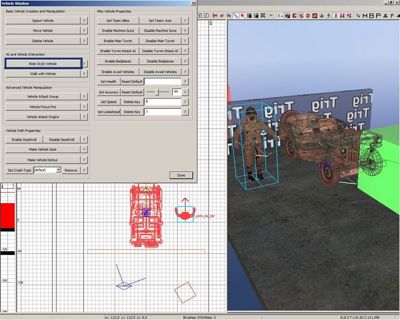
With the Spawner still selected, select the trigger we made before and go into the Vehicle GUI (Shift + V by default) and select Spawn And Ride In/On.
The AI will now spawn with the vehicle and ride inside.
Script
Now that we have all the Radiant based work done, we need to cover what sort of additions will need to be added to your script.
When you have a script_vehicle in your map, you will need to PreCache it in your script. PreCaching is just a way of preparing and building your vehicle for use with the vehicle system and scripts. It only requires one line of code per vehicle.
 Any sort of PreCaching must go before maps\_load::main() in any map.
#include common_scripts\utility;
#include maps\_utility;

main()
{
	maps\_jeep::main( "vehicle_usa_wheeled_jeep" ); // PreCache line is here

	maps\_load::main();
}
The PreCache line consists of the vehicle's utility script, and passing through the model we used as a parameter. For a list of which vehicle utilities to use visit the Vehicle Types page.
Compiling & Testing
Now that you have everything done, you will just need to build your map, update your zone source, and launch your map.
The process is similar to what is outlined in Launcher Tool Page. After you run your map the first time you should generate a missingAssets.csv with missing animations, models, and FX that the vehicle is using. Copy those to your map's CSV and rebuild FastFile and you're good to go.
Sources: Treyarch's Wiki
