Call of Duty 5: Making Roads
=Editing Terrain= CALL OF DUTY 4!
Introduction
What we are going to do is make an area, and make different elevated areas and add decals and blend the decals to the area.
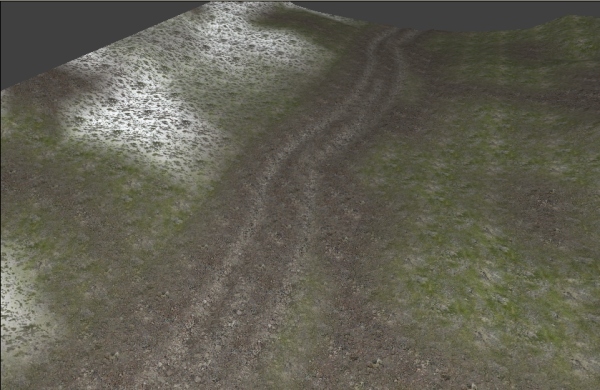
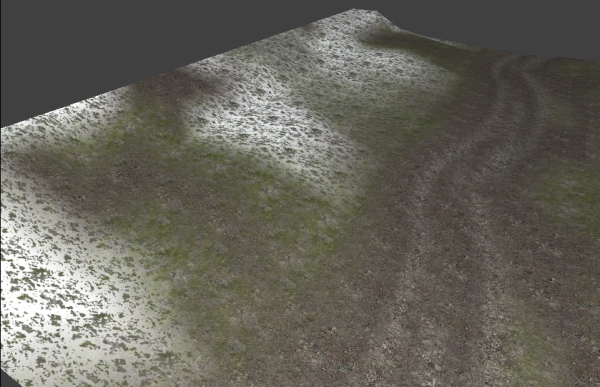
- The final result will look like this.
Grass areas with a gravel road and some snow on the hill.
Creating the Patches
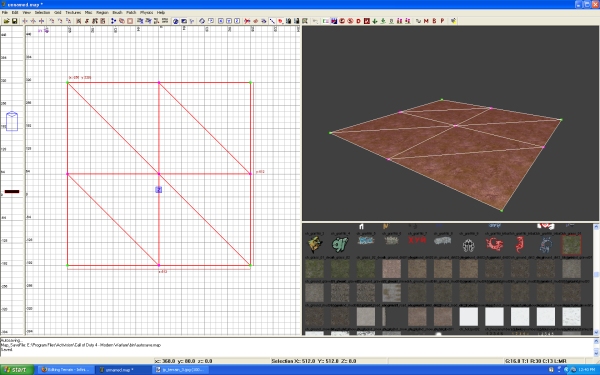
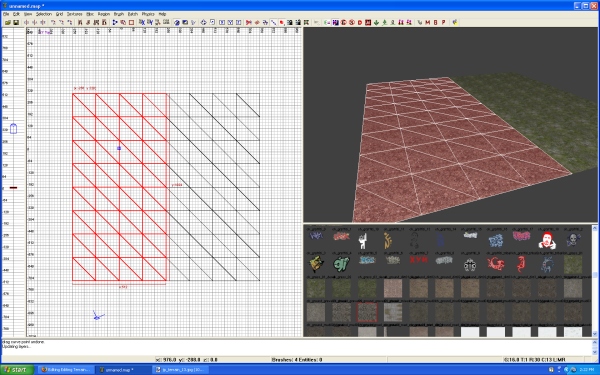
- First I have make a section of terrain and apllied the ch_grass_01 texture.
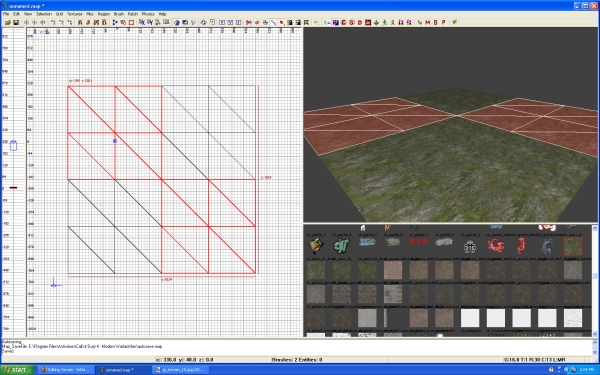
- I then made duplicates (Spacebar) of the terrain patch and lined them to each other.
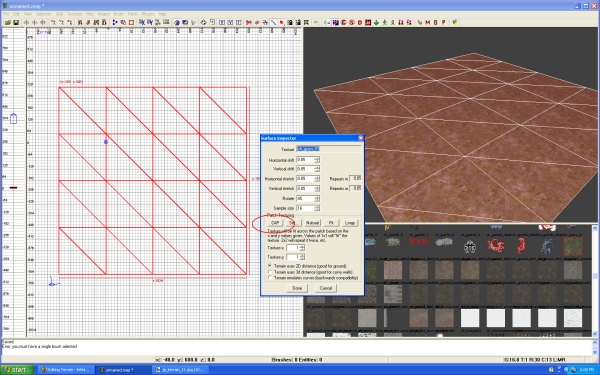
- I then selected all the pieces of terrain and I want to cap the texture. Capping a texture is properly projecting the texture to fit the area of selected terrain.
- Using cap will project the texture in a Z plane.
There are 2 ways to cap a texture.
1. Is to bring up the Surface Properties window (S key) and clicking on the Cap button
2. Is to use the hotkeys of Ctrl+Shift+P
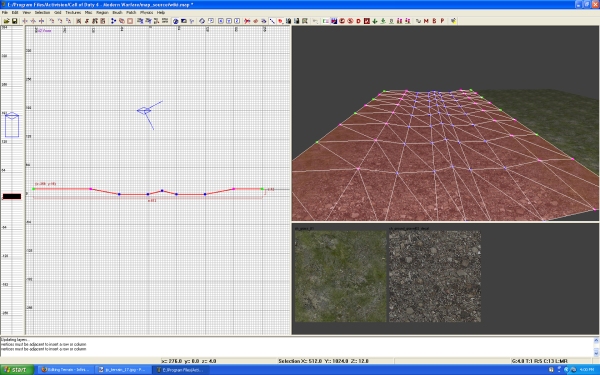
I went ahead and added a bunch of new rows to have more areas to edit. Know that when adding rows to a section of terrain, you can not exceed more then 16 rows in 1 direction.
- Next I duplicated 2 sections of terrain and apllied the ch_ground_gravel02_decal (cod4, different in codwaw).
- I then place it directly on top of the section I duplicated from that has the ch_grass_01 texture (cod4, different in codwaw).
Using Alpha-Blending
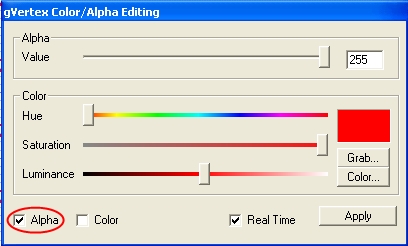
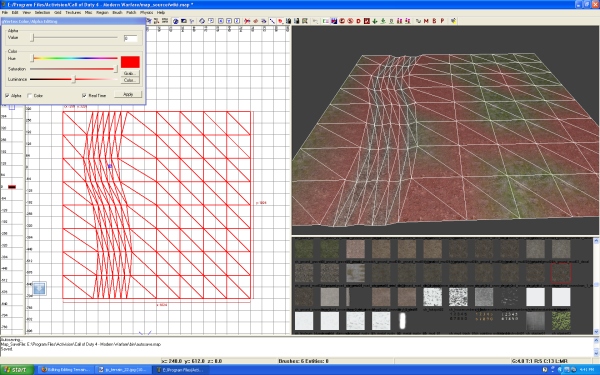
- Then I am going to bring up the gVertex Color/Alpha Editing window. (G key)
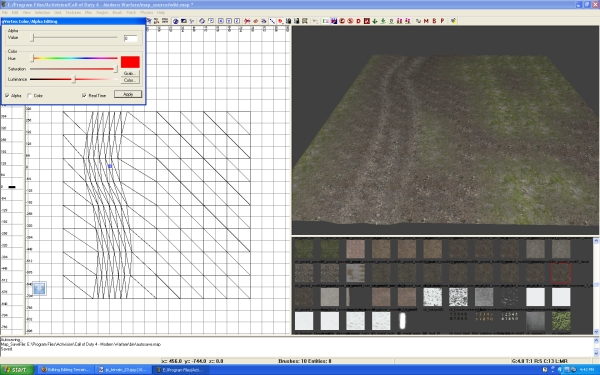
- I want to Alpha out the areas of the gravel texture so I can make a stone path.
- Check the box next to Alpha.
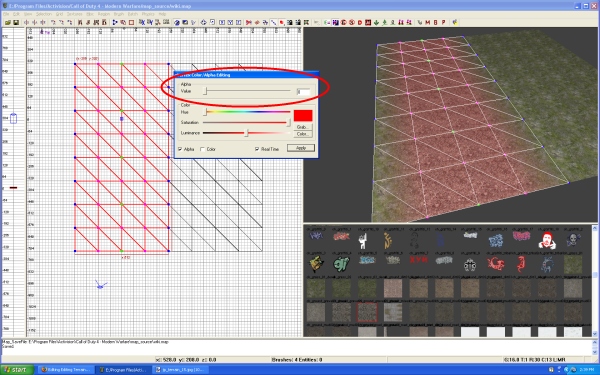
- I will then select the vertice points I want and scroll the Alpha Value Bar down to 0
- As you slide the bar you will see the gravel texture become transparent on the vertice points you have selected.
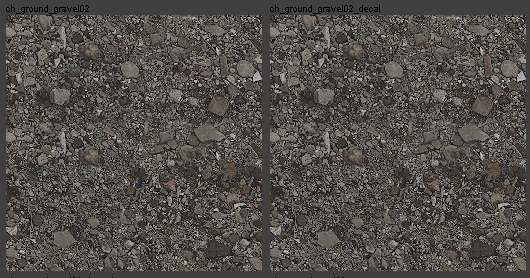
- This method will only work on Decals. Notice that in the texture window there are 2 ch_ground-gravel textures, but 1 of them has _decal on the end of the name.
- The one without the _decal is a base texture. It is solid and can not have Alpha properties added. The one with the _decal is the decal version. It is not solid. (no player collision)
- You can added and remove the Alpha properties to blend your textures.
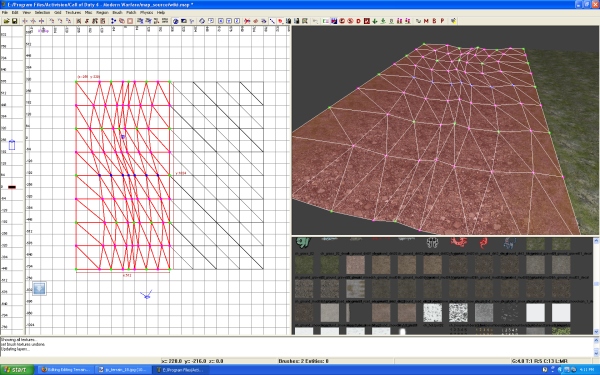
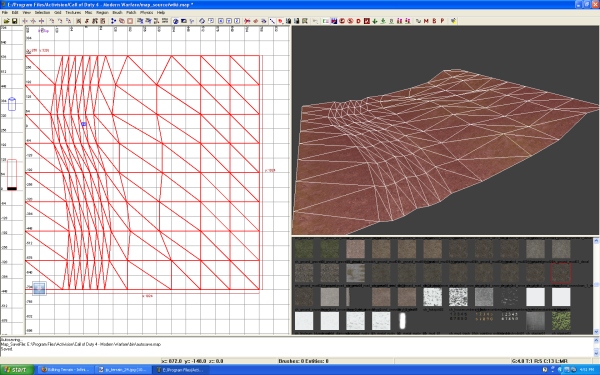
- OK, Now I am going to add a few more rows (Ctrl+Shift+A) and I am going to pull down the vertices.
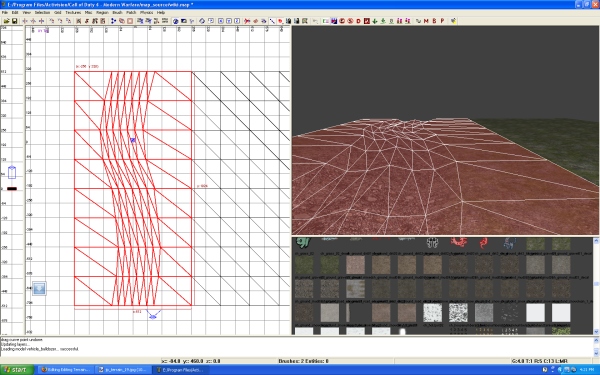
- Next I want to move the vertices around to give it more of a bend.
- Remember to move vertice points you are first selecting the vertices by LMB and drag the blue selection box, then holding Alt and LMB dragging the mouse to move the terrain vertices.
![]() You can select one vertice and still keep that selected and select another by holding Ctrl as you LMB dragging the blue selection box.
You can select one vertice and still keep that selected and select another by holding Ctrl as you LMB dragging the blue selection box.
- Now I am going to bring the rows in tighter.
Adding layers
- I want to add more decal layers. Want to add some mud.
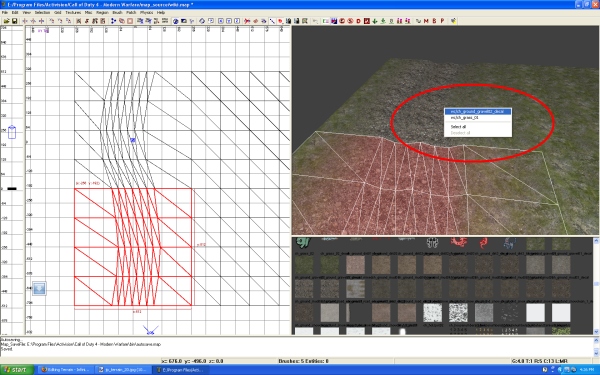
- There is a way to select a single piece of terrain that is with multiple layers.
- Just right click you mouse button in the 3D camera window and you will get a drop menu listing the layers by the texture that is applied.
- I then make a duplicate of the all the ch_grass_01 textured terrain.
- Then I apply the ch_ground_mud03_decal (from COD4, might be different ion CODWAW) from the texture window to the copies of terrain.
- Place the new terrain patches on top of the others.
- Then using the Vertex Editor I will get creative with alpha the vertices.
- Mine looks like this.
- So I go on to raise up the terrain on the other end to create a hill.
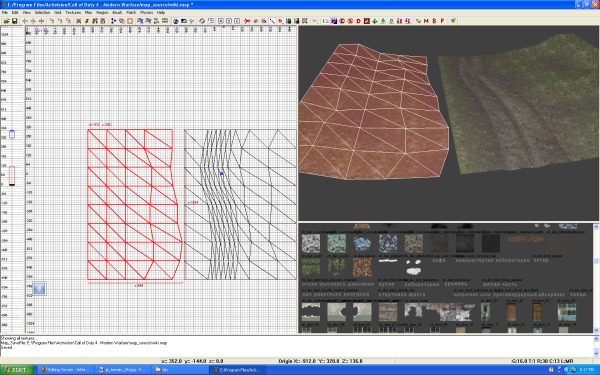
- Now I want to create the other side of my little road. The easiest thing to do is to make a copy of preexisting geometry.
- I selected the right side and made a duplicate.
- I then dragged it over to the other side and rotated the selection using Shift+D. Each you rotate it will rotate the selected object 90 degrees.
Welding Patches
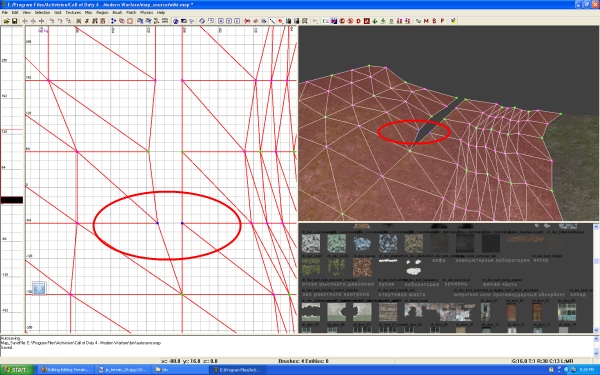
- Now I need to connect the vertices, so I select the 2 points I want to connect and I use W Key.
- This will connect the 2 together.
When you are joining vertices, you will notice one will stay stationary and the other will move to the other vertice.
There is a way to choose which vertice point you want to stay stationary. It's in the order of selection.
The first section of terrain that is selected, its points will stay stationary.
The next selected section of terrain, its vertice points will be the one to move to the other.
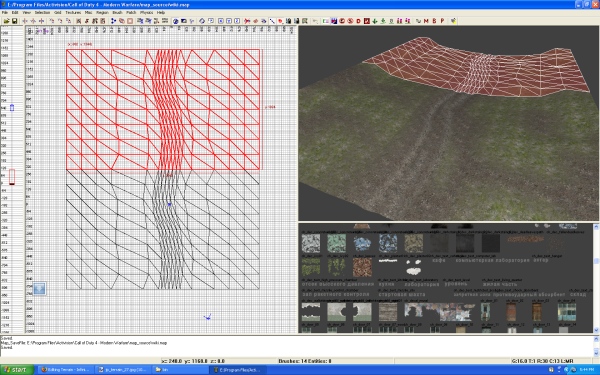
- I then selected all the terrain and made a duplicate and matched it end to end.
Final Steps and result
- Using the Vertex Editor I matched all the Alpha blending
- I then made a copy of the mud on the left side and applied the ch_ground_snow_decal_2
- Changed around the alpha blending and completed the end result.
The Result:
Tutorial by Zaphax & Jurgis
Sources: IW Wiki
