Call of Duty 4: Placing Models

Models in Radiant
Placing models in Radiant is different now than it was in previous versions of Call of Duty. Instead of placing misc_models in radiant and having an associated collmap for the model, we now use prefab that contain the model and collmap geometry.
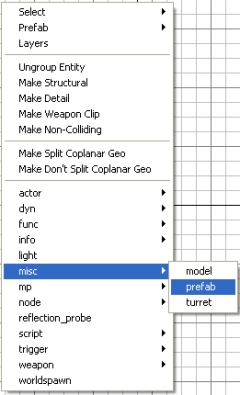
To place a model in a level, right click your mouse button in the 2D window (grid). You will get a drop window. Go to misc/prefab and click on prefab.
In the folder window, browse in prefabs/misc_models. There should be a prefab made here for every model in the game. If you make a new model you'll want to make a prefab for it that contains a misc_model containing the model, plus any collision brushes you want for that model. When you are making a new prefab for your model, be sure to place the model at coordinates 0, 0, 0. (x,y,z)
Remember, if you use the old method of placing a misc_model directly into your level, it will compile without collision, So use the prefabs!
Dynamic models and Dynamic brushmodels
A Dynamic Model is a model that has physics presets. The models physics are set in the models .gdt file.
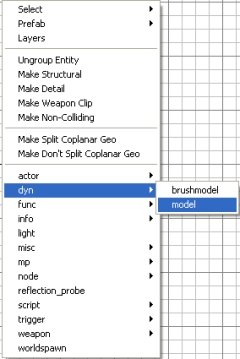
To place a dynamic model in your level you can do it one of two ways. First would be to place it as a prefab from the prefab/misc_model directory (recommended), or to just RMB in the 2D grid and select dyn/model then select the model from the list.
Now not all models have physics presets. Generally if there is a world model that is smaller then the size of a small/mid sized box, it would have physics preset in the models .gdt. The model would then be set as a dynamic model in its own prefab located in the prefab/misc_model directory. This way if you want to make a plastic bottle react in game, they all would. Assuming you placed the same prefab throughout your level.
Dynamic models do not have any type of collision (clip in its prefab. If it did, when the model moved from its placed position, the collision (clip) would stay. Thats a bad thing.
Dynamic models will only come in contact with world geometry. They will not react to other dynamic models, players or NPC's.
When placing a dynamic model, it will not react until something comes in contact with it. (explosion, bullet impact, etc) So when a level loads, gravity will not automatically take control of the model. It will stay suspended.
The best example is with a wall picture model. Place the prefab of a wall picture high on a wall. In the game it will not automaticlly drop. Once you shoot it, gravity takes over and the picture will fall to the floor.
A Dynamic Brushmodel is a physics object constructed of brush(s).
Select the brush(s) and right click in the 2D window and select dyn/brushmodel. It will then be set as a dynamic brushmodel. The brush(s) will then be viewed in red color in the 2D grid window.
Now it doesn't have physics set to it yet. You need to set them. Bring up the DynEntity Window (Shift+Y). Set the Type to clutter and hit Set. Same applies for your brushmodel as does the dynamic models. You should not exceed the size of a cinder block. If you do, I am sure you will not get the response you are hoping for.
Using brushmodels as physics objects is not encouraged or recommended. It is always recommend to use a model.
Placing Models in Radiant
With a small area I have constructed I am going to show you how to place a selection of models and prefabs.
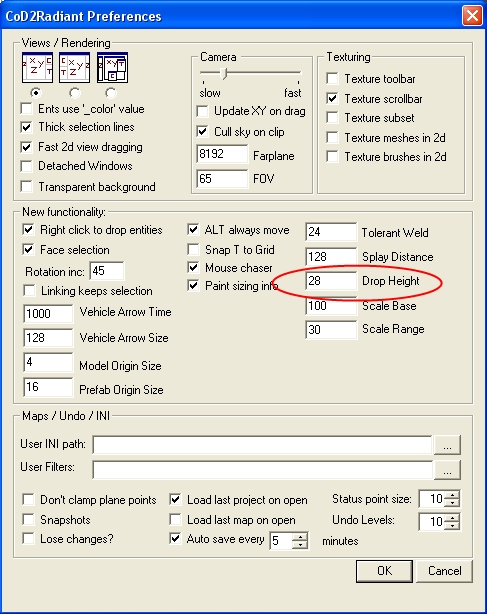
When placing models there is a setting in preferences that controls the placement height of entities. By default it is set to 28 units.
Setting the drop height is very useful when placing nodes. Having it set to 28 will insure that the node is not directly on the surface. With a static model it is different. You want the model to be placed on the surface.
We will set the drop height to 0 by clicking on ![]() on the upper right side of the tool bar.
on the upper right side of the tool bar.
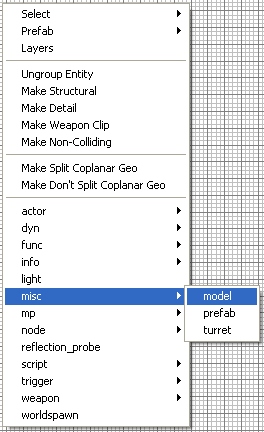
To bring a model into your level, right click on the 2D grid. in the drop menu select misc/model
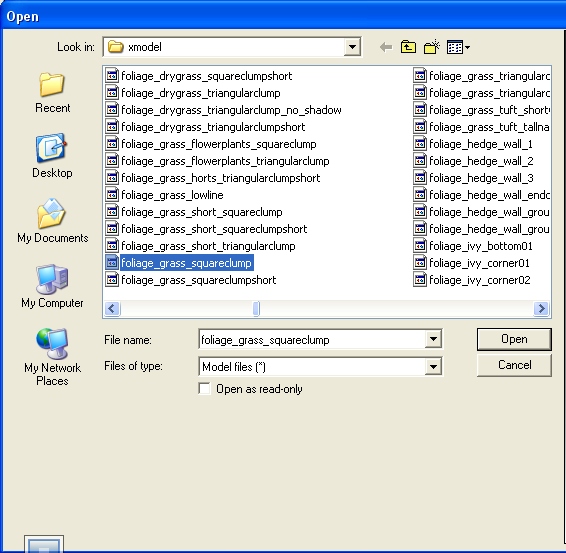
We want to add some grass in the level so select foliage_grass_squareclump and click on Open.
If your browser doesn't automatically point you to the xmodel directory you can find it at [root]\raw\xmodel
You should have the grass model selected in your level.
Now we are placing grass so its a good idea that each time you place one it is rotated differently each time.
This will set it so every time you place a model it will give it random scale and rotation.
Next we want the model to be placed flat with the angle of the surface.
To do this we will click on this button. ![]()
Now that we have our grass model we still have not placed it on the ground.
To have it drop on the ground click on the Drop entity button. ![]()
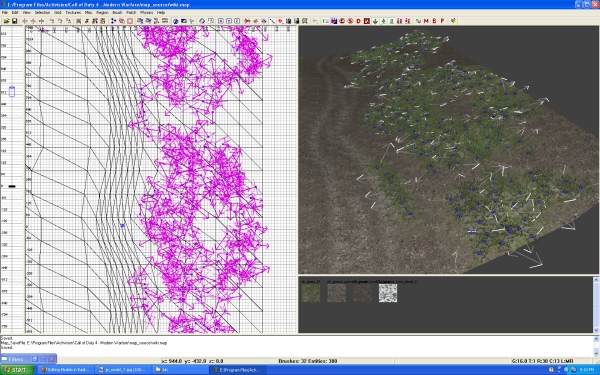
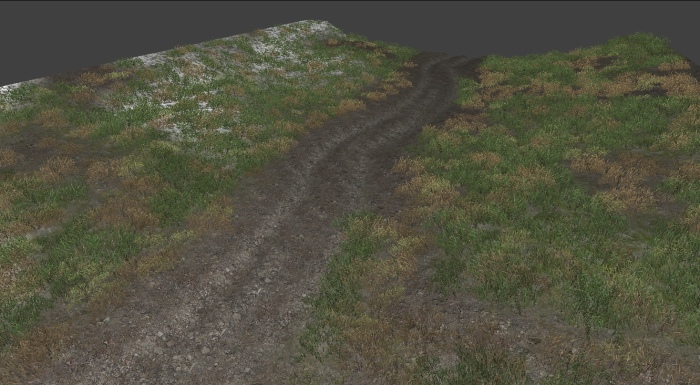
In this picture you can see I placed a bunch of models on the grass textured area.
If you want you can remove the arrows and the large blue origin boxes on the models.
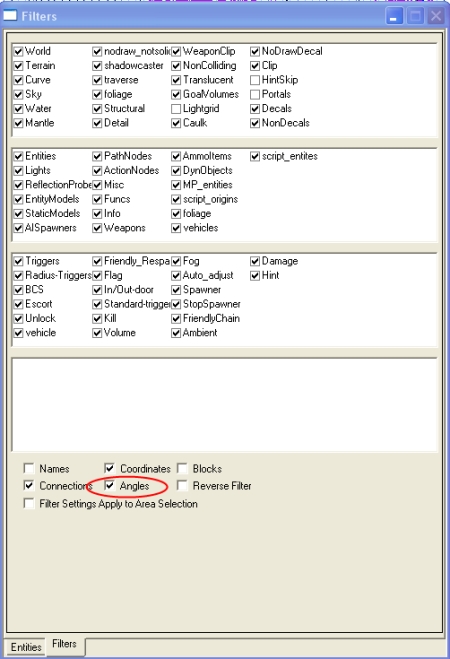
To remove the arrows, open up the filter window (F) and un-check the Angles check box.
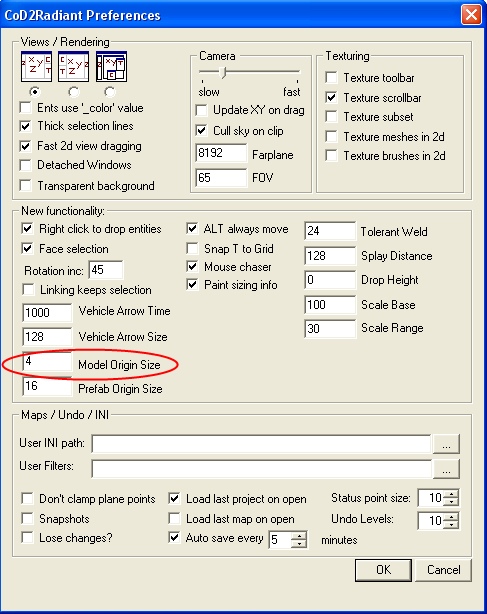
To reduce the size of the models origin blue wire box it can be adjusted in your preferences.
Reduce the number under Model Origin Size. You can set it all the way to 0.
Taking a step ahead, I went on to place grass all over and I added some other type of grass to break up the repetitiveness.
I want to add some trees now.
I am going to use a prefab because a tree will require collision. Setting the grass as a model is ok, because grass does not require player collision.
Right click in the 2D grid and select misc/prefab.
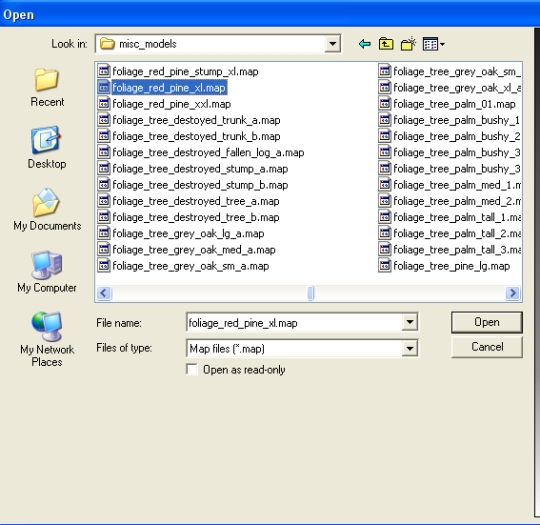
select he misc_models folder and find and select the foliage_red_pine_xl.map and click open.
You will see that the tree model is already has the proper clipping.
Since this is a tree and trees grow upward, I want to turn off placing models to angled surface. ![]()
Ok, now place the tree anywhere with Ctrl + Alt + Middle click.
You can make duplicates the same way you have with the grass models.
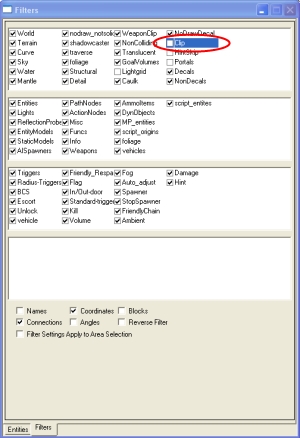
I went and turned off clip in my filters (F key) to not get too cluttered in my 3D Camera window.
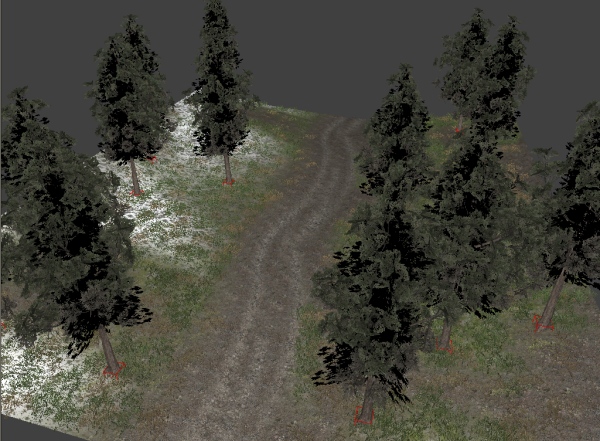
After placing a few trees my level looks like this.
Looking good so far.
So lets place some small rocks on the road.
I am first going to turn models on angled surfaces back on ![]() and I want to right click in the 2D window and select misc/model.
and I want to right click in the 2D window and select misc/model.
Check that you are searching in raw/xmodel folder.
Search for rock. In the file line type *rock* and it will list all models with rock in there name.
Select prop_misc_rock_small_04. Place it in your level same as before.
Go ahead and place a bunch.
Now we want to place another prop_misc_rock_small model but lets use prop_misc_rock_small_03
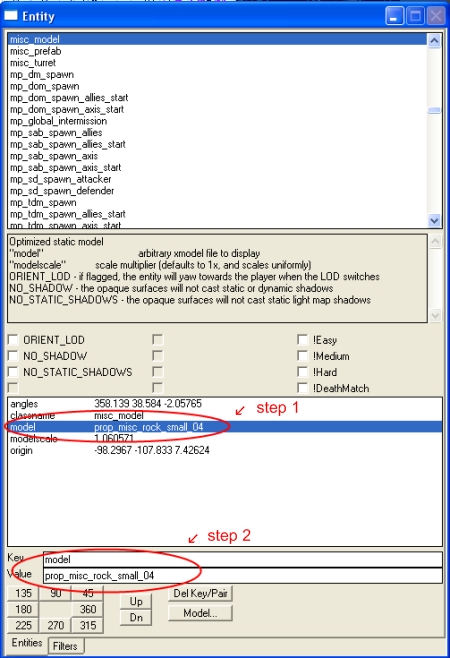
This time how I want you to grab the model is through your Entity window.
Select the prop_misc_rock_small_04 model, and then hit N key. This will pull up your entity window.
Now click on the line model prop_misc_rock_small_04 (step 1) and you will see the information transfered to the Key/value (step 2)
In the Key/Value line I want you to change the line in Value: prop_misc_rock_small_04 to prop_misc_rock_small_03. Then hit Enter
You will now see the model that you had selected in your level has changed to the prop_misc_rock_small_03 model.
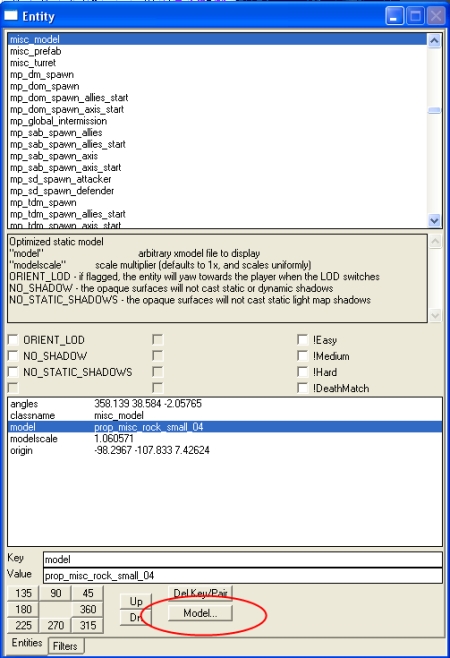
Another way to grab a model or prefab is to select a model or prefab as before and click on the model button. This will pull up the directory of the selected object, and you can then select a new model/prefab from the list.
