Call of Duty 4: Minimap Stock Like
Jump to navigation
Jump to search

Advanced tutorial using Adobe Photoshop to create Minimap Images just like in CoD4 stock maps.
Visual reference
- Download the Nvidia DDS Photoshop Plugin and install it
- Get a stock minimap out of an IWD:
compass_map_mp_MAPNAME.iwi(most can be found in iw_01.iwd) - Convert it to DDS using iwi2dds or IWI_x_DDS
- Load it in Photoshop and have a look at the channels. RGB = color, Alpha = transparency.
- Use the stock minimap you just extracted to look up and pick the Infinity Ward colors
Prepare your minimap image
- How to take the top-view image: Minimap & Transparent Minimap
- Load your minimap screenshot and crop it (if not already)
- Adjust the screenshot colors by turning saturation down, you may leave a slight touch of color
Outlines
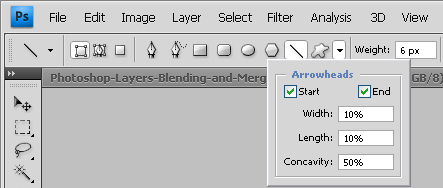
- Use the shape tool to draw lines: Color: #bedfe7
Thickness: 6 px
- You may turn on the arrow feature, width & length set to minimum and concavity all the way up
- When finished outlining, reduce the line shapes to a single layer (Merge Layers). This will rasterize them automatically. [Shift+Click] on the layer names to select multiple layers)
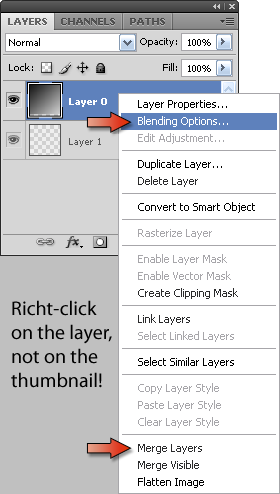
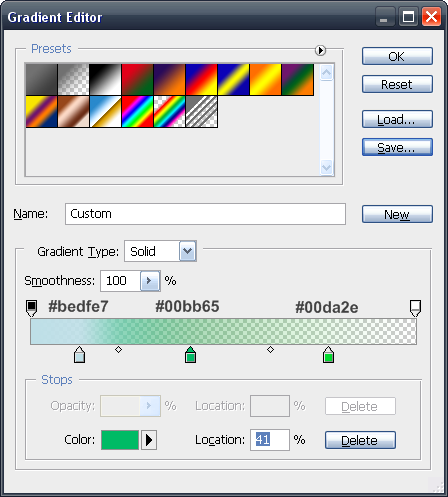
- Use the Blending Options to create a glow effect (Outer Glow, looks best if you use a custom gradient with slate blue - dark green - lightgreen)
- Add a Drop Shadow and adjust the parameters, suggestion: Angle: 129°
Distance: 4 px
Overfill: 16%
Size: 6 px
Contour: first curve in the second row (looks like a sinus growth)
Set blend mode and opcacity to whatever looks good for the whole composition.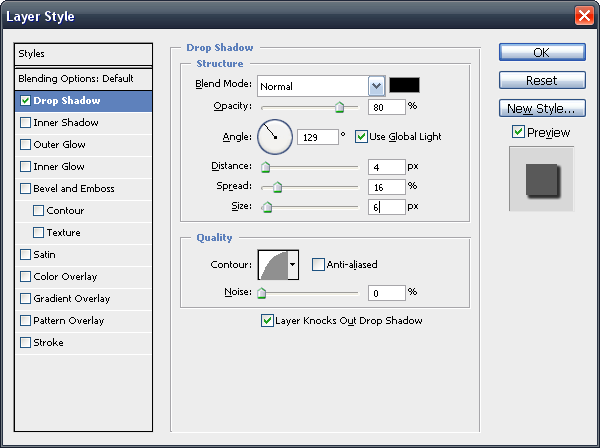


Inaccessable areas
- You can use the Polygon-Lasso tool to create selections for inaccessable areas (like buildings)
- Fill it with a cyan-darkgreen (or any color and "overwrite" it later using an overlay color in the fill options)
- Turn the layer opacity down and go thru the Blending Modes to find a good looking one
(Non)playable area
- Use the Lasso tool to select the playable area. Smooth the selection and add feather (something like 10-20 px)
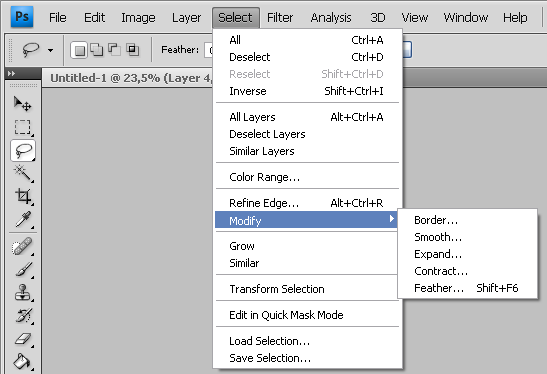
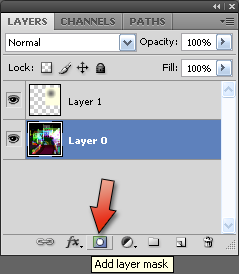
- Click the layer mask button for a smooth transition from opaque (playable area) to transparent (non-playable area)
- Create a new layer underneath the feathered minimap and fill it with color: #4D4D4D


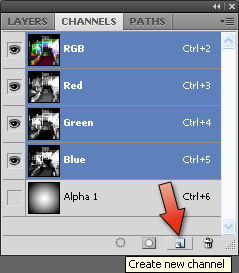
Alpha channel
- Go to the channels window, add new (Alpha 1)
- Fill it with color: #464646
- Create a gradient from #595959 (non-playable area) to #ACACAC (playable area) in the shape of the outer outline
- This is a bit tricky, but there are several ways to do this. Here are few recommendations:
- You can create a Lasso selection, then fill, contract, fill, contract etc.
- or use the brush tool and paint with hardness set to 0% (smooth border).
- You can also do this gradient on seperate layers using RGB channels instead of Alpha. It will allow you to use Blending Options and so on. The Inner Glow effect works pretty good if you use a color gradient and adjust the size, choke and range. When finished merge the layers you created, select all (refers to active layer only), cut, go to Alpha channel and paste.
- Hold [Ctrl] and click on the thumbnail of the outline layer to create a selection
- You might have to contract it by 1-2 px
- Go back to the Channel window and select the Alpha channel
- Fill the selection with white (#F9F9F9);
you don't have to use the color bucket, but hit the [Delete] key while having the background color set to white/the color you want

What it looks like
Minimap example of the stock map "Bog" (mp_bog)
RGB View

ALPHA View

ALPHA+RGB View (red = transparency)

Closer look at the cyan lines with green glow and black drop shadow

Picking the base line color

By CoDEmanX