Call of Duty 4: Minimap Stock Like

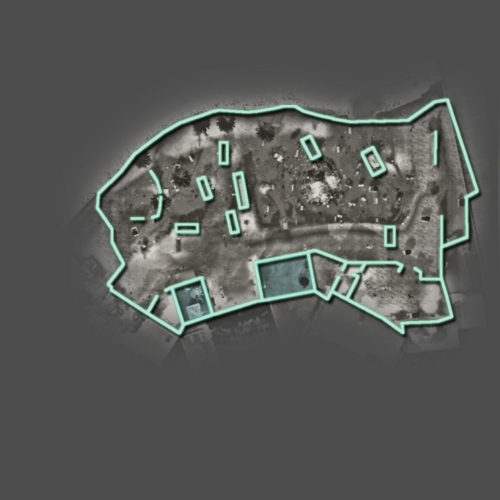
Visual reference
- Download the Nvidia DDS Photoshop Plugin and install it
- Get a stock minimap out of an IWD (compass_map_mp_*.iwi)
- Convert it to DDS using iwi2dds or IWI_x_DDS
- Load it in Photoshop and have a look at the channels. RGB = color, Alpha = transparency.
- Use the stock minimap to look up and pick the Infinity Ward colors
Prepare your minimap image
- Load your minimap screenshot and crop it (if not already)
- Adjust the colors by turning saturation down
Outlines
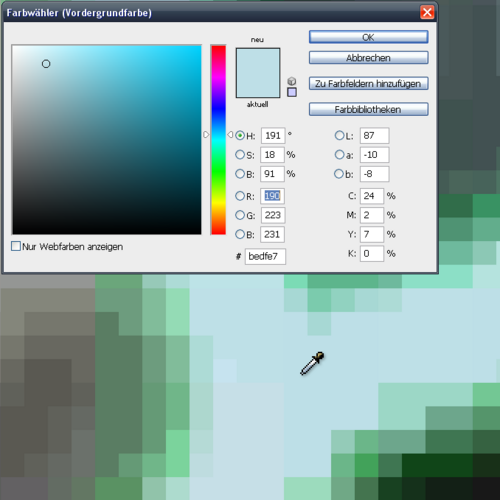
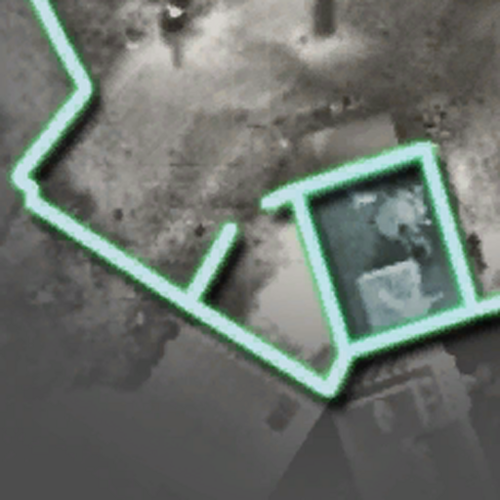
- Use the shape tool to draw lines: Color: #bedfe7
Thickness: 6 px
- You may turn on the arrow feature, width & length set to minimum and roundness all the way up
- When finished outlining, reduce the line shapes to a single layer (this will rasterize and merge them)
- Use the fill options to create the glow effect (outer glow, looks best if you use a custom gradient with slate blue - dark green - lightgreen)
- Add a drop shadow and adjust the parameters, suggestion: Angle: 129°
Distance: 4 px
Overfill: 16%
Size: 6 px
Contour: first curve in the second row (looks like a sinus growth)
Inaccessable areas
- You can use the Polygon-Lasso tool to create selections for inaccessable areas (like buildings)
- Fill it with a cyan-darkgreen (or any color and "overwrite" it later using an overlay color in the fill options)
- Turn the layer opacity down and go thru the blending modes to find a good looking one
(Non)playable area
- Use the Lasso tool to select the playable area. Smooth the selection and add feather (something like 10-20 px)
- click the vector mask button for a smooth transition from opaque (playable area) to transparent (non-playable area)
- Create a new layer underneath the feathered minimap and fill it with color: #4D4D4D
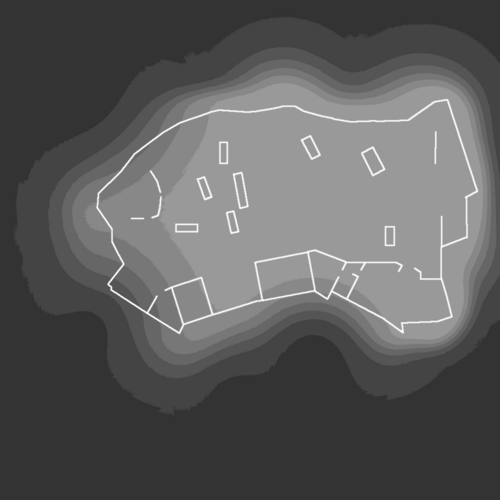
Alpha channel
- Go to the channels window, add new (Alpha 1)
- Fill it with color: #464646
- Create a gradient from #595959 (non-playable area) to #ACACAC (playable area) in the shape of the outer outline
- This is a bit tricky, but there are several ways to do this. Here are two recommendations:
- You can create a lasso selection, then fill, contract, fill, contract etc.
- or use the brush tool and paint with hardness set to 0% (smooth border)
- Hold [Ctrl] and click on the thumbnail of the outline layer to create a selection
- You might have to contract it by 1-2 px
- Go back to the channel window and select the alpha channel
- Fill the selection with white (#F9F9F9);
you don't have to use the color bucket, but hit the delete key while having the background color set to white/the color you want
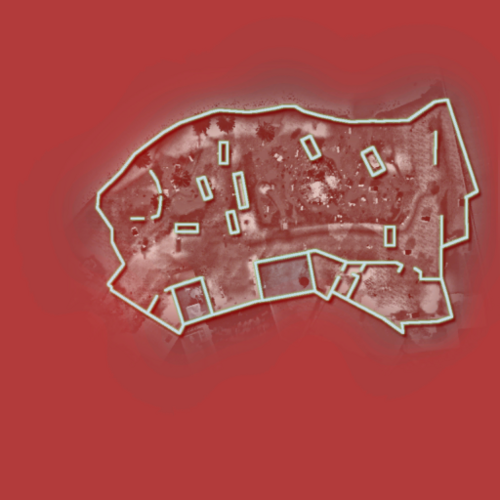
What it looks like
ALPHA+RGB View (transparency in 50% red)
Closer look at the cyan lines with green glow and black drop shadow
By CoDEmanX
