Call of Duty 4: Helipaths
![]() To get helicopter strikes working, five different paths of linked script_origins need to be added.
To get helicopter strikes working, five different paths of linked script_origins need to be added.
General
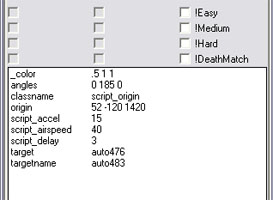
Each script/origin entity that is placed has a few values that can be used for control.
- script_accel: Acceleration of the heli from that point to the next point.
- script_airspeed: Speed of the heli from that point to the next point.
- script_delay: Causes the heli to pause at that point for # of seconds before proceeding.
The linked points determine where the helicopter rotor will travel. So, always put your path a bit higher than you might think, since the hole body of the helicopter will be traveling underneath the path.
To quickly link two script/origin entities, select the first point, then the target point, then press the “W” key.
Path 1 – Approach Path
The approach path is the method that the helicopter enters into the playable space. In CoD4 maps it’s generally split into 3 possible approach paths, all converging into a central point in the middle of a map.
To start one of the three paths, add a script/origin entity with a targetname value of “heli_start”. This point should usually be linked to the first point on the path with script_accel and script_airspeed values.
Once all three approach paths are completed, they should eventually all link to a central script/origin entity. This entity can be targeted by another script/origin entity with a targetname value of “heli_dest”.
Path 2 – Circle Path
The circle path should form a circle around the playable space of the map. It’s generally higher up than the approach paths. Use script_delay to make the heli stop in key points of the path.
Once a circle is created, a starting point on the circle needs to be designated (to determine the first point the heli will travel to after it finishes with the approach path.
Designate this starting point with a script/origin entity linked to one of the circle points, with a targetname value of “heli_loop_start”.
Path 3 – Crash Path
If a heli is shot down, it will travel from the point it’s currently at to the crash path. This path should usually be in a central location that can be reached from any part of the circle path.
Designate the first point of a crash path by another script/origin entity linked to the first point with a targetname of “heli_crash_start”. The end don't need to be specified… the heli will explode at the end of the path.
Exit Markes
If a heli doesn’t get shot down, it will eventually fly away to one of several placed points in a map. These are generally placed in each of the four corners of a map.
To make an exit point, place a script/origin entity with a targetname value of “heli_leave”.
Prefab
As the above steps can be complex you can get a prefab with a pre-made Helipath (Thanks Wakka!). Note that the prefab can be adjusted in Radiant, select it then Right-Click and Prefab>Enter Prefab.
Download HERE

