Call of Duty 4: Adding Entities

![]() By Entities this tutorial relate to 'Spawn' points AKA where the players will spawn depending on gametype.
By Entities this tutorial relate to 'Spawn' points AKA where the players will spawn depending on gametype.
Placing Entities
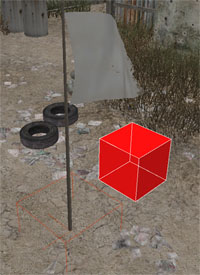
Thorought this tutorial different entities (large colored rectangle) are placed in the map in the place of your choice, the placement of each is very important. The steps below will show you how to place an entity correctly in the map.
In this example I am using mp_test and a TDM Allies Start entity but the same technique is valid for all gametypes.
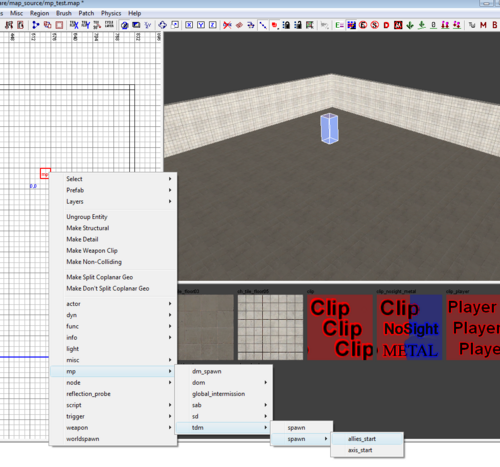
- Choose the place you want to place the spawn then right-click > MP > TDM > Spawn > Allies Start
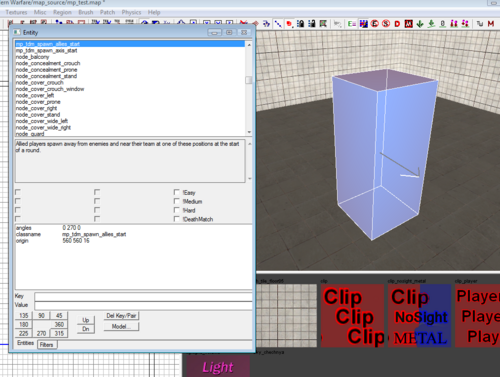
- With the spawn selected press 'N' to bring up the Entity properties window.
 Note the angle specified on this entity and the Arrow in the 3D view, this is extremely
important as it will determine the direction players will face when spawning.
- The last step for placing Entities correctly is to make sure that they are placed ABOVE the floor, whether its a Brush or a Patch.
To avoid that I always have the 'Force Drop height to Zero' selected and then i use the ' Drop selectec Entities to the floor button. ![]()
 Failing the above will create error in the Console and will result in Players getting stuck on Spawn.
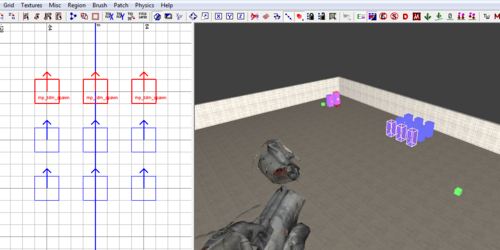
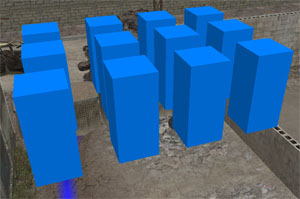
- Finally here is to show the space one should leave between entities of the same gametype:
Setting up gameplay modes
![]() This section covers how to set up a multiplayer map for the various gameplay modes in CoD4.
This section covers how to set up a multiplayer map for the various gameplay modes in CoD4.
MP prefabs are located in the map_source/prefabs/MP directory, and are used for several of the gameplay modes.
Global
To start out, place the mp/global_intermission entity and rotate it to face a cool-looking angle. This is the scene that will be displayed behind the scoreboard at the end of a match and is required to run the map.
Free-For-All
For FFA, place mp/dm_spawn entities around the entire map where you want players to spawn.
Team Deathmatch
For TDM, place mp/tdm/spawn entities around the entire map, generally overlapping FFA spawn locations. In the friendly base, place 8-12 mp/tdm/spawn/allies_start entities. In the enemy base, place 8-12 mp/tdm/spawn/axis_start entities.
The start spawn entities determine where players on each team spawn at the beginning of a match. They should generally be placed in rows and spaced out evenly.
Domination
For DOM, place mp/dom/spawn entities around the entire map. These sometimes overlap FFA spawns, but keep in mind that proximity to a DOM flag determines which spawns are linked to which flags. The command “set scr_domdebug 1” shows these flag to spawn connections in-game.
- In the friendly base, place 9-16 mp/dom/spawn/allies_start entities. In the enemy base, place 9-16 mp/dom/spawn/axis_start entities. These normally overlap the TDM start spawns.
- Next, 3 DOM flags must be placed throughout the map. Generally these are either placed in a “line” from the friendly to enemy base, or are evenly placed around asymmetrical maps.
- To place a prefab, right-click in the 2D view of Radiant and choose the misc/prefab option. Browse to the map_source/prefabs/MP directory and place dom_flag_primary_a.map, dom_flag_primary_b.map and dom_flag_primary_c.map in the appropriate locations.
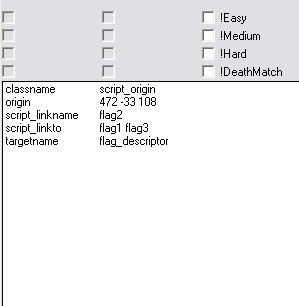
- Next to each flag, place a script/origin entity. The settings of this entity determine friendly and enemy spawning when that flag is captured. (For instance, if linkto has two values, enemies might spawn at either one of those locations when friendlies have that flag captured.)
The middle B flag in a linear map would have the following settings:
script_linkname: flag2
script_linkto: flag1 flag3
targetname: flag_descriptor
- Flag A and Flag C would have a linkname value of flag1 and flag3, respectively. In a linear map, Flag A would have a linkto value of flag2. However, with an asymmetrical layout it might have a script_linkto value of flag2 flag3.
![]() IW were kind enough to have left dom_flag_primary_d.map & dom_flag_primary_e.map and so you can actually add up to 5 flags with stock Prefabs.
IW were kind enough to have left dom_flag_primary_d.map & dom_flag_primary_e.map and so you can actually add up to 5 flags with stock Prefabs.
 Note that no sounds will be heard when capping those extra flags.
Sabotage
For SAB, the spawn layout will be slightly different from other gameplay modes. Determine where the invisible line in the map would be. One half of the map is the friendly base, and the other half of the map is the enemy base.
- Place mp/sab/spawn/allies entities around the friendly base, and mp/sab/spawn/axis entities around the enemy base. These could overlap FFA spawns on each respective side of the map, but keep in mind that you generally want a good distance between where the two sides are going to spawn from each other.
- In the friendly base, place 9-16 mp/sab/spawn/allies_start entities. In the enemy base, place 9-16 mp/sab/spawn/axis_start entities. These are normally placed in a location with the same distance from the middle bomb as the other side.
- Now, the middle bomb needs to be placed, generally somewhere along the invisible dividing line in the middle of the map. Browse to the map_source/prefabs/MP directory and place sab_bomb.map in that location.
- Next, each base needs a bomb target prefab. The friendly bomb target prefab is sab_bomb_allies.map, while the enemy bomb target prefab is sab_bomb_axis.map.
![]() We’ve found that the bomb doesn’t always work well if it’s too close to the start_spawn locations, because of how far back they are to the end of the map. If you find during playtesting that both teams are having a difficult time of planting the bomb, you should consider moving the bombs more towards the dividing line of the map. (Keeping in mind to keep the bomb locations of each side balanced.)
We’ve found that the bomb doesn’t always work well if it’s too close to the start_spawn locations, because of how far back they are to the end of the map. If you find during playtesting that both teams are having a difficult time of planting the bomb, you should consider moving the bombs more towards the dividing line of the map. (Keeping in mind to keep the bomb locations of each side balanced.)
Search and Destroy
Because SD doesn’t have respawns, only two types of spawning entities needs to be placed. Place 9-16 mp/sd/spawn/attacker entities in the attackers start location, and 9-16 mp/sd/spawn/defender entities in the defenders start location. These aren’t necessarily in the same place as the other start spawns, because they need to be placed in relation to where the two bomb targets will be placed.
- In front of the attacker spawns, the bomb needs to be placed. Place it far enough away from the attacker spawns so it won’t be automatically picked up at the beginning of a round. Also, put it in a highly visible location so it won’t be missed. Browse to the map_source/prefabs/MP directory and place sd_bomb.map in that location.
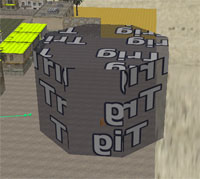
- To supplement the bomb prefab, the bomb trigger prefab needs to be placed somewhere in the map. This prefab is sd_bombtrigger.map. It can be anywhere, but for consistency place this prefab in the top-left corner of the map.
- Now, the two possible bomb targets need to be placed. It depends on the map, but these are generally placed closer to the defenders than the attackers, giving them time to get in location and prepare for the assault. They should also be spread far enough apart that defenders can’t cover both bomb sites from the same location. The prefab names of the bomb targets are
sd_bombzone_nuke_a.map
and
sd_bombzone_nuke_b.map
Headquarters
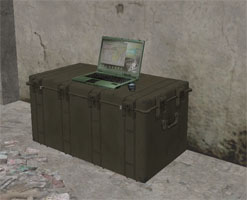
HQ uses TDM spawn entities, so there are no extra spawns to be placed for this game type. To set up a map for HQ, up to 7 locations need to be set up as HQ points. Interior locations tend to work the best for an HQ location.
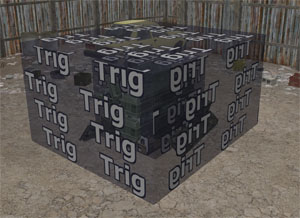
- To set up an HQ location, place a trigger/multiple brush entity covering the volume of a location. This is the space a player needs to touch in order to capture or destroy the HQ point. This trigger should have a targetname value of “radiotrigger”.
- Inside of each of these triggers, place a war_hq_obj.map prefab. There must be one for each of the 7 triggers, and each one must be fully inside of a trigger volume. These crates will appear and disappear along with the currently activated HQ location.
