Call of Duty 5: Zombie Map Tutorial: Shi No Numa


Overview
In Mod Tools Update 1.3, you will find various of Nazi_Zombie_Sumpf (Shi No Numa) scripts such as nazi_zombie_sumpf_zipline.GSC. Each of these scripts contains many lines of code to implement the new features; these new features will take quite a bit of time to integrate and requires proficient scripting knowledge as the scripts are tailored specifically for Nazi_Zombie_Sumpf.
In an effort to make it easier, a tutorial map as well as an in-game Modder Help Center was created for this tutorial to modulate the integration of the new Shi No Numa features without requiring scripting knowledge. All of the Nazi_Zombie_Sumpf specific scripts have been altered to DLC2_* GSCs and appropiate changes have been made to them as well as ZombieMode utility scripts to remove Nazi_Zombie_Sumpf specific lines and modulate them to work with any map that wants to use the features from Shi No Numa.
Tutorial Supplement Download: Version 1.0 Source Files (Updated July 20, 2009 )
Playable Tutorial Download:
Modder Help Center
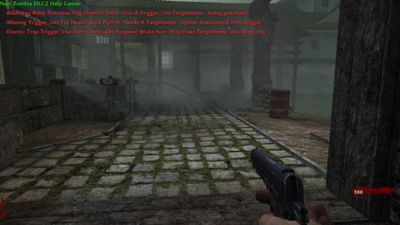
When working on creating your zombie map, if you set dvar 'developer' to '1', you'll get HUD elements displaying anything that is detected wrong with your map when adding Shi No Numa features and how to go about fixing the problem.
This will also help prevent the game from disconnecting from the map since it will stop the thread where a problem is caught and spit out debug HUD info for you.
Tutorial Map
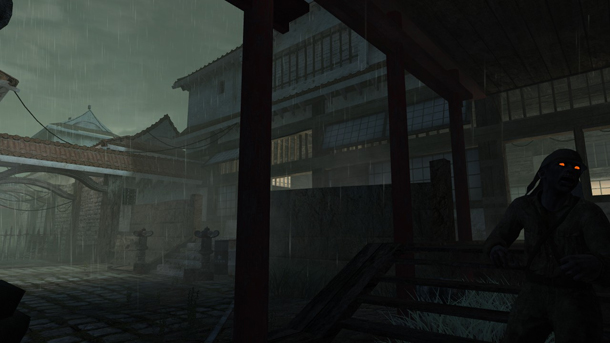
The map included in the source and playable files is entitled Nazi_Zombie_Kyassuru. It is a rehash of the MP_Castle map that comes in the 1.2 mod tools update. Any MP_Castle specific prefabs that were changed are saved into Map_Source/_Prefabs/Kyassuru, that way the stock the MP Castle prefabs stay untouched.
Setting up Your Map Name
Custom zombie maps will need to have a prefix of nazi_zombie_ in order to work correctly with the game. Your scripts/ zone source/ soundalias/ etc should follow the same naming convention too.
Setting Up Your Level Script
Download the tutorial supplement above and extract the files into your Call of Duty: World At War installation directory. You may be asked to overwrite files such as Zombie Utilities -- these were changed to work with any custom Zombie map in the future rather than changing them each time you wish to make a new Shi No Numa-style map.
Copy Nazi_Zombie_Kyassuru.GSC and rename it your map name. Open it NotePad, UltraEdit, or any type of word editor you use.
Level Variables
Inside your map script, you will notice a lot of level variables at the top. There are four very important ones you want to look at:
	level.coreZones[ level.coreZones.size ] = "corner1";
	level.coreZones[ level.coreZones.size ] = "corner2";
	level.coreZones[ level.coreZones.size ] = "corner3";
	level.coreZones[ level.coreZones.size ] = "corner4";
These represent four corners in your map that correspond to the four corners in Shi No Numa. These will be called Cores for the time being.
Cores
These Cores will tie into the DLC2 and ZombieMode scripts provided in the supplement, that way you do not have to do any extensive scripting.
Core = [Enter Below In List]                    ie. "corner1"

Area Zone = Core + "_area_zone"                 ie. "targetname" "corner1_area_zone"
Building Zone = Core + "_building_zone"         ie. "targetname" "corner1_building_zone"

Door Open Zombiess = Core + "_initial_zombies"  ie. "targetname" "corner1_initial_zombies"

Area Door = Core + "_area_unlocked"             ie. "script_flag" "corner1_area_unlocked"
Building/Magic Box Door = Core + "_building_unlocked"  ie. "script_flag" "corner1_building_unlocked"

Magic Box = Core + "_chest"                     ie. "script_noteworthy" "corner1_chest"

Chest = Core + "_chest"                         ie. "script_noteworthy" "corner1_chest"

Perk Locs = Core + "_randomVendingLoc"          ie. "script_noteworthy" "corner1_randomVendingLoc"

Area Dogs = Core + "_area_dog_spawns"           ie. "targetname" "corner1_area_dog_spawners"
Building Dogs = Core + "_building_dog_spawns"   ie. "targetname" "corner1_building_dog_spawners"
Changes You Need To Make
You will definitely need to change the latter coreZones to correspond to the Cores you plan to use for your map. You will also need to change the following name for your level's:
maps\nazi_zombie_kyassuru_fx::main();
Otherwise, you there are various variables in the main() function you can feel free to change to turn off/on features such as the Pendulum, using Coop Hero Players, etc... All you need to do is change the variable, no other scripting required.
Radiant Setup
Players
In Shi No Numa players are spawned together, unlike Verruckt. This tutorial covers spawning all the players together.
Spawn Point Set Up
Add in an info_player_start found in the right click menu under the info sub menu. You'll need just one, but you'll have to add in four (4) script_structs to support four players. Place these anywhere you wish in your map and give them the KVP:
"targetname" "initial_spawn_points"
Intermission Cameras
This isn't required but if you want a camera view pan at the end of the match add in two script_structs to your map. Make the first struct target the second one, the start and end points for the camera view respectively.
For the start point struct, you will need to give it two KVPs
"targetname" "intermission"
"speed" "20"
20 is a good number and the one used for the stock zombie map, feel free to tweak it.
You can repeat the process to have multiple camera paths so the game will cycle randomly through them during the end of the game.
Zombies
Japanese
Right click in Radiant.
Actor>Axis>Zombie>JP_Swamp
Generally, they will need these KVPs:
"targetname" "zombie_spawner_init"
"script_forcespawn" "1"
"count" "9999"
"script_noteworthy" "zombie_spawner"
"spawnflags" "3"
"model" "char_ger_wrmcht_fullbody1"
"classname" "actor_axis_zombie_jp_swamp"
Path Nodes
Your map will need nodes placed based on where you want the Zombies to walk. For an explanation of nodes and how to place them, please see the Navigation Overview page.
Traversals
Ideally, if you have Zombies breaking through windows, they will need to make their way through the window. This requires placing in negotiation nodes with a traverse animation, but these are already done for you in the form of prefabs. The one you will need is: _prefabs/traverse/wall_hop_zombie.map
As with the window barriers, the direction of the angle on the prefab is the direction the Zombies will wall hop through.
Rise Out Of Ground
To have Zombies rise out the ground, you will simply need to give them a KVP of:
"script_string" "riser"
You'll also need to add in script_structs on where you want Zombies to rise out of. It is important that you drop these script_structs to 0 height, the will be half intersecting the terrain and half sticking out.
"targetname" "zombie_rise"
To have a water FX play as a Zombie rises, give the script_struct a KVP of:
"script_noteworthy" "in_water"
Hell Hounds
Right click in Radiant.
Actor>Zombie_Dog
Generally, they will need these KVPs:
"classname" "actor_zombie_dog"
"model" "zombie_wolf"
"spawnflags" "5"
"targetname" "zombie_spawner_dog_init"
"script_forcespawn" "1"
"script_noteworthy" "zombie_dog_spawner"
"script_string" "zombie_chaser"
Make a Script_Struct below the Hell Hound and make the dog target the Script_Struct.
Path Nodes
Your map will need nodes placed based on where you want the Hell Hounds to walk. For an explanation of nodes and how to place them, please see the Navigation Overview page.
Window Boards
The boards Zombies rip through can easily be placed in your map using the prefab: \map_source\_prefabs\zombiemode\nazi_sumpf_window.map.
The direction of the angle on the prefab is the direction the Zombie will approach it and break through.
Weapons
Buyable weapons are like blockers in that they are unique and are left up to the user to determine price cost. Although, there are a few prefabs of buyable weapons that can be included in your map or used to learn from in \map_source\_prefabs\zombiemode\ -- they are the weapon_*.MAP prefabs.
Decal
You'll want to add the weapon chalk decals to your map, these can be found in Radiant under Locale>Decals.
Model
Add in a script_model.
Assign it a model of the weapon you want players to buy and place it by the decal.
Buy Trigger
Make a trigger_use.
Select the script_model you just made while the trigger is still selected and press W (by default) to make the trigger target the script_model weapon.
The trigger will need some KVPs:
"targetname" "weapon_upgrade"
"zombie_weapon_upgrade" ""
"zombie_cost" ""
The zombie_weapon_upgrade value should be the weapon name.
zombie_cost you define on your own based on how much money you want required. These are the stock defined values (if you want a different price, you'll have to edit a string into the the zombie.STR in raw\english\localizedstrings):
| 100 | 200 | 250 | 500 | 750 | 1000 | 1250 | 1500 | 1750 | 2000 |
Blockers
Blockers are buyable furniture in the map. These aren't prefabbed because they aren't always the same and can differ depending on how a mapper wants to set them up.
Model
Start off by making a script_model, and assigning any model you want to block the path. Then you'll need to give it some KVPs.
Required:
"script_linkTo" ""
"spawnflags" "1"
"targetname" ""
Optional:
"script_firefx" "poltergeist"
"script_fxid" "large_ceiling_dust"
"script_noteworthy" "jiggle"
script_linkTo and targetname are left blank up above because it will be different for each furniture piece (hence a reason why there are no prefabs). They will be referenced in the Move Location section right below on how to properly set them up.
Move Location
You'll need to make a script_struct on where you want the blocker to move when triggered. You'll have to give a KVP:
"script_linkName" ""
The script_linkName should match up to the number as the script_linkTo on the blocker. You'll see a red line connected from the blocker to the struct when both are entered.
Buy Trigger
You'll then need to make triggers for players to buy the blocker, depending on how your map is laid out, you typically need to make two trigger_uses on both sides (in case the players unlock a different part of the map and come from the other side, depends on your map). Any triggers you want to use for that particular blocker will need a few KVPs:
"targetname" "zombie_debris"
"zombie_cost" ""
"target" ""
The target should match up to the targetname on the blocker. Once the triggers are set, you should see red lines connecting to the blocker.
zombie_cost you define on your own based on how much money you want required. These are the defined values (if you want a different price, you'll have to edit a string into the the zombie.STR in raw\english\localizedstrings):
| 100 | 200 | 250 | 500 | 750 | 1000 | 1250 | 1500 | 1750 | 2000 |
Zone Management
Zone Management is made easy through the tutorial supplement. It is based on the Cores you entered in earlier, and those Cores are the root for operations within the Zones through the KVPs you enter in Radiant for entities.
Zombie Doors
On Zombie Double Doors, you can assign a Script_Flag to set a flag. The flag will get initialized so there is no need to worry about scripting.
Area
To unlock an "Area", the map section outside a perk building, give the Zombie Double Door purchase trigger a KVP such as:
"script_flag" "corner1_area_unlocked"
When a player purchases the door, the "corner1_area_unlocked" flag will be set spawning initial zombies, adding new zombie and hell hound spawn locations, etc...
Building
To unlock a "Building", the map section inside a perk building, give the Zombie Double Door purchase trigger a KVP such as:
"script_flag" "corner1_building_unlocked"
When a player purchases the door, the "corner1_building_unlocked" flag will be set spawning initial zombies, adding new zombie and hell hound spawn locations, etc... And also initiating the random Perk lottery in that building.
Random Magic Boxes
The Magic Boxes can easily be placed in your map using the prefab: \map_source\_prefabs\nazi_zombie_sumpf_treasure_chests.map
You will need to edit the Script_Noteworthy on each purchase trigger to match the Cores you listed, such as:
"script_noteworthy" "corner1_chest"
"script_noteworthy" "corner2_chest"
Zombies
Japanese
If you would like to have Zombie Spawners active when players are in a zone, make an Info_Volume and target it to the spawners. The Zombie spawners will need a unique or blank targetname KVP before doing this as you might accientally have the Info_Volume target all the initial zombies.
Give the Zone a KVP depending upon whether this is for an "Area" or "Building" such as:
"targetname" "corner1_area_zone"
Area Zone = Core + "_area_zone" ie. "targetname" "corner1_area_zone"
Building Zone = Core + "_building_zone" ie. "targetname" "corner1_building_zone"
Risers
If you would like to have Zombie Risers active when players unlock an "Area" or "Building", give the script_struct a targetname KVP such as:
"targetname" "corner1_area_zombie_rise"
Area Zombie = Core + "_area_zombie_rise" ie. "targetname" "corner1_area_zombie_rise"
Building Zombie = Core + "_building_zombie_rise" ie. "targetname" "corner1_building_zombie_rise"
Hell Hounds
If you wish to have Hell Hound spawn locations made available upon an Area or Building map section being opened, change the Hell Hound targetname to a KVP such as:
"targetname" "corner1_area_dog_spawners"
This will make Hell Hound spawns with that KVP available when the Zombie Double Door is purchased for Corner1 Area.
Area Dogs = Core + "_area_dog_spawns" ie. "targetname" "corner1_area_dog_spawners"
Building Dogs = Core + "_building_dog_spawns" ie. "targetname" "corner1_building_dog_spawners"
Zipline
The Pendulum can easily be placed in your map using the prefab: \map_source\_prefabs\nazi_zombie_sumpf_zlift.map.
You can feel free to edit the size of the prefab to fit your map.
Traps
Pendulum
The Pendulum can easily be placed in your map using the prefab: \map_source\_prefabs\nazi_zombie_sumpf_logtrap.map.
You can feel free to edit the size of the prefab to fit your map.
Initiating Pendulum
You will need to be sure to flag set "pendulum_on" through either of these KVPs on a Zombie Double Door:
"script_flag" "pendulum_on"
"script_parameter" "pendulum_on"
Electric
The Electric Traps can easily be placed in your map using the four prefabs: \map_source\_prefabs\nazi_zombie_sumpf_electric_ne.map, \map_source\_prefabs\nazi_zombie_sumpf_electric_nw.map, \map_source\_prefabs\nazi_zombie_sumpf_electric_se.map, and \map_source\_prefabs\nazi_zombie_sumpf_electric_sw.map.
Zone Source Files
Map
Copy Nazi_Zombie_Kyassuru.CSV and rename it to your map.
Inside, replace any references of nazi_zombie_kyassuru to your map name. You may want to comment out any level specific files you do not have yet such as CreateFx, Client Script, etc... until you are ready to have them executed.
Build your map!
Mod
Copy the Mod.CSV and move it to your Mod folder.
Build the Mod.FF!
Patch
Copy the nazi_zombie_kyassuru_patch.CSV and rename it to your map.
Build the Patch FF for your map!
IWDs
While not a Fast File, it is important to note you will need to put any weapons for ZombieMode in an IWD and place it in your mod folder.
Sources: Treyarch's Wiki

