Call of Duty 5: Custom Water Textures
Dynamic Water not covered.
Pre-requisites
- Experience with creating your own textures. [1]
- Knowledge of photoshop or similar if you'd like to get the water looking right.
What's Needed
- The water texture assets. File:Water.zip
Extract this file to your \Call of Duty - World at War folder.
Creating The Water Asset
- Open Asset Manager.
Either create a new material or open the example GDT in the \source_data folder - custom_water.gdt
If you've created a new material choose water as the material type.
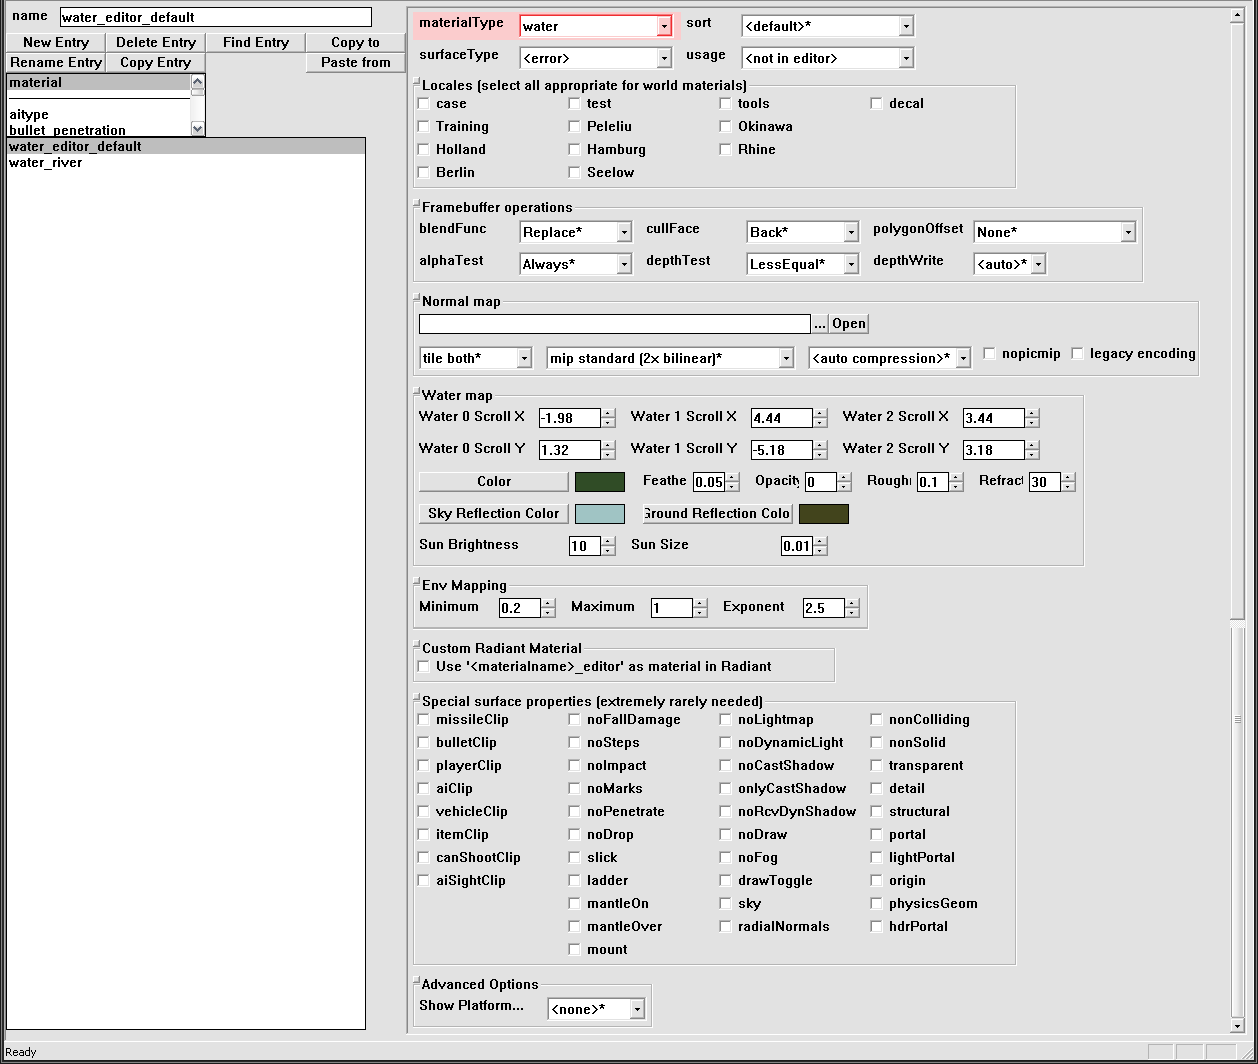
If you opened the example choose the water_editor_default material.
You'll now be presented with the following screen.
There are a few settings required but most of it is up to you on how you'd like the water to look & behave.
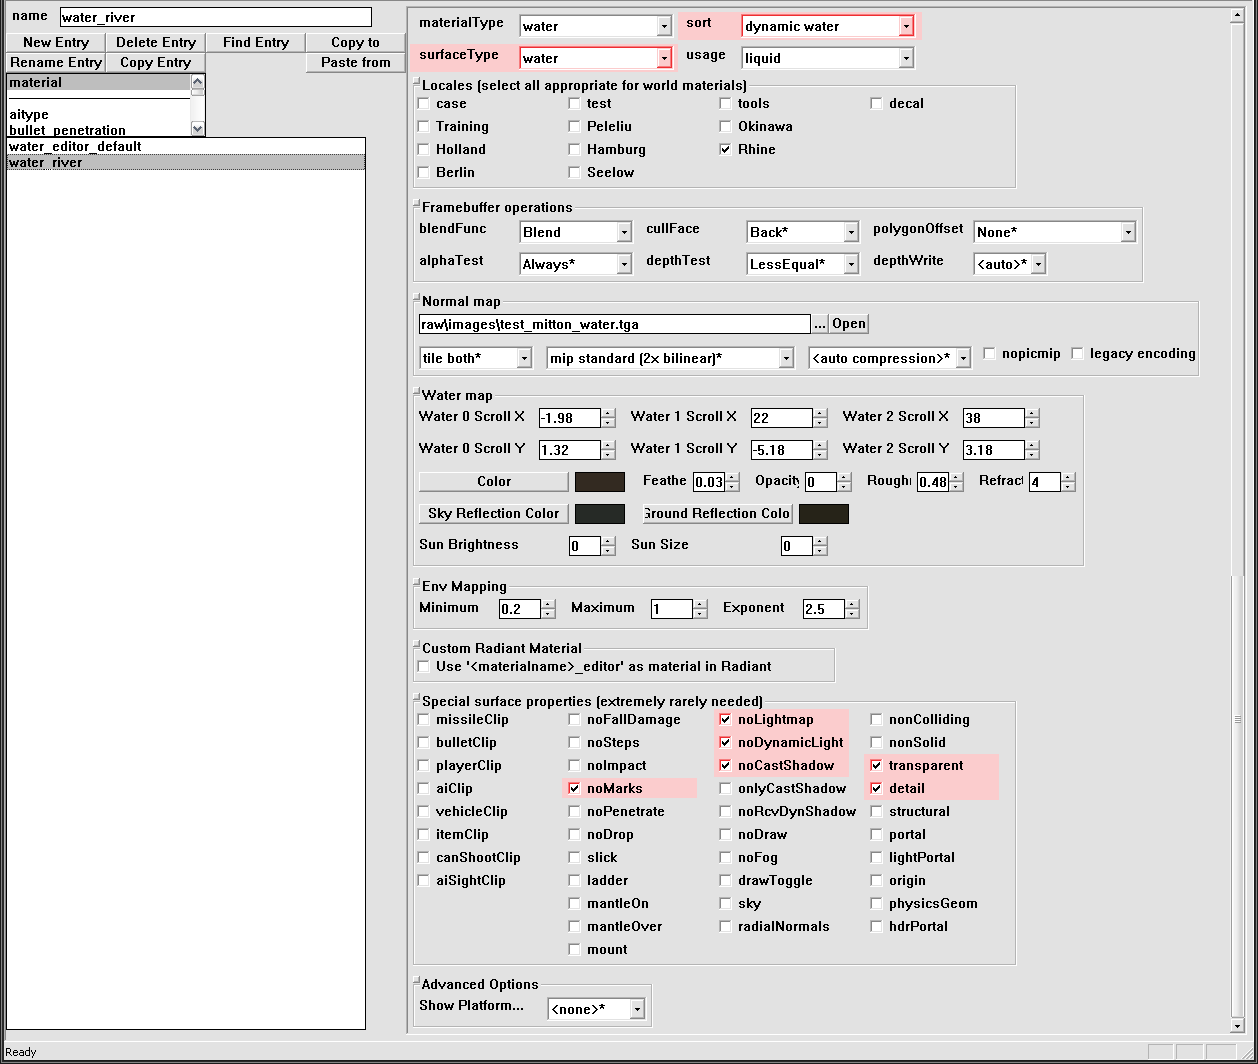
By choosing the water_river asset these are the settings required for a river I made in my current project.
As you can see: sort, surfaceType & some Special surface properties need to be checked.
You can choose the usage & locales as per how you'd like them presented to you in radiant.
Making The Water
Depending on what you're after & your map setting you'll need to play with the settings until you're happy with the result.
A few that may be of use:
* blendFunc - Blend (if you'd like to alpha blend the texture. It won't show alpha blended in the editor)
* Normal Map - The bump map you'd like the water to have. (use one of the TGA files included in the Water.zip file /images folder or your own.
               No normal map will give a smooth surface to the water)
* Water Map -
   Scroll - The default should yield a result like most in game water.
          - All 0's is dead still water.
          - Exaggerating X or Y will give the water more or less movement allowing you to create a stream, river, raindrops, etc.
   Color - The water base color.  (see the Coloring The Water section)
   Feather - The fading of the edges. Seems to make the water less clearer.
   Opacity - Water cloudiness
   Roughness - The strength of the Normal Map
   Refraction - The amount of refraction distortion. While looking through the water this seems to effect whatever is below it.
   Sky Reflection Color - The average color of the sky in the water. (see the Coloring The Water section)
   Ground Reflection Color - The average color of the ground in the water. (see the Coloring The Water section)
   Sun Brightness & size - All 0's is no sun reflection in the water.
* Env Map - The reflection of the surrounding evironment.
Coloring The Water
- You'll need some screenshots of your map if you'd like to take the guess work out of the colors for your water.
If you'd like better accuracy with the colors remove the 2d stuff from your screen. In console type.
\devmap mp_yourmap
\cg_draw2d 0
You'll need a screenshot of just the sky, if there are clouds include them if you like. This is for the Sky Reflection Color.
Take another of the scenery close to your water, ground terrain, trees & cliffs etc. try not to get any sky in the shot. This is for the Ground Reflection Color.
Lastly think of where your water comes from & what is in it, if required take a screenshot of what you think. In the example water_river, I've used a dark brown soil in my map so I took a screenshot of the soil which I've used in creating the base color of the water.
- In Photoshop open the screenshots.
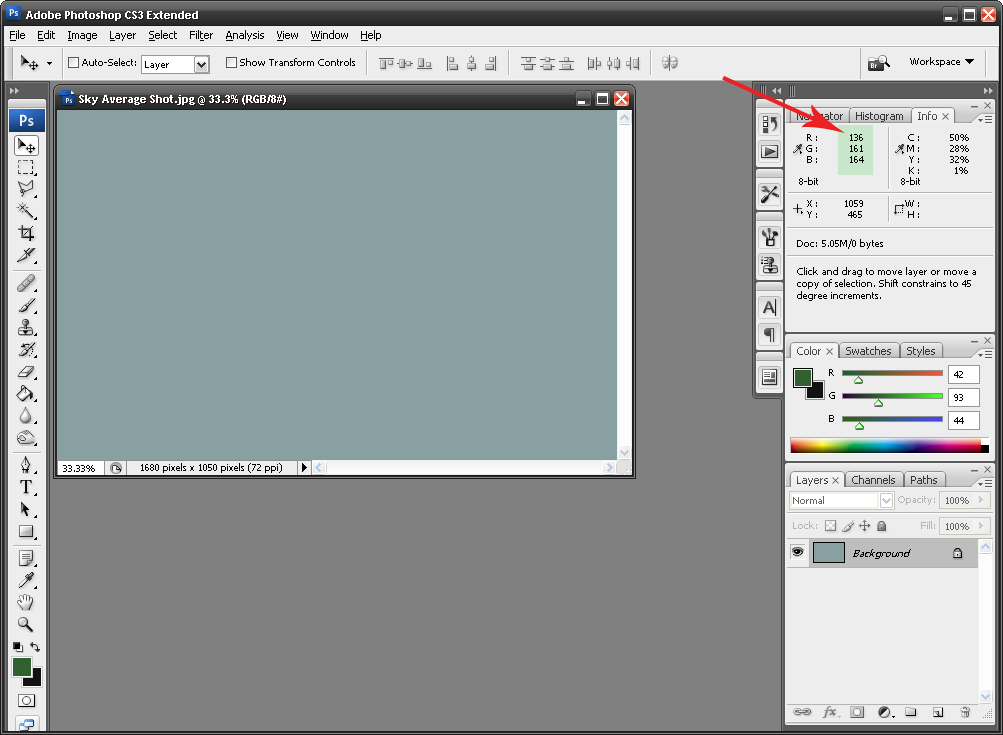
Under Filters \ Blur choose Average Blur. Do this for your screenshots.
In the info section take note of the RGB values for each shot.
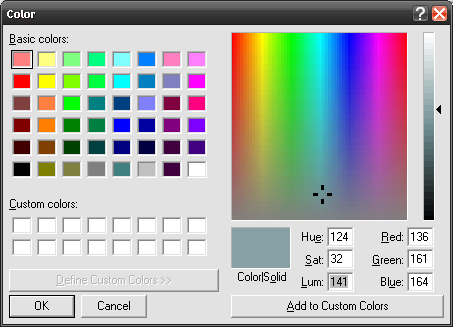
- Back in Asset Manager select the color you'd like to edit & choose define custom color.
Enter the corresponding RGB values from Photoshop & click ok. Do this for all the colors you'd like to change.
If the sky is too bright in the water try changing the Luminance value to a darker setting.
If you're happy with the settings create the texture & it'll be ready to go in radiant for you to use.
When compiling your map, the water texture gets included in the .FF files so it's not required in the .IWD file.
by Gerry


