Call of Duty 5: transparent Minimap: Difference between revisions
Jump to navigation
Jump to search
mNo edit summary |
No edit summary |
||
| Line 5: | Line 5: | ||
[http://developer.nvidia.com/object/photoshop_dds_plugins.html] Download DDS Plugin for Photoshop | [http://developer.nvidia.com/object/photoshop_dds_plugins.html] Download DDS Plugin for Photoshop | ||
---- | |||
<ol> | |||
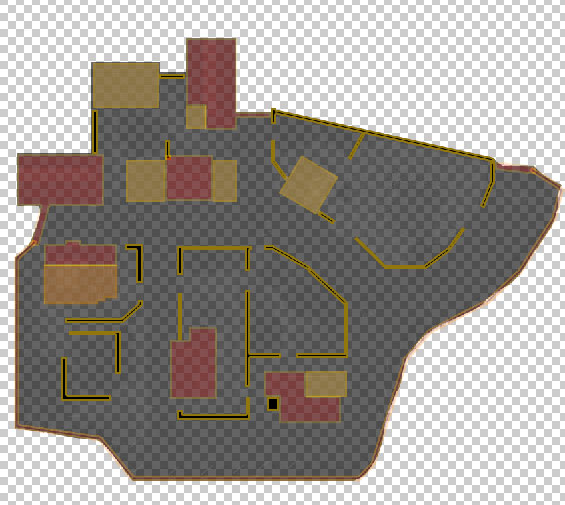
<li>Open up your screenshot in Photoshop, make it transparent in the ways you want it to. | |||
[[Image:Transpalpha.jpg]] | [[Image:Transpalpha.jpg]] | ||
<li>Make sure the size is 512 x 512px</li> | |||
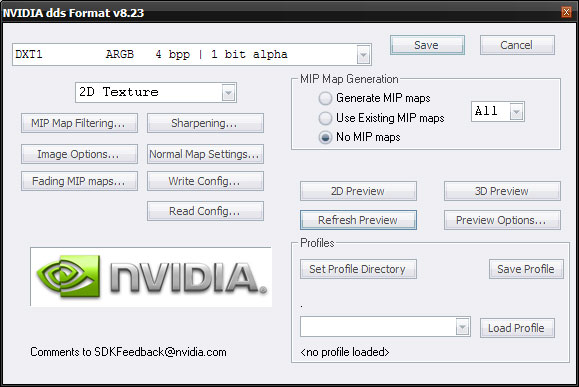
<li> Save it as DDS: Choose '''DXT1 ARGB 4 bpp | 1 bit alpha''' | |||
[[Image:Dds.jpg]] | [[Image:Dds.jpg]] | ||
</li> | |||
<li> Load Asset Manager from the launcher | |||
<ul> | |||
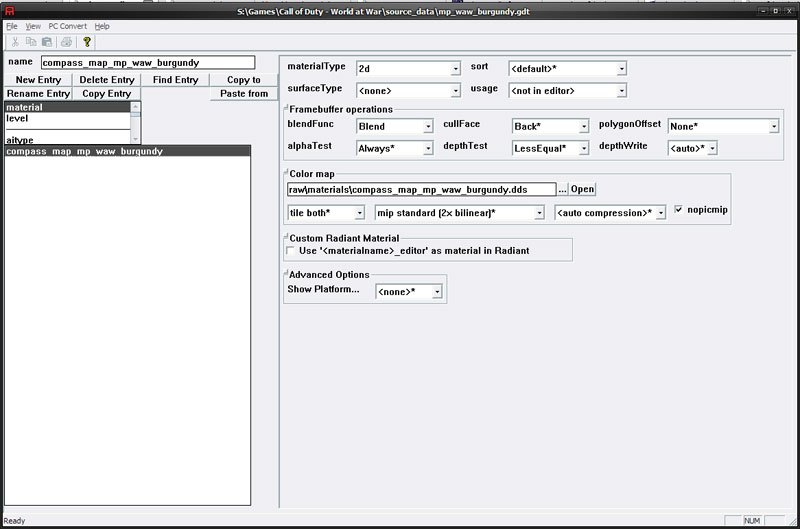
<li>Select 'Material' in the list, then create a 'New Entry' and name it 'compass_map_yourmapname' | |||
<li>See picture. Change materialType to '''2d''', surfaceType should be '''<none>''' and blendFunc to '''Blend''' | |||
<li>Colormap: browse for your .dds file. | |||
</ul> | |||
[[Image:IngameAsset.jpg]]</li> | |||
<li>Now convert this. Menu: PC Convert > Current Asset Only</li> | |||
<li>Rebuild your FF (FastFile)</li> | |||
</ol> | |||
<ul><li> | |||
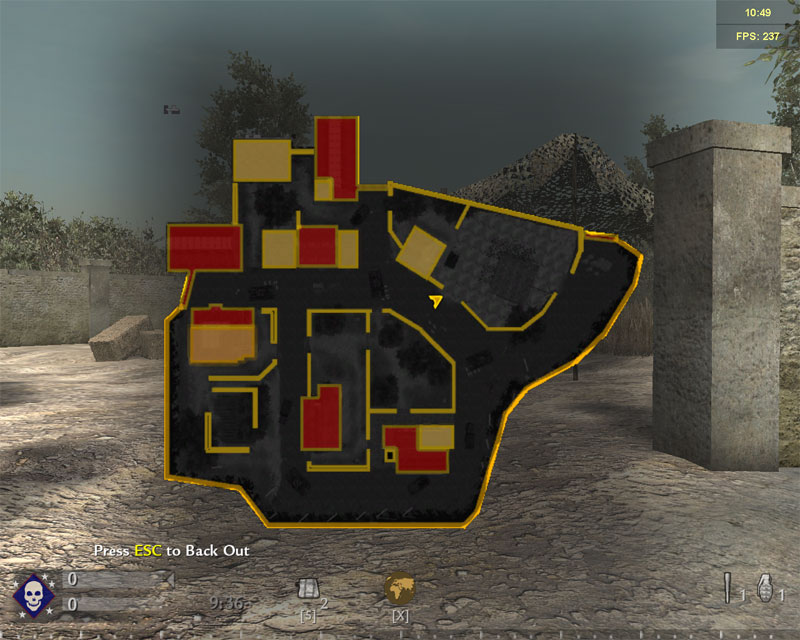
Now launch the map and look at the compass (and overviewmap) | Now launch the map and look at the compass (and overviewmap) | ||
[[Image:Transminimapingame.jpg]] | [[Image:Transminimapingame.jpg]] | ||
</li></ul> | |||
'''Note:''' If you havent added your minimap to your 'zone_source/levelname.csv' file, you should do that before you remake your .ff file. | '''Note:''' If you havent added your minimap to your 'zone_source/levelname.csv' file, you should do that before you remake your .ff file. | ||
( Add '''material,compass_map_yourmapname''' ) | ( Add '''material,compass_map_yourmapname''' ) | ||
--[[User:Rrrkn|Rrrkn]] 10:57, 7 December 2008 (UTC) | |||
Revision as of 10:57, 7 December 2008
Making a transparent/blended Minimap
[1] Follow the regular steps for creating a minimap.
[2] Download DDS Plugin for Photoshop
- Open up your screenshot in Photoshop, make it transparent in the ways you want it to.

- Make sure the size is 512 x 512px
- Save it as DDS: Choose DXT1 ARGB 4 bpp | 1 bit alpha

- Load Asset Manager from the launcher
- Select 'Material' in the list, then create a 'New Entry' and name it 'compass_map_yourmapname'
- See picture. Change materialType to 2d, surfaceType should be <none> and blendFunc to Blend
- Colormap: browse for your .dds file.

- Now convert this. Menu: PC Convert > Current Asset Only
- Rebuild your FF (FastFile)
Note: If you havent added your minimap to your 'zone_source/levelname.csv' file, you should do that before you remake your .ff file.
( Add material,compass_map_yourmapname )
--Rrrkn 10:57, 7 December 2008 (UTC)

