Call of Duty 4: Patches: Difference between revisions
| Line 9: | Line 9: | ||
I selected ch_grass_01 as my texture. | I selected ch_grass_01 as my texture. | ||
[[Image:jp_terrain_1.jpg|600px]] | [[Image:jp_terrain_1.jpg|600px|center]] | ||
Once you have your brush and it is selected go to the tool bar and select '''Patch/Simple terrain patch'''. | Once you have your brush and it is selected go to the tool bar and select '''Patch/Simple terrain patch'''. | ||
[[Image:jp_terrain_02.jpg]] | [[Image:jp_terrain_02.jpg|center]] | ||
You will then have a pop up window '''Terrain density'''. This is how many rows you want to have. You can just use the default of Width 3 and Height 3. Hit OK. | You will then have a pop up window '''Terrain density'''. This is how many rows you want to have. You can just use the default of Width 3 and Height 3. Hit OK. | ||
[[Image:jp_terrain_3.jpg]] | [[Image:jp_terrain_3.jpg|center]] | ||
Now you have your terrain patch you can add more rows or delete rows. | Now you have your terrain patch you can add more rows or delete rows. | ||
| Line 23: | Line 23: | ||
Hit the '''V''' key and you will see you now have pink and green dots on your terrain. There are editing vertices points. These points are used to move and shape your terrain patch. | Hit the '''V''' key and you will see you now have pink and green dots on your terrain. There are editing vertices points. These points are used to move and shape your terrain patch. | ||
[[Image:jp_terrain4.jpg]] | [[Image:jp_terrain4.jpg|center]] | ||
First select a vertices point by holding '''Control + LMB''' and dragging the mouse. You will notice it makes a blue selection box to select your point. You can also use this process of selection with anything in the 2D window. Models, brushes, etc. Just make sure that the object you want to select is fully in the blue selection box. | First select a vertices point by holding '''Control + LMB''' and dragging the mouse. You will notice it makes a blue selection box to select your point. You can also use this process of selection with anything in the 2D window. Models, brushes, etc. Just make sure that the object you want to select is fully in the blue selection box. | ||
[[Image:jp_terrain_5.jpg]] | [[Image:jp_terrain_5.jpg|center]] | ||
To add a new row of vertices you need to select 2 vertices points next to each other and then you use '''Control + Shift + A'''. This will add a row. | To add a new row of vertices you need to select 2 vertices points next to each other and then you use '''Control + Shift + A'''. This will add a row. | ||
[[Image:terrain_6.jpg]] | [[Image:terrain_6.jpg|center]] | ||
| Line 40: | Line 40: | ||
Selected a row of vertices then use '''Alt + O''' | Selected a row of vertices then use '''Alt + O''' | ||
[[Image:jp_terrain7.jpg]] | [[Image:jp_terrain7.jpg|center]] | ||
Using '''Control + Shift + Q''' you can delete a row of vertices. | Using '''Control + Shift + Q''' you can delete a row of vertices. | ||
[[Image:jp_terrain_08.jpg]] | [[Image:jp_terrain_08.jpg|center]] | ||
To cut a piece of terrain, select the row where you want the cut and then '''Control + Shift + X'''. | To cut a piece of terrain, select the row where you want the cut and then '''Control + Shift + X'''. | ||
| Line 52: | Line 52: | ||
You can set the unit distance for Tolerant Weld in your preferences. | You can set the unit distance for Tolerant Weld in your preferences. | ||
[[Image:jp_terrain_9.jpg]] | [[Image:jp_terrain_9.jpg|center]] | ||
You can also use connect two pieces of terrain together but first the two pieces of terrains must have matching edges and vertices. | You can also use connect two pieces of terrain together but first the two pieces of terrains must have matching edges and vertices. | ||
* Moving vertices points | * Moving vertices points | ||
Select the vertices you want to move. Hold '''Alt + LMB'''. Then move the vertices by dragging the mouse. | Select the vertices you want to move. Hold '''Alt + LMB'''. Then move the vertices by dragging the mouse. | ||
Revision as of 10:57, 15 October 2008
Curve and Terrain Patch
- Making a Terrain Patch
First off, you should use terrain for all your ground. Even if you’re making a parking lot and you want it to be flat. Use terrain patches.
To make a piece of terrain you first make a brush. You can make it any size you wish. It can be edited later.
I selected ch_grass_01 as my texture.
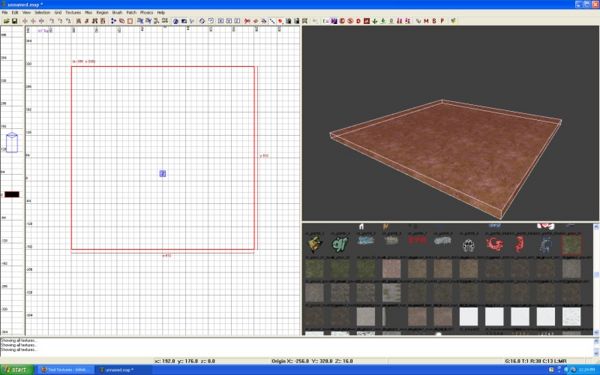
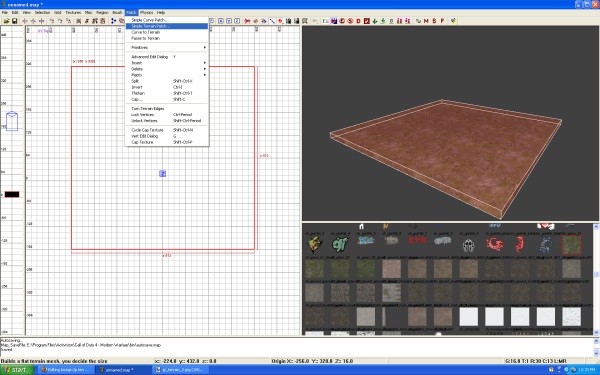
Once you have your brush and it is selected go to the tool bar and select Patch/Simple terrain patch.
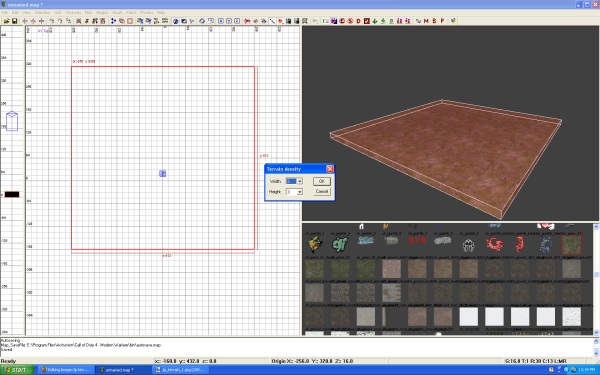
You will then have a pop up window Terrain density. This is how many rows you want to have. You can just use the default of Width 3 and Height 3. Hit OK.
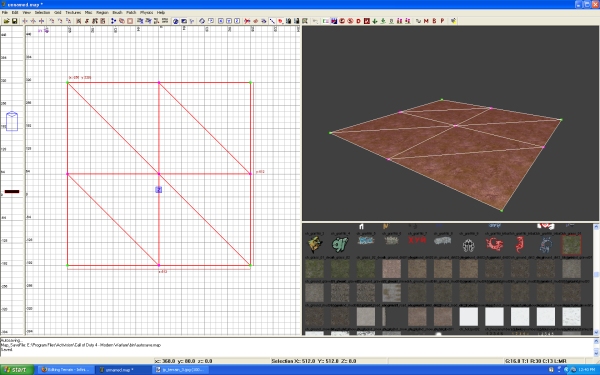
Now you have your terrain patch you can add more rows or delete rows.
Hit the V key and you will see you now have pink and green dots on your terrain. There are editing vertices points. These points are used to move and shape your terrain patch.
First select a vertices point by holding Control + LMB and dragging the mouse. You will notice it makes a blue selection box to select your point. You can also use this process of selection with anything in the 2D window. Models, brushes, etc. Just make sure that the object you want to select is fully in the blue selection box.
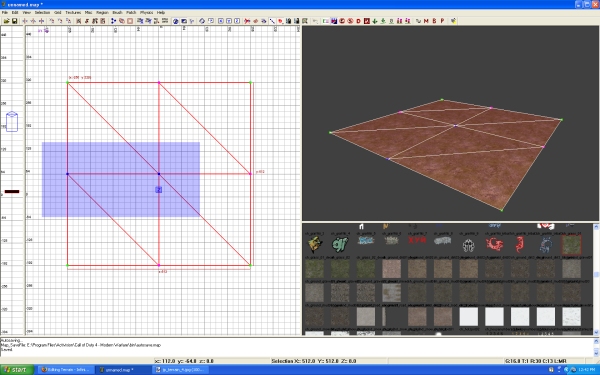
To add a new row of vertices you need to select 2 vertices points next to each other and then you use Control + Shift + A. This will add a row.
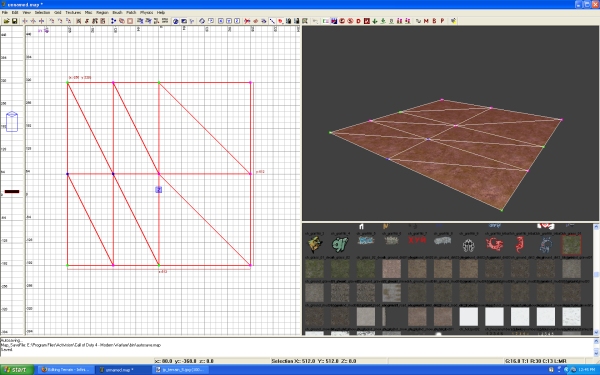
To select a full row you use Shift + LMB clicking on one vertice point and it will select the full row. Clicking on it again will select the row in the other direction.
You can Extrude a row of vertices
Selected a row of vertices then use Alt + O
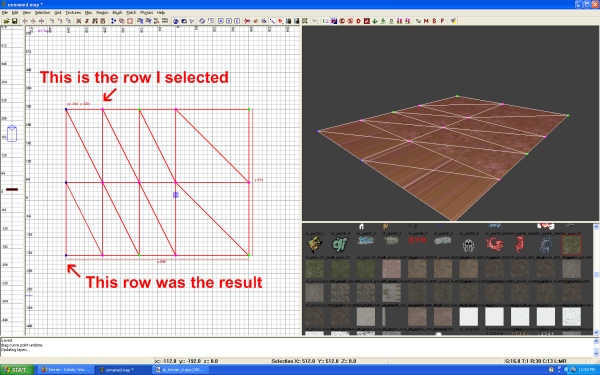
Using Control + Shift + Q you can delete a row of vertices.
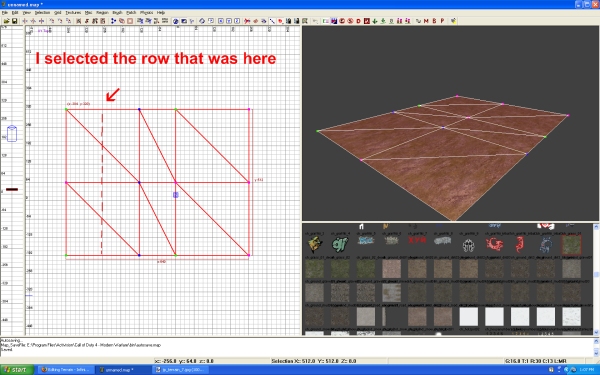
To cut a piece of terrain, select the row where you want the cut and then Control + Shift + X.
To connect vertices together you select the vertices you want to merge and hit W. If the points are to far apart they may not connect. Reason is because you have Tolerant Weld ![]() turned on. Turning it off you can connect vertices's together no matter the distance from each other.
turned on. Turning it off you can connect vertices's together no matter the distance from each other.
You can set the unit distance for Tolerant Weld in your preferences.
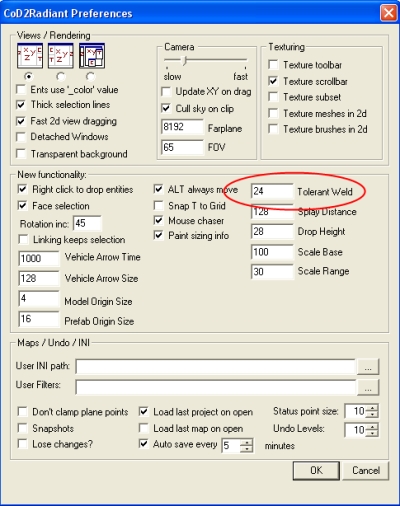
You can also use connect two pieces of terrain together but first the two pieces of terrains must have matching edges and vertices.
- Moving vertices points
Select the vertices you want to move. Hold Alt + LMB. Then move the vertices by dragging the mouse.
Notice the vertices will move freely. You may want to snap the points back to the grid when finished.
Control + G will snap the vertices points to the grid.
