Call of Duty 2: Viewsleeves Tutorial: Difference between revisions
mNo edit summary |
|||
| Line 336: | Line 336: | ||
''Copyright © 2007 - SevenSniff'' | ''Copyright © 2007 - SevenSniff'' | ||
[[Category:Call of Duty ]] | [[Category:Call of Duty 2]] | ||
[[Category:Modtools]] | [[Category:Modtools]] | ||
[[Category:Advanced Editing]] | [[Category:Advanced Editing]] | ||
[[Category:Modelling]] | [[Category:Modelling]] | ||
[[Category:Maya]] | [[Category:Maya]] | ||
Revision as of 02:28, 16 February 2009
![]() This tutorial will show you how to get your weapon model in the game and how to animate it.
This tutorial will show you how to get your weapon model in the game and how to animate it.
Before we start we assume you have the xmodel and xamin exporters installed and know how to use it.
Downloading the Assets
- First you want to download the View sleeves supplied by IW which can be located View Sleves Download link.
- Now you want to extract the contents of the zip file so you have a folder structure like so:
C:\trees\cod2_animation_source\viewmodels
FileNames
- In this folder you will see 2 files and a folder called "american"
ViewModel_DefMesh.mb
ViewModel_Rig.mb
if we go into the american folder we will see the folder called thompson.
Lets copy that folder to the C:\trees\cod2_animation_source\viewmodels folder and rename it to 30cal (name it what ever you like i have choose this as this is based on hand animations for the 30cal.
So now our directory looks like
C :\trees\cod2_animation_source\viewmodels\30cal
in this folder you will see 4 files
(Definitions courtesy of JackTheRiper)
trees\cod2_animation_source\viewmodels\[teamname]\[weaponname]\viewmodel_[weaponname].mb
- The third person weapon file (exported as weapon_[weaponname])
trees\cod2_animation_source\viewmodels\[teamname]\[weaponname]\viewmodel_[weaponname]_gunsleeves.mb
- No idea what it's for
trees\cod2_animation_source\viewmodels\[teamname]\[weaponname]\[weaponname].VMGun
- The first person weapon file (exported as viewmodel_[weaponname])
trees\cod2_animation_source\viewmodels\[teamname]\[weaponname]\viewmodelanimation_[weaponname].mb
- References the rig and the .VMGun file (used for making the custom anims)
- Ok so going with what Jack said about each file we need to edit the the VMGun file. This dosent seem like a file used in Maya since its not on the export list but don't worrie it its. From what i can see it is just an .mb file with a different extension. Ok so we just want to rename our files now as we don't need them named as thompson that will get confusing for you when you go to try and find them. So just change thompson with your weapon name so i renamed them to 30cal.
In Maya
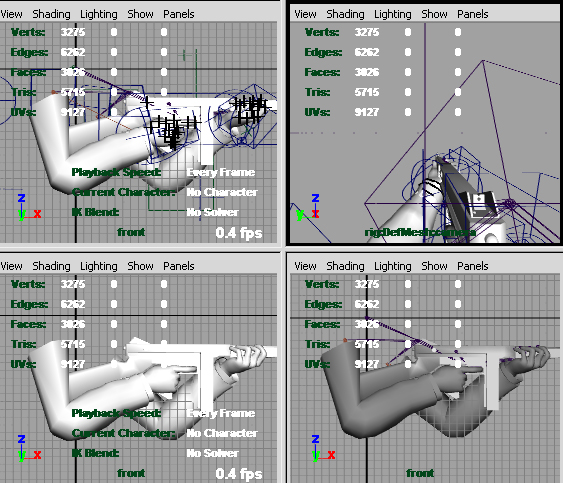
- Ok so we open the 30cal.VMGun file with Maya and you should see the thompson with a bone structure.
- All we need to do is select the mesh and delete it.
- If you are having trouble moving about click View > Default Home this will reset the cam to be looking at 0 0 0
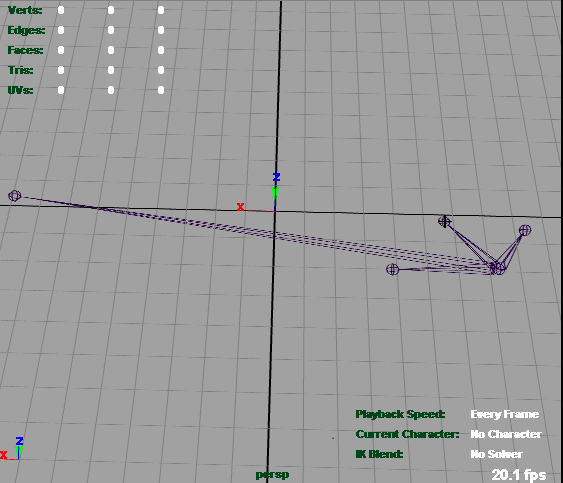
- So now once we have deleted everything we should just have the bones and cameras left.
- Now hopefully you have made your weapon model somewhere else. (if not go back and do it now before you can continue)
- Once you know where your file is click File > Import... > and find your file
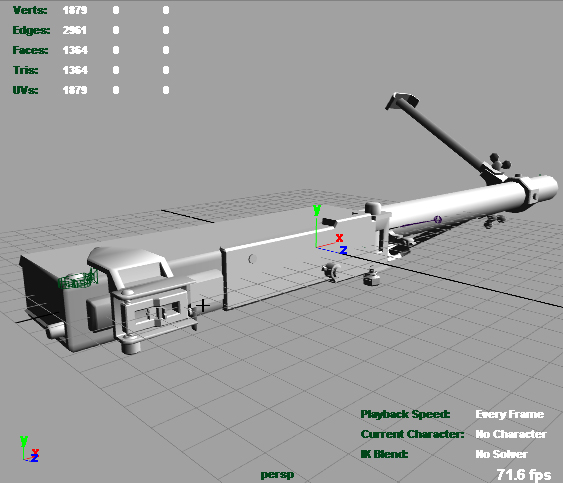
- Now you might notice you gun seems to small that's alright u can edit it to the right size you can edit models in the file just like any other file.
- Once your happy with size of you model u need to "Skin" it. Which simply means attach the model to the bones.
- What we do is select the root joint "J_Gun" and then select the main part of our weapon model.
- Now look for the drop down box at the top of may that should say for you "Modelling". Which is normally the default.
You need to change this to Animation.
- Once that's done you will notice the top bar will have new options and lost some
options. That's the whole point
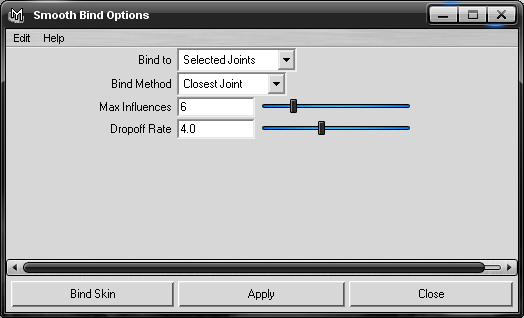
- Click Skin > Bind Skin > and click the box of smooth bind
- Change your settings to look like this:
- Then click Smooth Bind. You wont have to change these settings again. so can just click
smooth bind from now on without having to click the box.
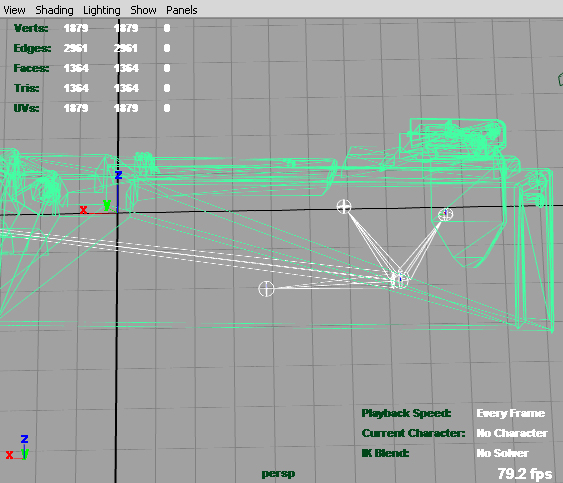
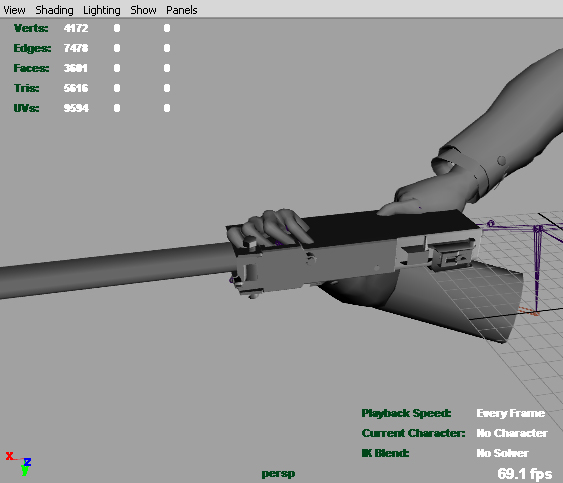
- Now you should see something like this:
Now that's your model connected!
- Since the 30cal doesn't have a clip (Yet - I'm going to make a belt for it - Not in this tutorial I wont be showing you how to bind the clip but it is very simple. Just select the
J_Clip bone and move it to around were the top-middle of your clip part is on your model click your clip part of you model then bind it that's it done
- We need to move the Tag_Flash and Tag_Brass.
Tag_Flash is the fire-like FX at the end of your guns barrel.
Tag_Brass is were the bullet casings will come out of your gun.
This is really simple to do all you have to do is click on the bone and move it to the position of were you want them to appear. Job Done.
- Save this file and that's us done with it for now.
- Open the viewmodel_animation_30cal.mb
you will notice it looking something like this:
- Click one of the windows except for the first person view one.
- Click Panels > Perspective > Persp then Press Space to go full view of that
window.
- Ok so now we will notice is that it has the thompson and we don't want this. so click
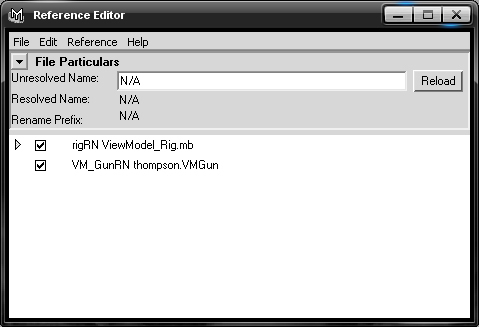
file > Preference Editor...
- You will get a window like this:
- Click the "VM_GunRN thompson.VMGun" Now you will notices the N/A's have changed to
actual information. Click the text box and change the location to
C:/trees/cod2_animation_source/viewmodels/30cal/30cal.VMGun
![]() Don't forget to change the names of the folders and the VMGun file to the name of yours.
Don't forget to change the names of the folders and the VMGun file to the name of yours.
- Once you've typed in your new location just hit Enter. and close the window now you will notice he is now holding the 30cal.
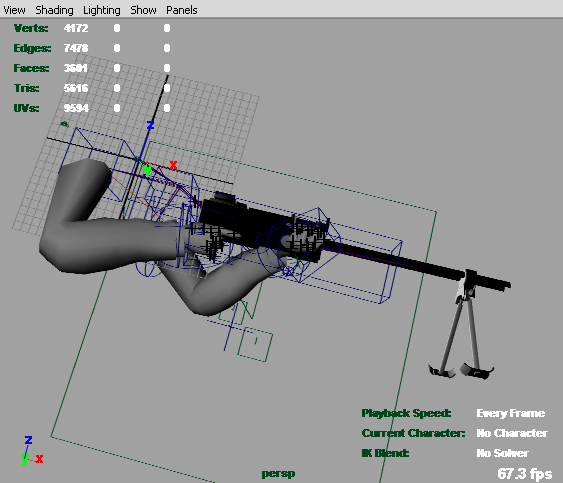
- Now with mine you will notice there is only the bones and mesh. we want to be able to see the bone controllers all we need to do is click Show > All
- Now it looks like this:
Animation
- Now the animating begins.
I'm only going to be showing how to make a key frame with your animations if u want to learn better look up some Maya tutorials.
- So now click one of the circles around one of the hands.
- Now if u don't notice any red lines appearing on the timeline that's either because:
1. you don't have the timeline up 2. don't know what the hell a timeline is 3. or you have it set to a too small amount of frames.
- If your answer was 1 you click Display > UI Elements > Time Slider
- If your answer was 2 Its this thing-a-ma-bob
- If our answer was 3 u will notice 2 boxes, a grey area with a brighter greyer slider thing and then 2 more boxes. In box number 2 type in 0.00 and in box number 3 type 350.00 and now u should notice the red lines. If not you probably have deselected the Circles.
- Ok so now that we have the timeline sorted lets get to work on getting that hand in the right place. All we have to do is use the move tool and move the circles to the place were we want the hand.
- Before you start moving stuff I recommend moving to frame 0 so can set it as the default position of were u want the hands to be. So now move your hand to were u want it on the gun once your happy with the place press "S" on your keyboard.
- Now you have saved that frame. If your not happy with the way his fingers are just click the joints to them and rotate them to the way you want.
![]() After changing something always press "S" on the frame u want the movement to be
saved on. "S" is the key that will set a "Key Frame" which makes the animation recognise you want this bone to be in that place at this point of the animation.
After changing something always press "S" on the frame u want the movement to be
saved on. "S" is the key that will set a "Key Frame" which makes the animation recognise you want this bone to be in that place at this point of the animation.
- Move stuff about till your happy with all your types of animations.
i.e. Bash, Shoot, put away, take out, etc.
- Now the big moment allot of people want to know:
HOW TO EXPORT IT!
Export
- Now this bit was tricky to get right but i have managed it.
- I will be exporting the bash animation i made for the 30cal so stick with me on this.
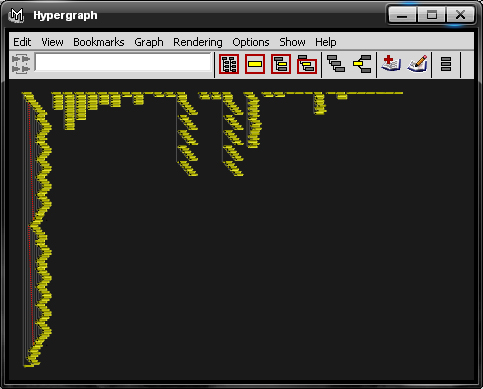
- Open the Hyper Graph windows which can be opened via "Window > hyper graph"
- Select EVERYTHING in this window.
- Then click COD Tools > Animation Exporter
- Click "Add New Entry".
- You will get more options now.
- Tick the tickable box. in the text area type
C:/trees/cod2_animation_source/viewmodels/[yourweaponname]/viewmodel_[yourweaponname]_melee
And then in the start and end times type in when the animation starts and when it ends.
- Now with everything still selected in the Hyper Graph click Set Export Nodes and now u can click Export Selected Entries and it may hopefully export you don't get a message on success in a pop up but if you look in the log in the bottom corner you will get a message like this.
Exporting from frame [270] to [290] to file
[C:/trees/cod2_animation_source/viewmodels/30cal/viewmodel_30cal_melee.XANIM_EXPORT]
took: 0.712000 secs
==> That means it was successful.
- Now this part does cause bother.
- You also need to export an xmodel as a guideline of what bones aren't actually needed for the animation to work.
- Open the Model Exporter COD Tools > Model Exporter
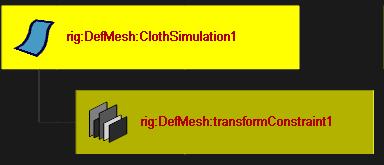
- Now you will notice everything gets deselected this is something to do with the exporter. I don't know what but it annoys the hell out of me. So you need to select everything again. Before you go and jump the gun there is a problem with a certain object in the actual file that needs to be deselected from the
objects being used it looks like this:
- It can be located here:
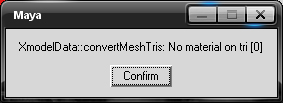
- This little bugger causes this error during the exporting of the xmodel file:
- Do fix this just hold Ctrl and drag over the two boxs to deselect them, so now that we have that error fix now we can move on.
- Click "Add New Entry" and tick the tickable box and type this in to the text area.
C:/trees/cod2_animation_source/viewmodels/[yourweaponname]/viewmodelanimation_[yourwea
ponname]
and click "Set Exports"
 THIS BIT MUST BE DONE!
- You must tick "Force Export Selected Joints". If you don't you will not get a lot of the major joints like Tag_Camera and Tag_Cambone
- That's it ready now we click "Export Selected Entries" You will be asked do you wish to continue? just click "Yes"
- It will reach 100% and down the bottom right corner you will see a box that says
Successfully exported
C:/trees/cod2_animation_source/viewmodels/30cal/viewmodelanimation_30call.XMODEL_EXPORT
- That is us done with Maya now to hunt for our files and move them to the correct places.
- Find your "viewmodel_[weaponnamehere]_melee.XANIM_EXPORT"
- Place it in this directory:(Based on default cod2 installation)
C:\Program Files\Activision\Call of Duty 2\xanim_export
- Open the "viewmodelanimation_[weaponnamehere].XMODEL_EXPORT" with notepad and you will find this section here
NUMBONES 122
BONE 0 -1 "rig:controlWrist"
BONE 1 -1 "rig:controlWrist1"
BONE 2 -1 "rig:DefMesh:tag_view"
BONE 3 -1 "VM_Gun:J_Gun"
BONE 4 2 "rig:DefMesh:tag_cambone"
BONE 5 2 "rig:DefMesh:tag_torso"
BONE 6 0 "rig:Index_FK_LE_0"
BONE 7 1 "rig:Index_FK_RI_0"
BONE 8 0 "rig:Mid_FK_LE_0"
BONE 9 1 "rig:Mid_FK_RI_0"
BONE 10 0 "rig:Pinky_FK_LE_0"
BONE 11 1 "rig:Pinky_FK_RI_0"
BONE 12 0 "rig:Ring_FK_LE_0"
BONE 13 1 "rig:Ring_FK_RI_0"
BONE 14 0 "rig:Thumb_FK_LE_0"
BONE 15 1 "rig:Thumb_FK_RI_0"
BONE 16 3 "VM_Gun:J_Bolt"
BONE 17 3 "VM_Gun:J_Clip"
BONE 18 3 "VM_Gun:tag_brass"
BONE 19 3 "VM_Gun:tag_flash"
BONE 20 5 "rig:DefMesh:J_Shoulder_LE"
BONE 21 5 "rig:DefMesh:J_Shoulder_RI"
BONE 22 4 "rig:DefMesh:tag_camera"
BONE 23 5 "rig:DefMesh:tag_weapon"
You need to remove all the bits that say "rig:", "rig:DefMesh:", "VM_Gun:" no i know this is a horrible thing making you have to through 122 bones removing crap from the name. but that's were the tools in notepad come handy! . This is a little tool not many pp know off that notepad has. if you press CTRL+H a window will open that allows you to take a certain piece of text that is in the notepad document copied several times. what you do is take the first box and type each code that we want to remove in "rig:" (without quotations) and in the second box we leave that blank now we just click replace all and there gone! do this for each bit of code we don't want.
![]() I recommend copying that section of the code out of the notepad and putting it in a blank one as doing this method in a 12mb+ file will lag the hell out of your computer.
I recommend copying that section of the code out of the notepad and putting it in a blank one as doing this method in a 12mb+ file will lag the hell out of your computer.
- Save and close the file.
- Copy the file to this location:
C:\Program Files\Activision\Call of Duty 2\model_export
- And that's us ready for compiling the animation
- I have supplied this file to give you a good guideline on how to compile them you can download the GDT file GDT File download link. Open this file with the CoD2 Assets Manager.
- Now you will see that there are 3 items in this GDT file you don't need them all they
are just a guideline on how to make your own.
- What you can do is take my original ones and copy them or rename them to the way you want.
Compiling
ok so lets compile this animation.
- Select the "viewmodel_thompson_melee" and "click Copy Entry" no rename it to:
viewmodel_[yourweaponname]_melee
This part is what the animation file is going to be called so make sure you make it something you can understand what the animation does.
- In the file name box and the model box simply just change thompson to your weapon name. Then press F10 and it will compile it. Now just open up your weapon file that controls everything the gun does like the model it uses how much ammo is in each clip. You know the file I'm on about its located in "weapons\mp"
- Look for the melee animation code and just type in the name of the animation you just compiled and load of the up the game get your weapon on and bash! your weapon should now play the animation you need
- Now you just need to export all of the other animations for the gun and you have a fully animated weapon now
Hope this tutorial helps you guys with your modding needs
Copyright © 2007 - SevenSniff
