Call of Duty 5: Advanced Terrain Editing: Difference between revisions
mNo edit summary |
|||
| (4 intermediate revisions by the same user not shown) | |||
| Line 1: | Line 1: | ||
[[Image:Nutshell.png]] Advanced Tutorial for Terrain Editing; | |||
[[Image:rgn_warning.png|right]] | |||
=Changing edge directions= | |||
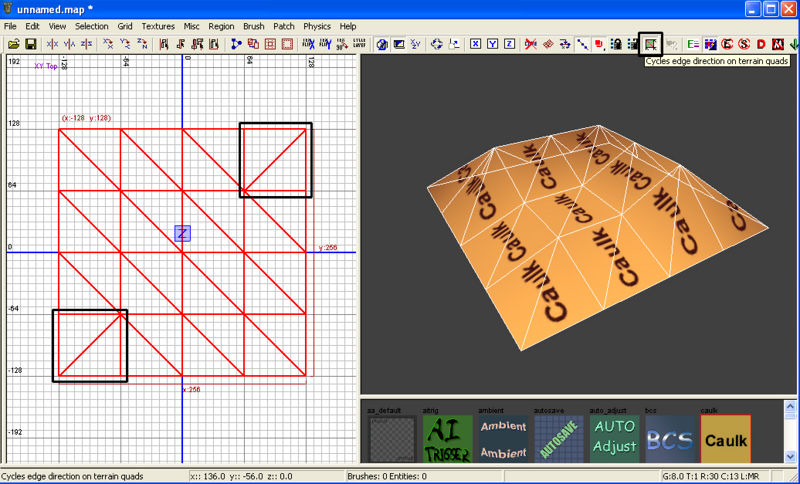
You can change the edge direction between the terrain vertices by toggling [[Image:CoD5_Advanced_Terrain_Editing_2.png]] in your toolbar.<br> | You can change the edge direction between the terrain vertices by toggling [[Image:CoD5_Advanced_Terrain_Editing_2.png]] in your toolbar.<br> | ||
| Line 6: | Line 9: | ||
[[Image:CoD5_Advanced_Terrain_Editing_1.jpg|800px]]<br><br> | [[Image:CoD5_Advanced_Terrain_Editing_1.jpg|800px]]<br><br> | ||
=Advanced mesh editing options= | |||
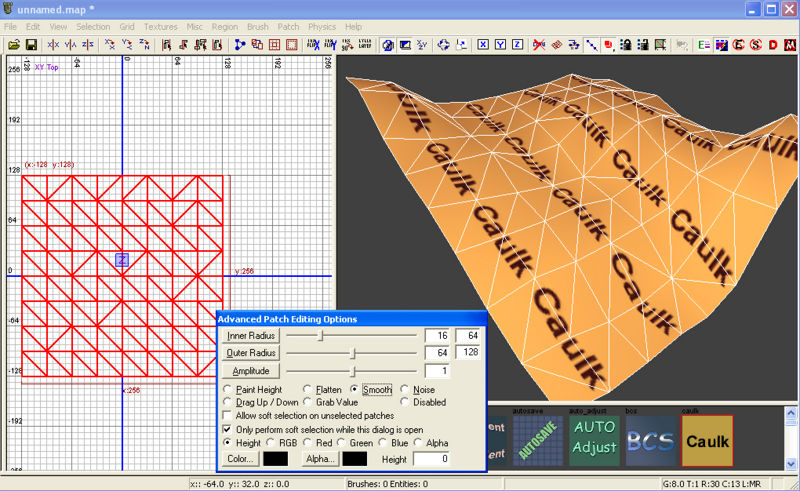
* Press "Y" to bring up the "Advanced Patch Editing Options" window | |||
* First select what action you want | |||
*Paint height will raise and lower the terrain | |||
*Flatten will flatten the terrain to the average height of the vertices | |||
*Smooth will smooth the terrain around your circle | |||
*Noise will move the vertices around | |||
3. Then select your circle size<br> | |||
*Inner radius is the circle that has the most affected vertices. | *Inner radius is the circle that has the most affected vertices. | ||
**Across the slider are 2 boxes. | **Across the slider are 2 boxes. | ||
| Line 21: | Line 26: | ||
*Outer radius is the softening of changes from inner radius and outside of outer radius. | *Outer radius is the softening of changes from inner radius and outside of outer radius. | ||
*Amplitude is the speed at which changes happen with all settings, this is also relative to the grid size. | *Amplitude is the speed at which changes happen with all settings, this is also relative to the grid size. | ||
<br> | |||
<br> | <br> | ||
[[Image:CoD5_Advanced_Terrain_Editing_3.jpg|800px]]<br><br> | [[Image:CoD5_Advanced_Terrain_Editing_3.jpg|800px]]<br><br> | ||
=Combining meshes= | |||
'''Manually:'''<br> | '''Manually:'''<br> | ||
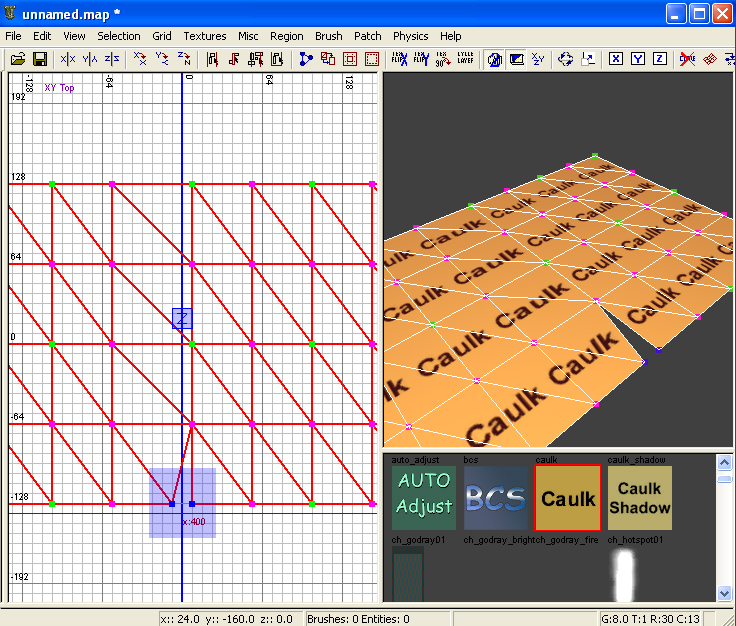
* Select both meshes | |||
* Press "V" to toggle vertices | |||
* Click and drag to make a blue selection box and select two vertices | |||
* Press "W" to connect | |||
* Repeat as necessary | |||
[[Image:Information.png]] Both meshes can be selected separately but the vertices you connected can be edited together.<br> | |||
[[Image:CoD5_Advanced_Terrain_Editing_4.jpg]]<br><br> | [[Image:CoD5_Advanced_Terrain_Editing_4.jpg]]<br><br> | ||
'''Tolerant Weld:'''<br> | '''Tolerant Weld:'''<br> | ||
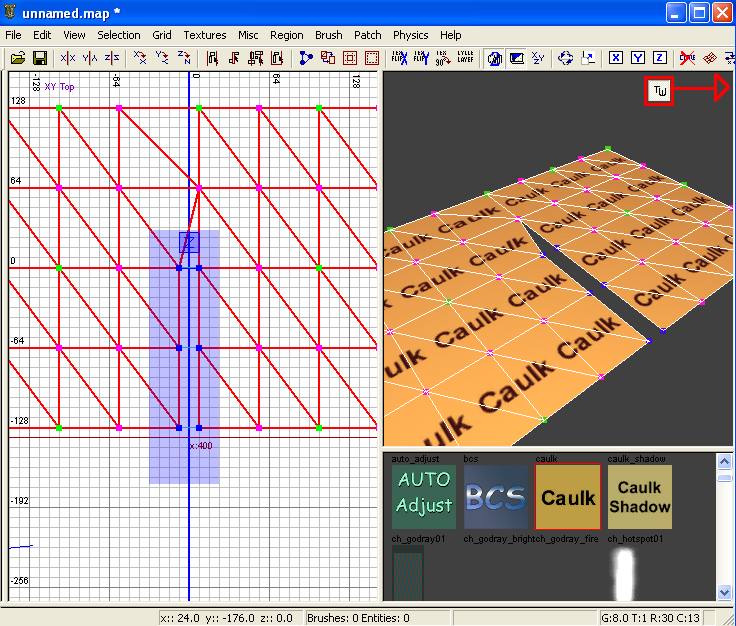
* Toggle Tolerant Weld by selecting [[Image:CoD5_Toolbar_Tolerant_Weld.png]] in the toolbar | |||
* Select both meshes | |||
* Press "V" to toggle vertices | |||
[[Image:Information.png]] With tolerant weld you will see faint light blue lines connecting vertices that are close enough to automatically connect | |||
* Create the blue selection box over all the vertices you want to connect.<br> | |||
* Press "W" to have the vertices connected by that light blue line combined.<br> | |||
[[Image:CoD5_Advanced_Terrain_Editing_5.jpg]] | [[Image:CoD5_Advanced_Terrain_Editing_5.jpg]] | ||
=Cutting terrain= | |||
* First it must be a terrain patch, not a curve. | |||
* Select the patch | |||
* Bring up the Vertices by pressing '''V''' on keyboard | |||
* Now with the mouse drag over the "line" of vertices you wish to cut as shown below: | |||
[[Image:terrain_cut_1.png|600px]] | |||
*Now press on keyboard '''Ctrl + Shift + x''' | |||
[[Image:terrain_cut_2.png|600px]] | |||
''If the vertices were properly selected you will now have 2 patch separated where the line was selected and cut.'' | |||
[[Image:terrain_cut_3.png|600px]] | |||
[[Image:Information.png]] if its a square patch, selecting the first 2 vertices in a line is sufficient to cut the entire patch along that line. | |||
Sources: [http://wiki.treyarch.com/wiki/Advanced_Terrain_Editing Treyarch's Wiki] | Sources: [http://wiki.treyarch.com/wiki/Advanced_Terrain_Editing Treyarch's Wiki] | ||
Latest revision as of 10:33, 11 March 2009
![]() Advanced Tutorial for Terrain Editing;
Advanced Tutorial for Terrain Editing;
Changing edge directions
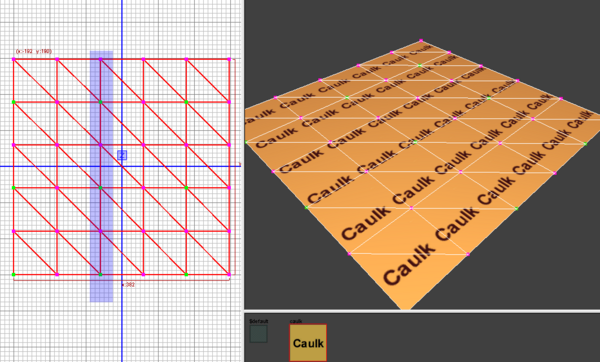
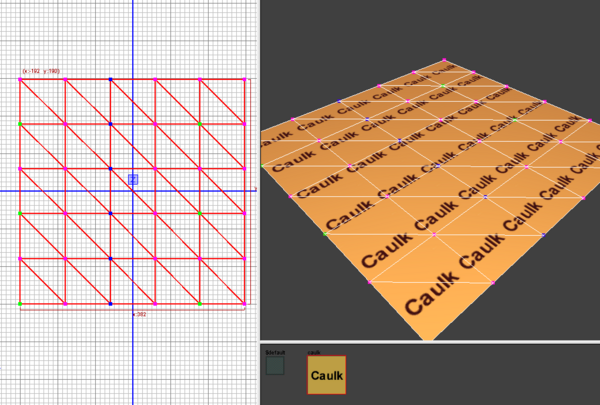
You can change the edge direction between the terrain vertices by toggling ![]() in your toolbar.
in your toolbar.
Then click on the edge you want to change in the 3D window. This is useful for helping smooth terrain and kinks in meshes.
Advanced mesh editing options
- Press "Y" to bring up the "Advanced Patch Editing Options" window
- First select what action you want
- Paint height will raise and lower the terrain
- Flatten will flatten the terrain to the average height of the vertices
- Smooth will smooth the terrain around your circle
- Noise will move the vertices around
3. Then select your circle size
- Inner radius is the circle that has the most affected vertices.
- Across the slider are 2 boxes.
- First box is the actual size of the circle in units.
- Second box is the max size.
- Across the slider are 2 boxes.
- Outer radius is the softening of changes from inner radius and outside of outer radius.
- Amplitude is the speed at which changes happen with all settings, this is also relative to the grid size.
Combining meshes
Manually:
- Select both meshes
- Press "V" to toggle vertices
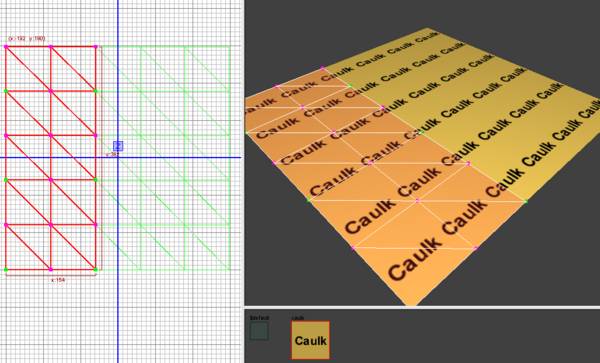
- Click and drag to make a blue selection box and select two vertices
- Press "W" to connect
- Repeat as necessary
![]() Both meshes can be selected separately but the vertices you connected can be edited together.
Both meshes can be selected separately but the vertices you connected can be edited together.
Tolerant Weld:
![]() With tolerant weld you will see faint light blue lines connecting vertices that are close enough to automatically connect
With tolerant weld you will see faint light blue lines connecting vertices that are close enough to automatically connect
- Create the blue selection box over all the vertices you want to connect.
- Press "W" to have the vertices connected by that light blue line combined.
Cutting terrain
- First it must be a terrain patch, not a curve.
- Select the patch
- Bring up the Vertices by pressing V on keyboard
- Now with the mouse drag over the "line" of vertices you wish to cut as shown below:
- Now press on keyboard Ctrl + Shift + x
If the vertices were properly selected you will now have 2 patch separated where the line was selected and cut.
![]() if its a square patch, selecting the first 2 vertices in a line is sufficient to cut the entire patch along that line.
if its a square patch, selecting the first 2 vertices in a line is sufficient to cut the entire patch along that line.
Sources: Treyarch's Wiki
