Call of Duty 4: Rotating Models: Difference between revisions
No edit summary |
m formatting |
||
| (One intermediate revision by one other user not shown) | |||
| Line 30: | Line 30: | ||
'''Rotating brushes:''' | |||
*Make the brushes into the object you want to rotate. | *Make the brushes into the object you want to rotate. | ||
| Line 59: | Line 59: | ||
'''Rotating models:''' | |||
| Line 68: | Line 68: | ||
*With the model still selected, press N and set the speed desired and script_noteworthy for the rotation axis. Press Esc and that finishes the radiant work for a model. | *With the model still selected, press N and set the speed desired and script_noteworthy for the rotation axis. Press Esc and that finishes the radiant work for a model. | ||
''NOTE: | '''NOTE:''' prefabs can’t be rotated and this includes prefab models. If you want to rotate a vehicle for example, you would need to place the model and set it to rotate as shown above. Open the vehicle prefab and copy the clips to your map. Add an origin to the clips to match your model axis, and set it to rotate as a script_brushmodel as shown above. With the model and clips rotating in the same position on the same axis, at the same speed, they are still two separate entities, but in game will function as one. | ||
== In Script == | == In Script == | ||
< | <syntaxhighlight>main() | ||
main() | |||
{ | { | ||
rotate_obj = getentarray("rotate","targetname"); | |||
if(isdefined(rotate_obj)) | |||
for(i=0;i<rotate_obj.size;i++) | |||
rotate_obj[i] thread ra_rotate(); | |||
} | } | ||
ra_rotate() | ra_rotate() | ||
{ | { | ||
if (!isdefined(self.speed)) | |||
self.speed = 10; | |||
if (!isdefined(self.script_noteworthy)) | |||
self.script_noteworthy = "z"; | |||
for(;;) | |||
{ | |||
// rotateYaw(float rot, float time, <float acceleration_time>, <float deceleration_time>); | |||
if (self.script_noteworthy == "z") | |||
self rotateYaw(360,self.speed); | |||
else if (self.script_noteworthy == "x") | |||
self rotateRoll(360,self.speed); | |||
else if (self.script_noteworthy == "y") | |||
self rotatePitch(360,self.speed); | |||
wait (self.speed-0.1); // removes the slight hesitation that waittill("rotatedone"); gives. | |||
// self waittill("rotatedone"); | |||
} | |||
}</ | }</syntaxhighlight> | ||
The first part of the script collects all the entities with the target name of rotate. The second part checks the entity for speed, if none specified, it will be 10 as indicated in the script. This number can be changed. The last section checks the axis the entity is to rotate around. If no script noteworthy is specified, the Z axis will be assigned. | The first part of the script collects all the entities with the target name of rotate. The second part checks the entity for speed, if none specified, it will be 10 as indicated in the script. This number can be changed. The last section checks the axis the entity is to rotate around. If no script noteworthy is specified, the Z axis will be assigned. | ||
== Files == | == Files == | ||
Latest revision as of 19:48, 22 February 2012
By FiremanPaul
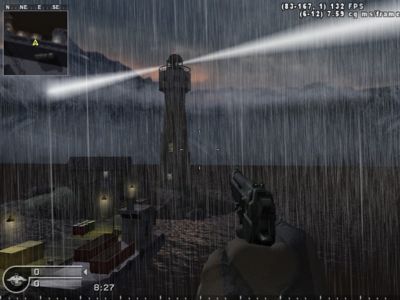
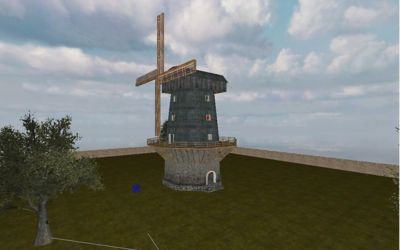
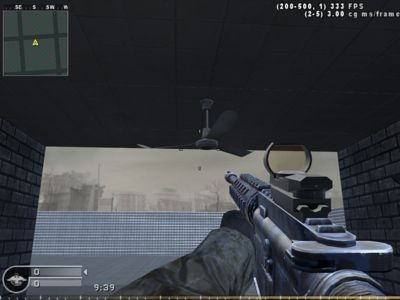
![]() This tutorial will show you how to rotate models or brushes around any axis and at any speed. One single script will allow multiple objects to be rotated and each can be on its own axis and rotating at its own speed. The following pictures show some of what is possible with rotating objects. Movement in a map can provide animation and “life” to a map.
This tutorial will show you how to rotate models or brushes around any axis and at any speed. One single script will allow multiple objects to be rotated and each can be on its own axis and rotating at its own speed. The following pictures show some of what is possible with rotating objects. Movement in a map can provide animation and “life” to a map.
The lights on this lighthouse are models and rotate very slowly, looks awesome in game.
The blades on this windmill are brushes and slowly rotate.
This fan rotates at a nice brisk pace.
In Radiant
Rotating brushes:
- Make the brushes into the object you want to rotate.
- On the axis that you want to rotate around, make a small brush of 8x8 or 16x16 and texture it with the origin texture from the tools textures.
- Select all the brushes that are to be rotated and select the origin brush.
- With the brushes and origin selected, right click on the 2D screen and select script>brushmodel.
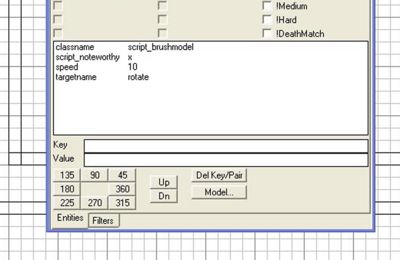
- With the brushes and origin still selected, press N to bring up the Entity window and enter the following key/value entries.
Targetname/rotate
Script_noteworthy/x,y or z for the desired axis
Speed/ the number of seconds for object to make one revolution
Example:
Targetname rotate
Script_noteworthy z
Speed 5
In the above example, the brush model will rotate around the x axis, making a complete revolution once every 10 seconds. Press Esc and that finishes the work in radiant for a brushmodel.
Rotating models:
- Place the model you wish to rotate. Models do not need an origin brush, and will rotate around their own origin.
- With the model selected, right click the 2D screen and select script>model.
- With the model still selected, press N and set the speed desired and script_noteworthy for the rotation axis. Press Esc and that finishes the radiant work for a model.
NOTE: prefabs can’t be rotated and this includes prefab models. If you want to rotate a vehicle for example, you would need to place the model and set it to rotate as shown above. Open the vehicle prefab and copy the clips to your map. Add an origin to the clips to match your model axis, and set it to rotate as a script_brushmodel as shown above. With the model and clips rotating in the same position on the same axis, at the same speed, they are still two separate entities, but in game will function as one.
In Script
<syntaxhighlight>main() { rotate_obj = getentarray("rotate","targetname"); if(isdefined(rotate_obj)) for(i=0;i<rotate_obj.size;i++) rotate_obj[i] thread ra_rotate(); }
ra_rotate() { if (!isdefined(self.speed)) self.speed = 10; if (!isdefined(self.script_noteworthy)) self.script_noteworthy = "z";
for(;;) { // rotateYaw(float rot, float time, <float acceleration_time>, <float deceleration_time>); if (self.script_noteworthy == "z") self rotateYaw(360,self.speed); else if (self.script_noteworthy == "x") self rotateRoll(360,self.speed); else if (self.script_noteworthy == "y") self rotatePitch(360,self.speed); wait (self.speed-0.1); // removes the slight hesitation that waittill("rotatedone"); gives. // self waittill("rotatedone"); } }</syntaxhighlight>
The first part of the script collects all the entities with the target name of rotate. The second part checks the entity for speed, if none specified, it will be 10 as indicated in the script. This number can be changed. The last section checks the axis the entity is to rotate around. If no script noteworthy is specified, the Z axis will be assigned.
Files
The above script goes in its own gsc called mp_mymapname_rotate.gsc and goes in the raw\maps\mp folder like the main gsc.
Add the line to the main gsc:
maps\mp\mp_mymapname_rotate::main();
Add the line to the missing asset csv (step 4 of compile tools) - Zone File:
rawfile,maps/mp/mp_mymapname_rotate.gsc
This completes the script and files. Recompile the map from step 1 of the compile tools and enjoy!!!!
Making a test map to test rotating objects is easy if you use the existing test map that came with radiant. Open the mp_test.map that came with radiant. Add brushes and/or models as described above. Create the gsc mp_test_rotate.gsc and add the lines to the main mp_test.gsc and to the missing asset csv. This test map is a great way to test this tutorial or any other prefab that will fit the map. Wanna see how something looks, test it in a ready to go map!!


